The purpose of this post is to explain how you can automatically send a WhatsApp message with a file / PDF attachment whenever a new user responds to your Google forms.
Each time a new user fills out your Google Form, you can automatically send them a brochure, quotation, or something else on their WhatsApp number.
Steps Required to Automate this Process
1. Sign In / Sign Up and Create a new Workflow
2. Select a Trigger Application and connect with Google Forms
3. Setup an Action Application
Step 1:- Sign In / Sign Up and Create a new Workflow
A. Sign In / Sign Up
Visit pabbly.com and sign in to your Pabbly Connect account. If you don’t already have an account,

‘Sign Up Free’ to create a free Pabbly Connect account.

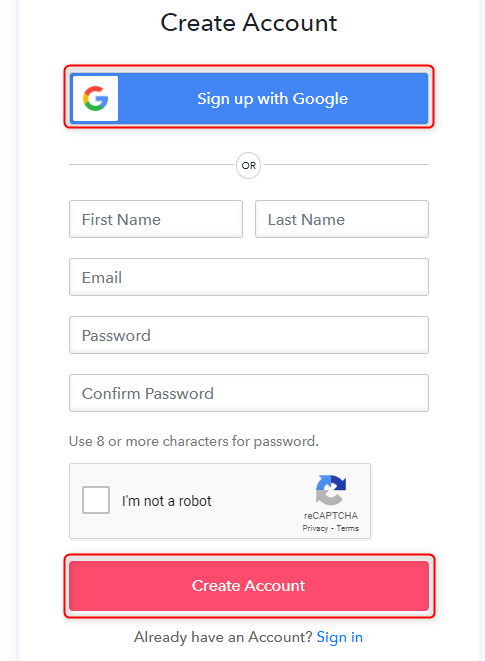
Click on ‘Sign up with Google’ to sign up using your Gmail account, or fill in your details and click on ‘Create Account’
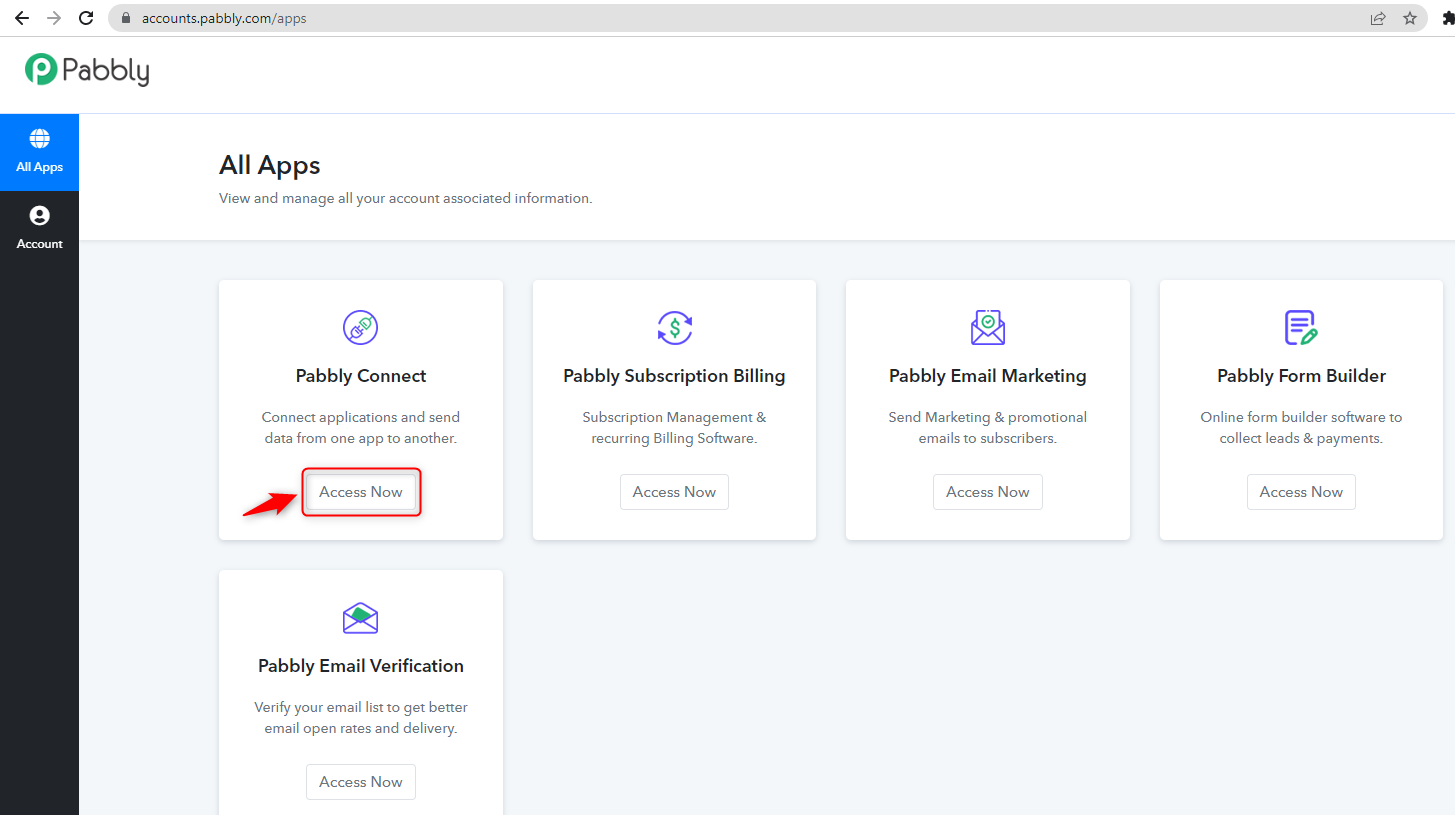
Click on Pabbly Connect ‘Access Now’ button
B. Create Workflow
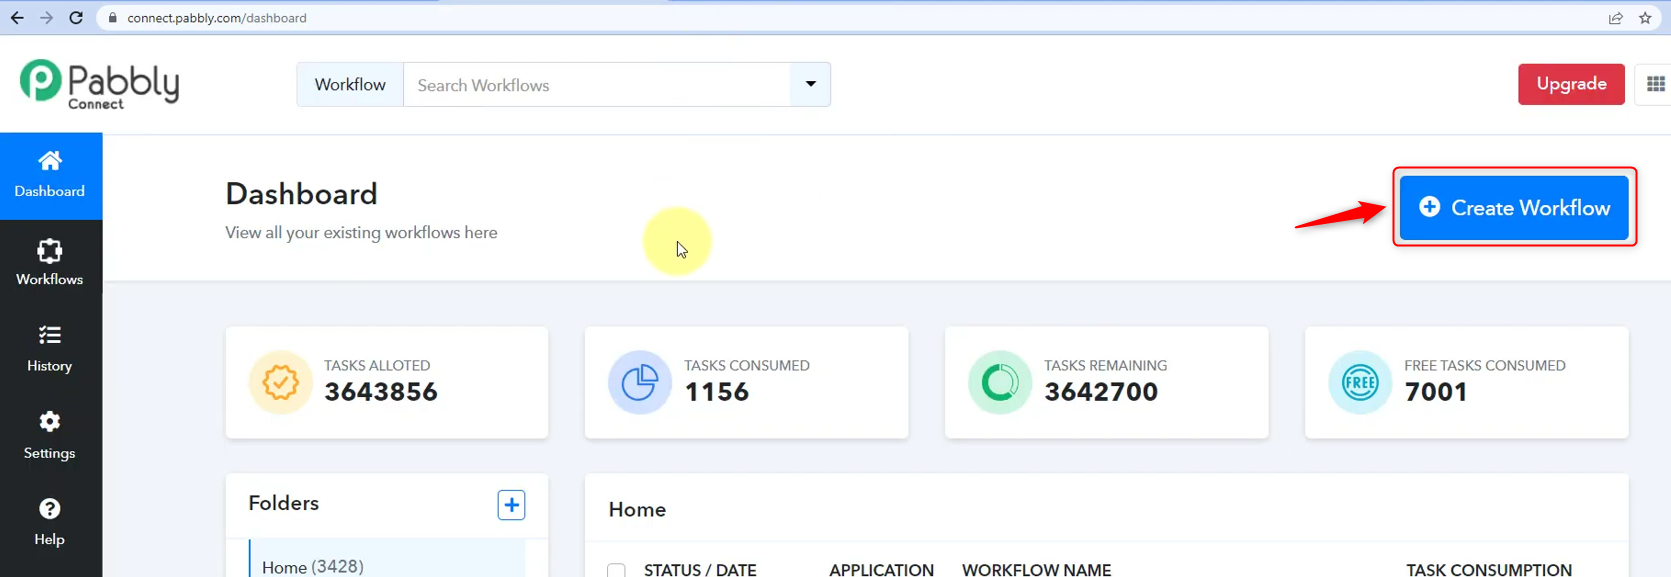
Create a new workflow by clicking on ‘Create Workflow’ button.
Name your new workflow, then click on ‘Create’.

Step 2:- Select a Trigger Application and connect with Google Forms
Trigger allows us to choose the application that will perform the necessary action when triggered. In our case, it would be Google Forms.
A. Trigger Application
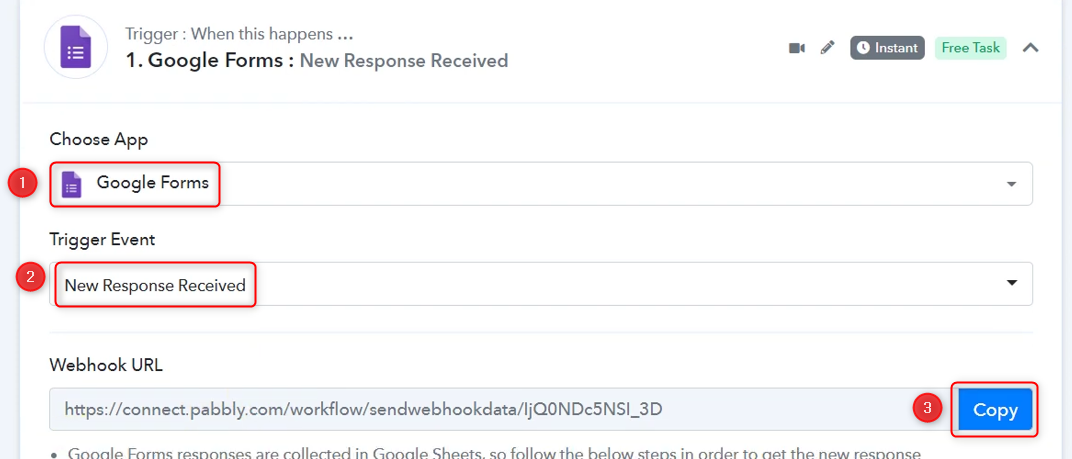
Expand the trigger window and choose ‘Google Forms’ as your trigger application, and select ‘New Response Received as your trigger event. Copy the Webhook URL as it will serve as a link between Google Forms and Pabbly Connect.
B. Connect with Google Forms
Go to your Google Forms tab and click ‘Responses’.
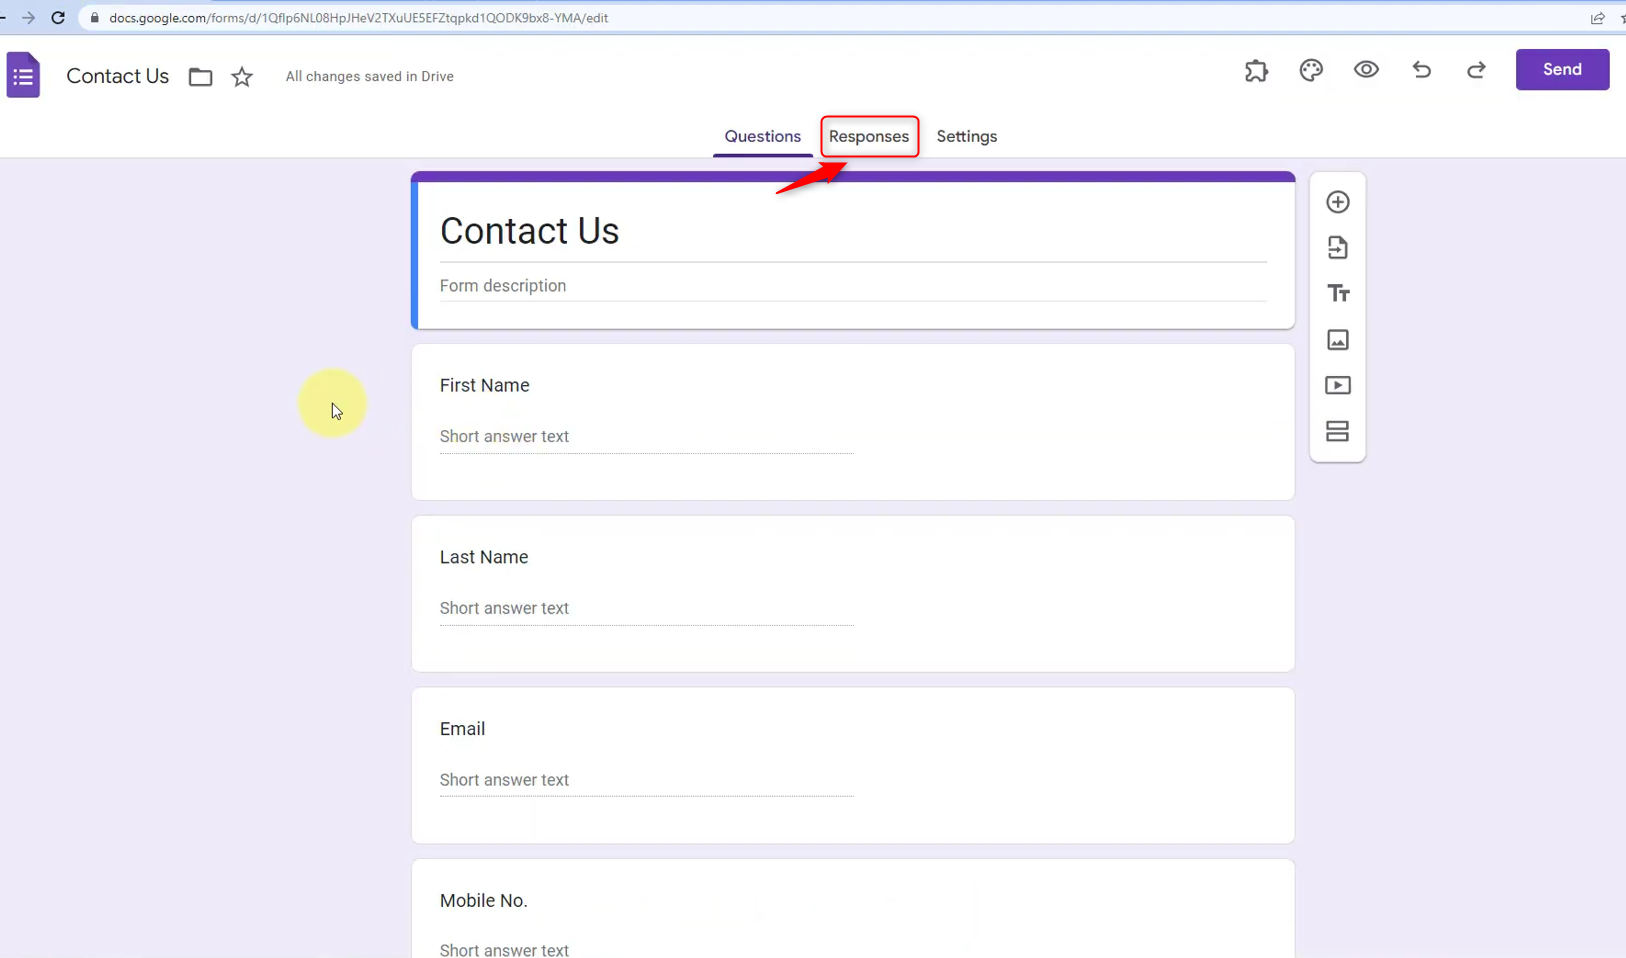
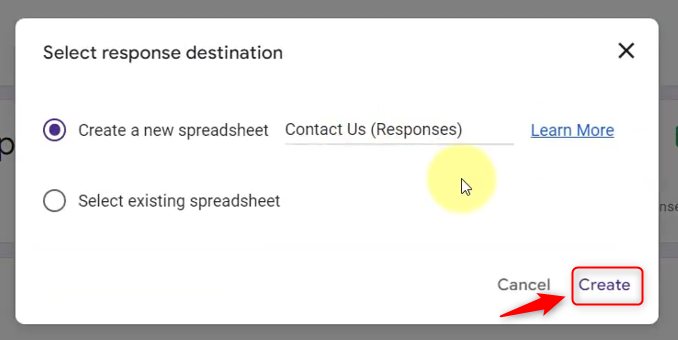
Click the ‘Spreadsheet’ icon to create a new spreadsheet. It will create a spreadsheet in a separate Google tab. This spreadsheet will act as a repository for the responses we’ll receive on Google Forms.
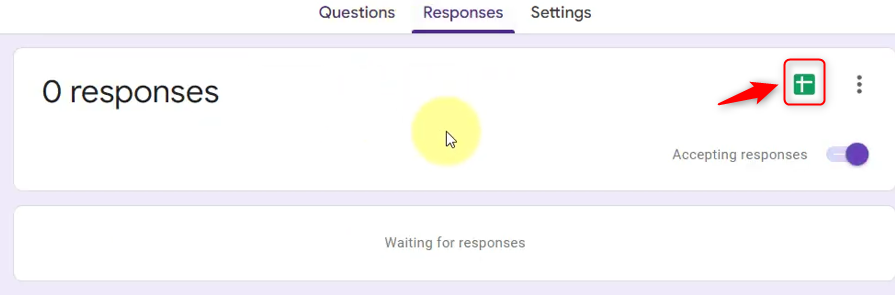
It will create a spreadsheet in a separate Google tab. This spreadsheet will act as a repository for the responses received on Google Forms.
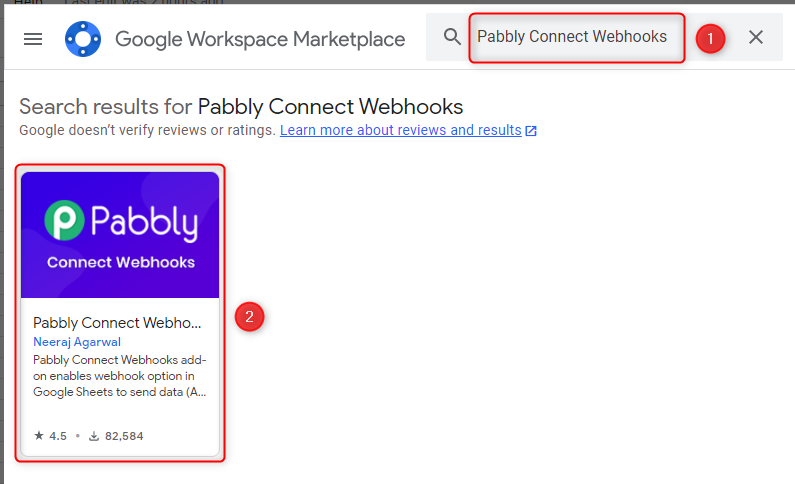
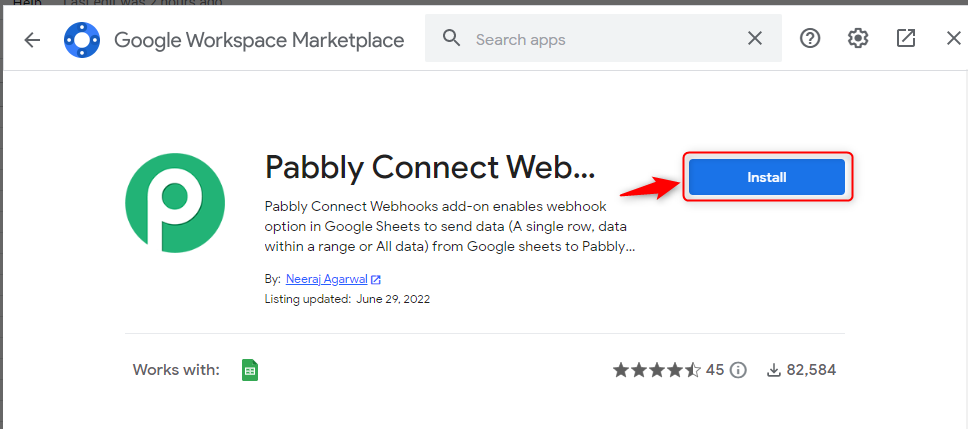
C. Install Add-on
To get the Pabblly Connect Webhook add-on, click on Extensions > Add-ons > Get add-ons
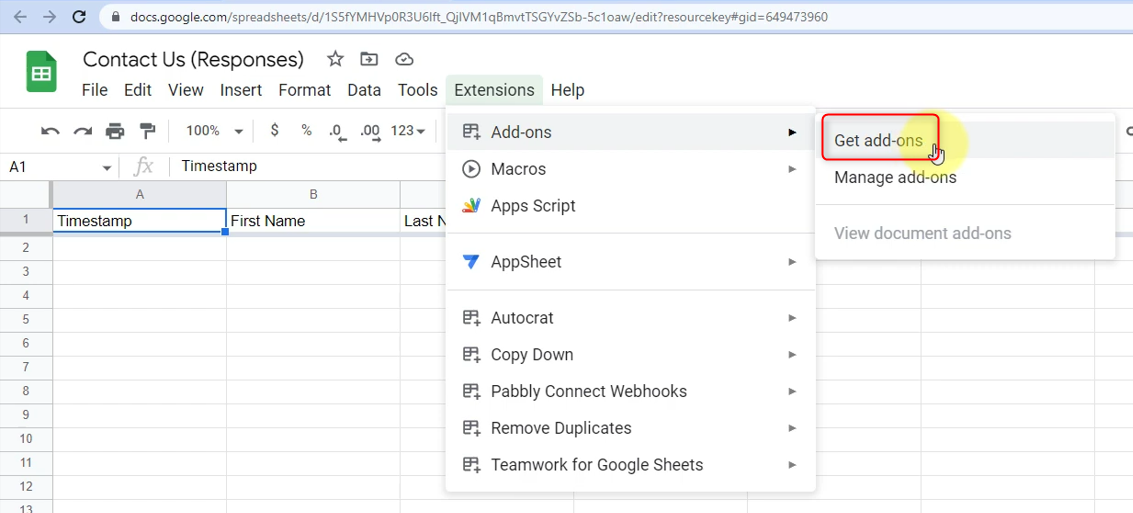
Search for Pabbly Connect Webhook and install the extension.
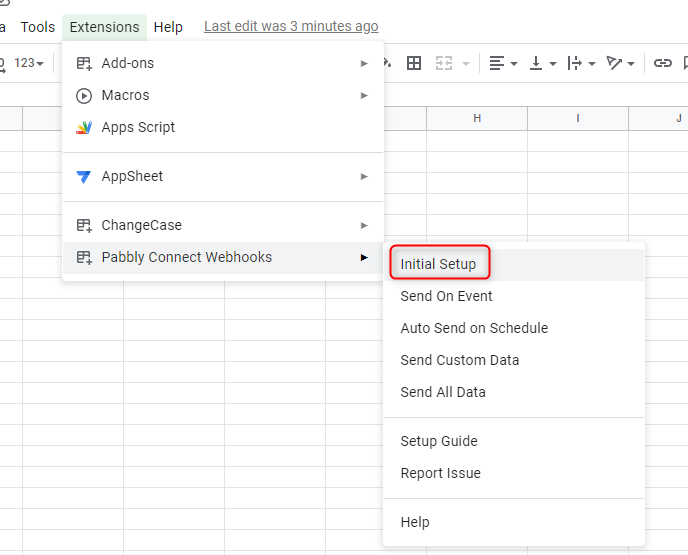
D. Initial Setup
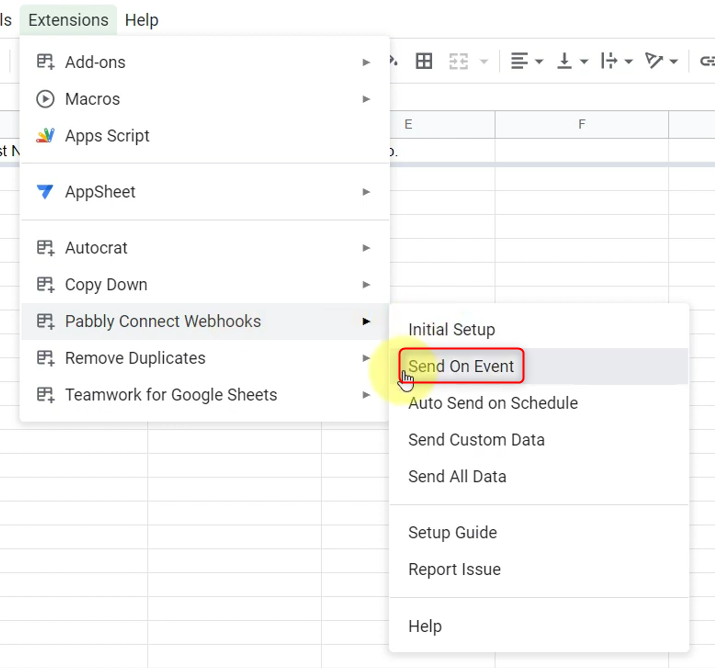
Refresh the spreadsheet, go to Extensions > Pabbly Connect Webhooks > Initial Setup.
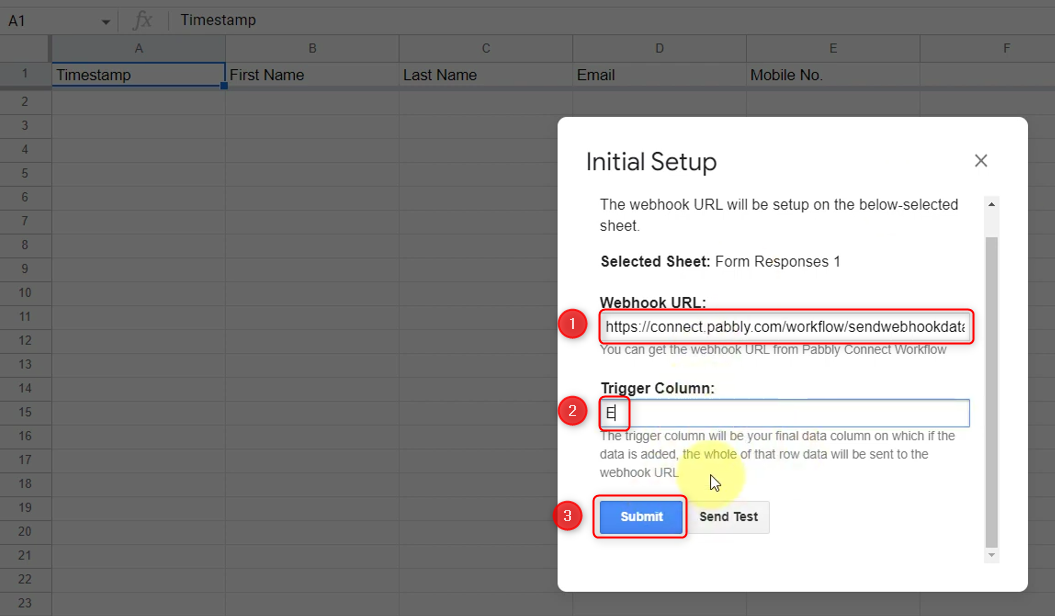
A new dialogue box will pop up asking you for the initial setup. Paste the same Webhook URL we copied earlier, and in Trigger Column, fill in the name of the last column of your spreadsheet containing data. Click on ‘Submit’.
Again click on Extensions > Pabbly Connect Webhooks > Send on Event. By doing this, we have established a connection between Google Forms and Pabbly Connect. Pabbly Connect, will now receive data whenever a new user responds to your Google form.
To test this connection, go to Google Forms and click the ‘Preview’ button. Fill up this dummy form and ‘Submit’.

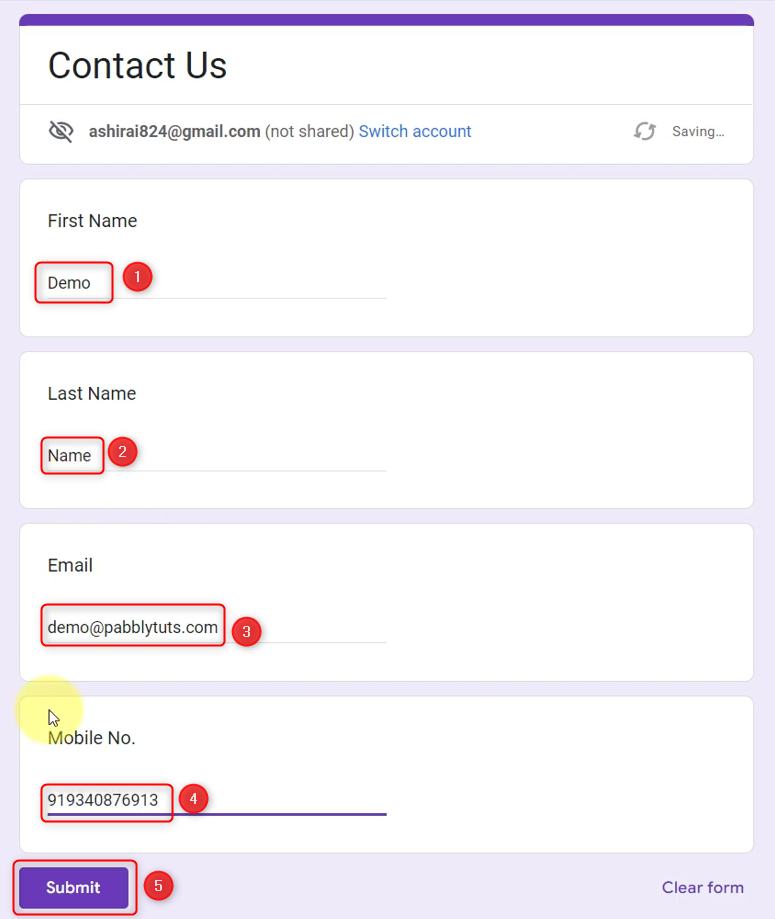
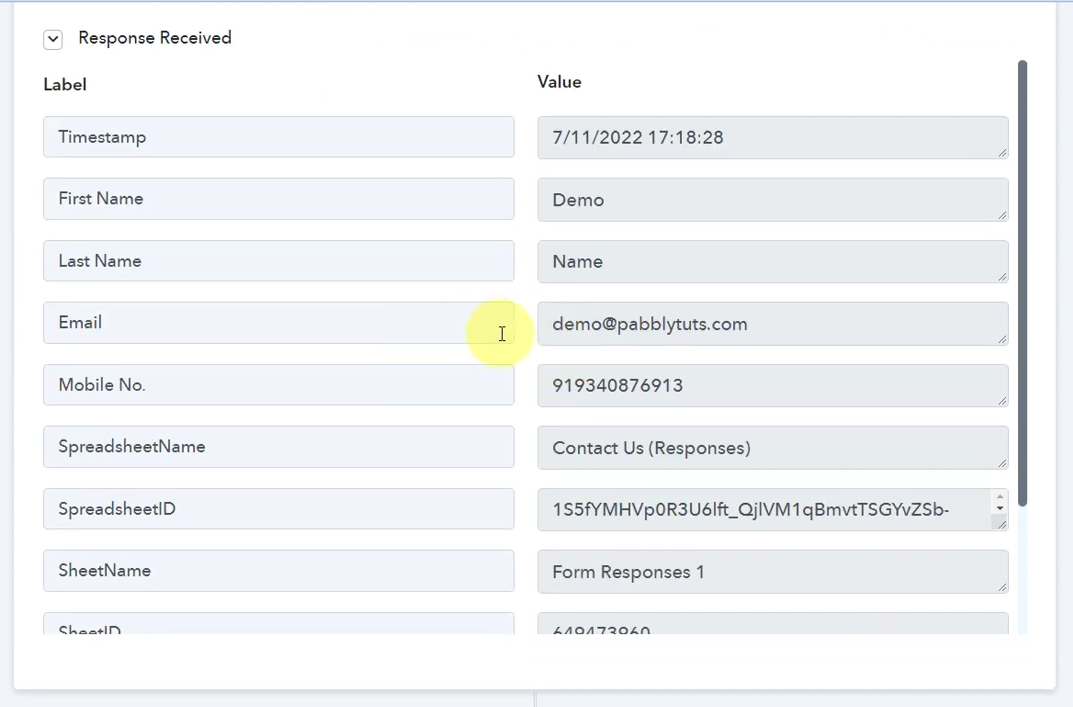
We have tied this form with Pabbly Connect, so the data must be available there.
Step 3:- Set up an Action Application
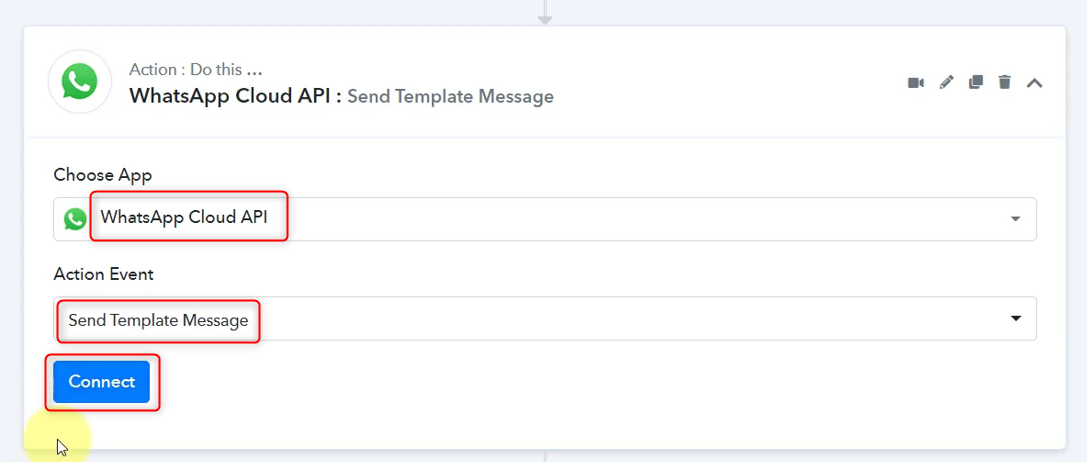
The Action allows us to select the application that will react to our trigger. In this case our action app will be WhatsApp Cloud API.
A. Action Application
Search for ‘WhatsApp Cloud API’ and select it as your trigger app. Select ‘Send Template Message’ as your action event and click on ‘Connect’.
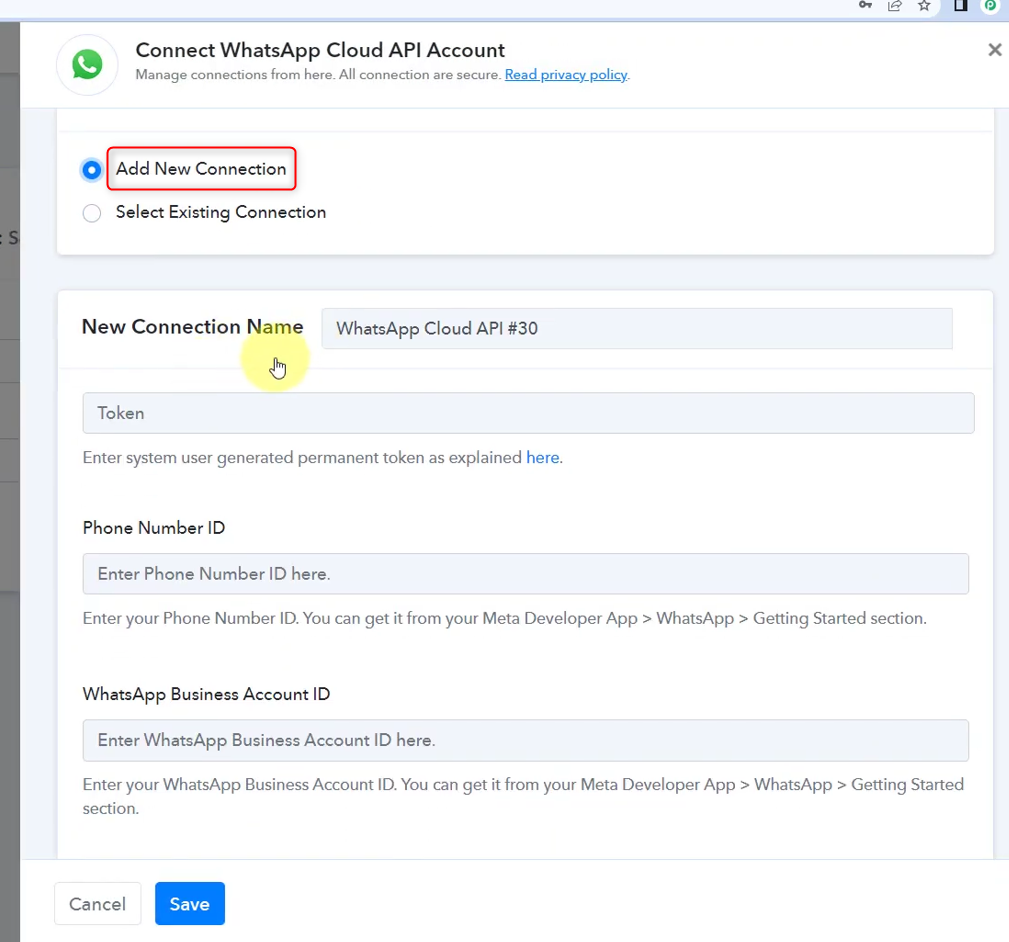
B. Add New Connection
Click ‘Add New Connection’. To get the necessary information go to your WhatsApp Business Cloud API account. Note: Follow these steps to create a new Whatsapp Business Cloud API account if you don’t already have one.
Copy both the Phone Number and Whatsapp Business Account ID
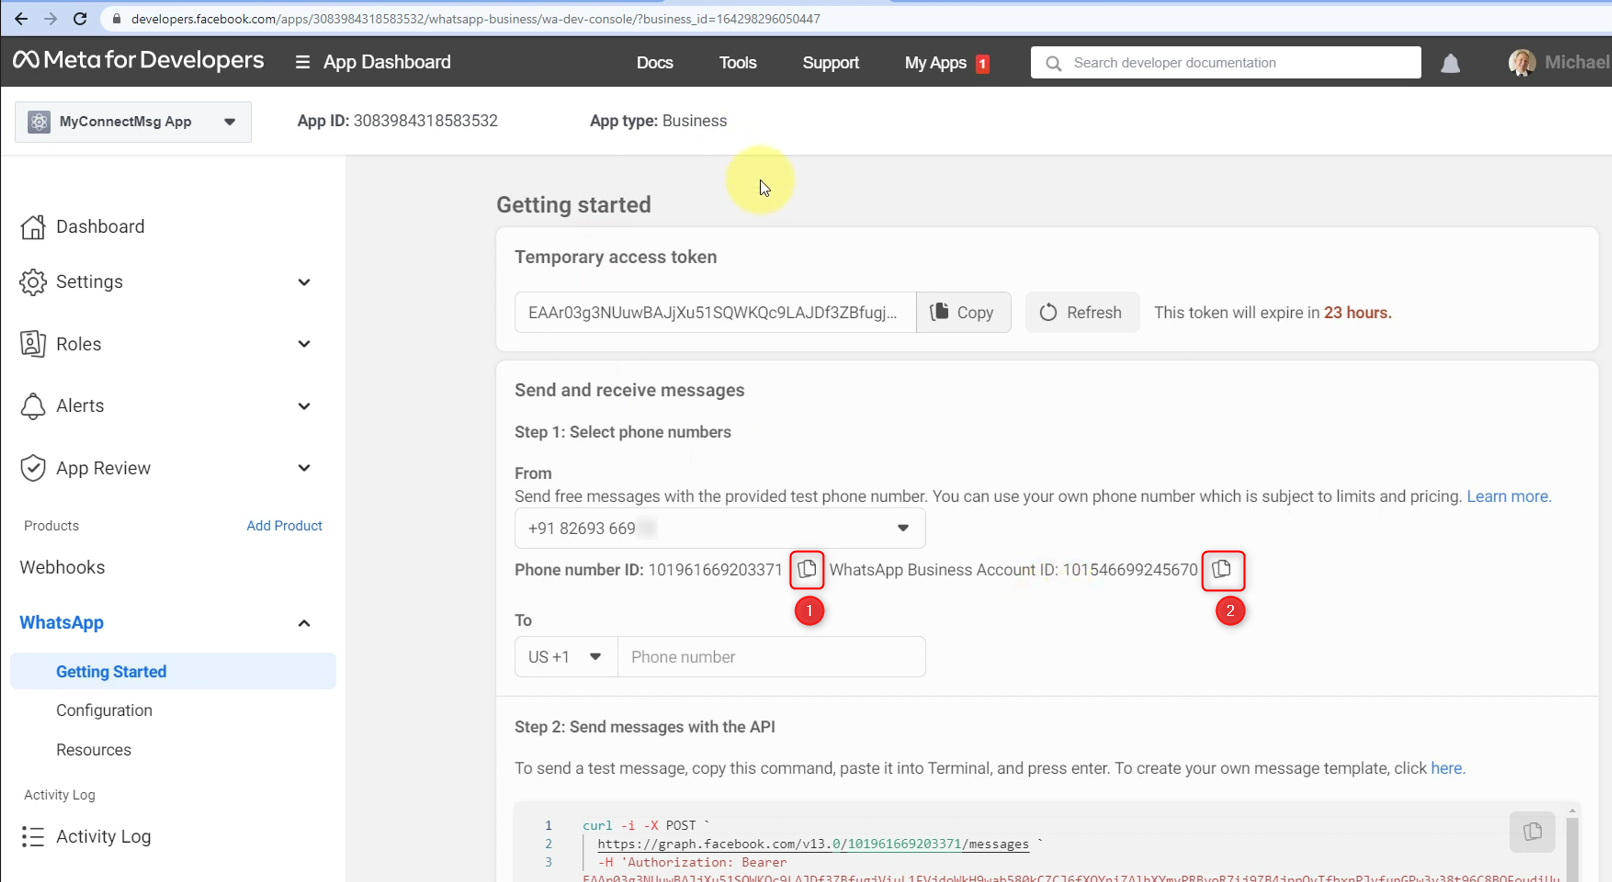
And Paste them here.
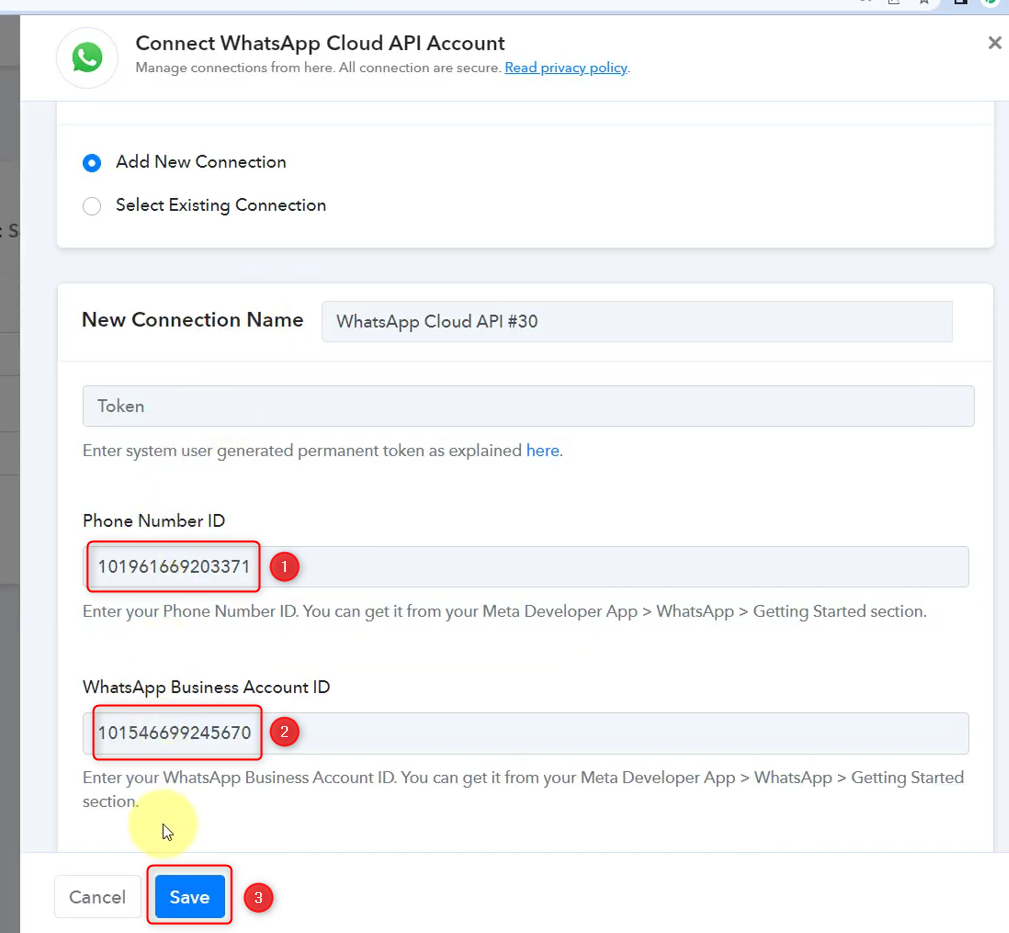
The token ID visible in your API account is temporary, and you need to fill in a Permanent token ID. To generate a Permanent token ID, follow the steps given here, then paste the ID and click on ‘Save’.
C. Template Information
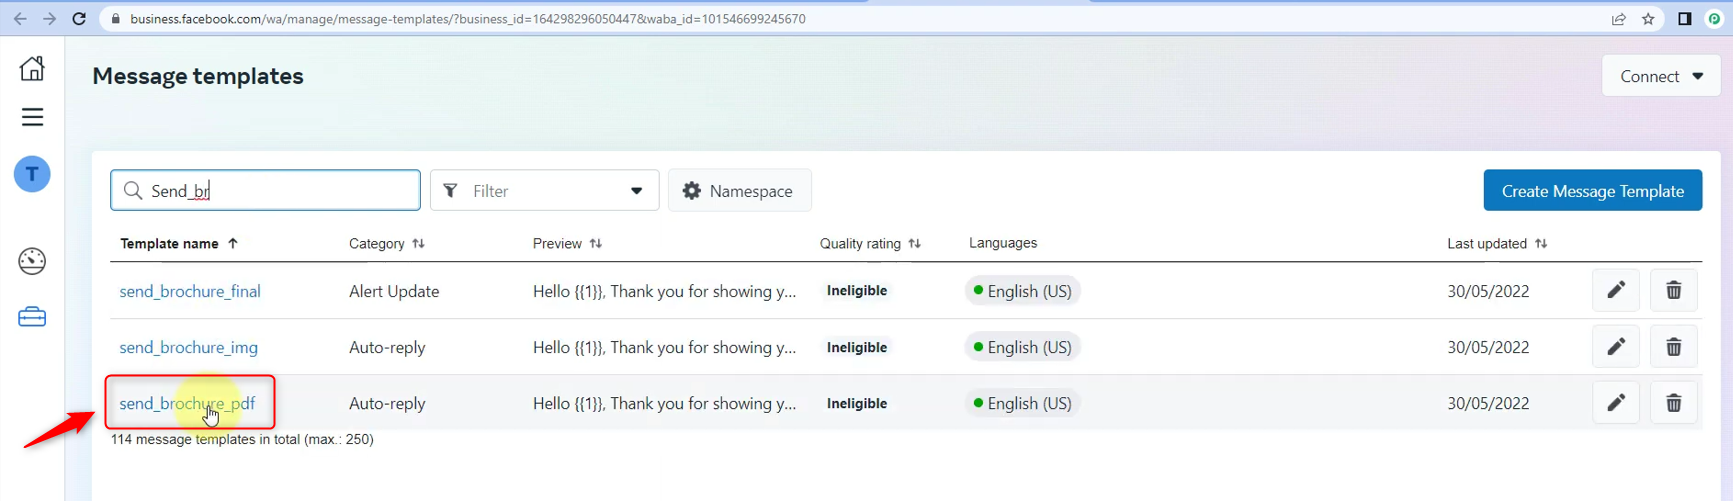
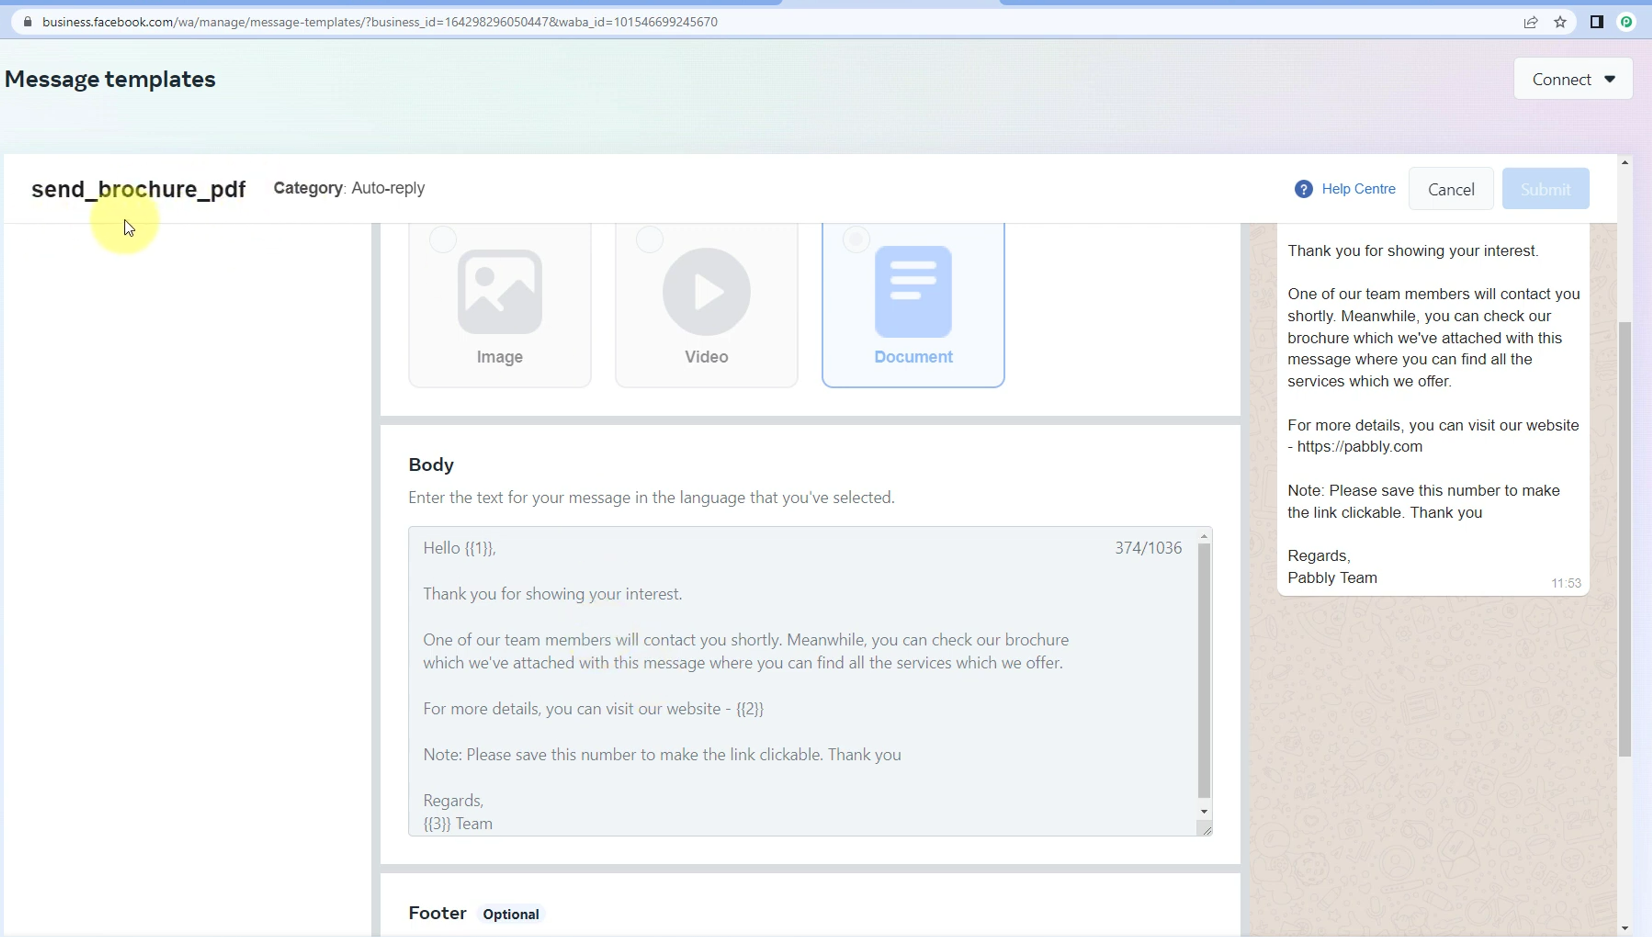
If you have already created a message template, choose that as Template Name, or else create one. The steps needed to create a new message template are here.
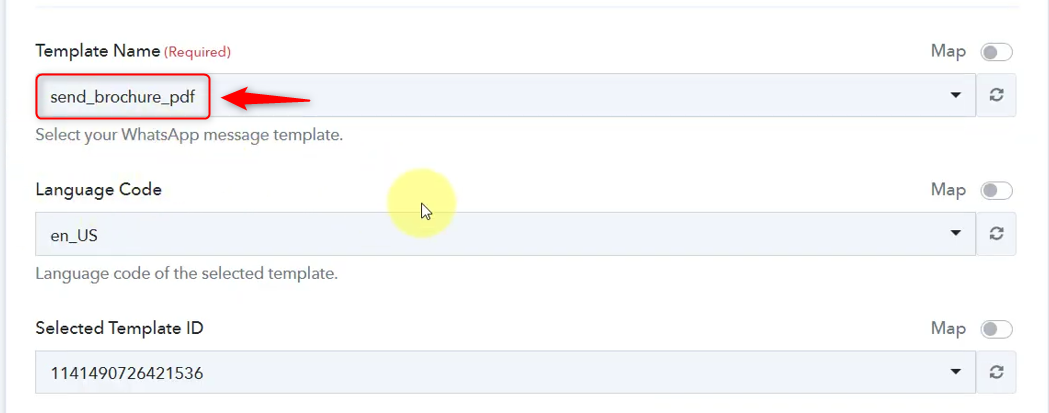
Here is a preview of how the template will appear in your WhatsApp Business Cloud API account.
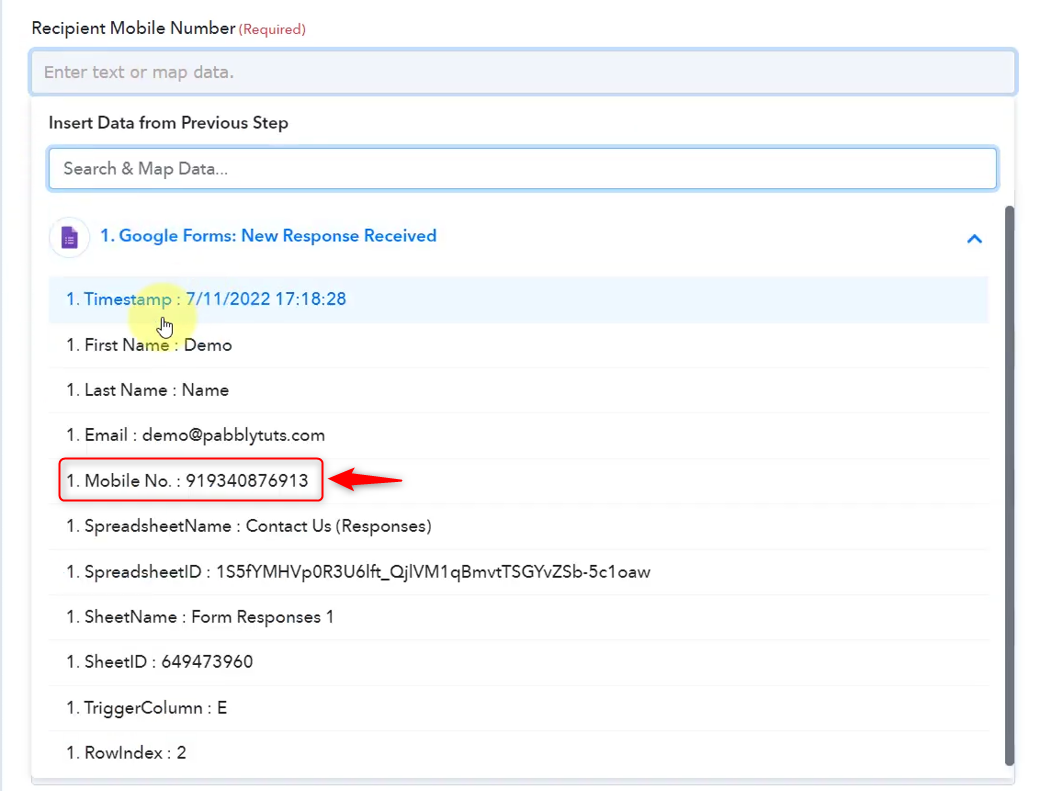
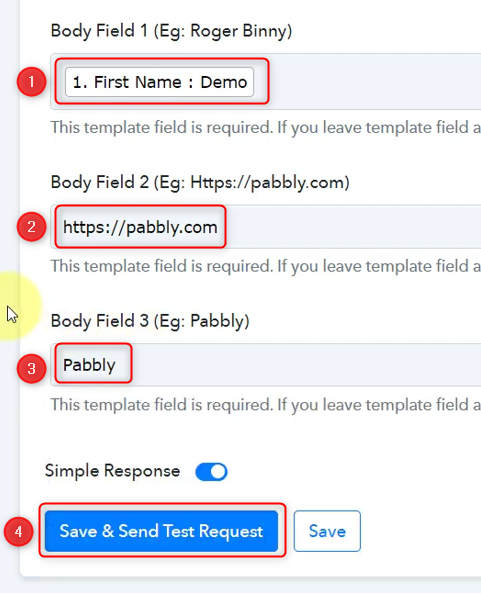
Map the recipient mobile number from above and make sure, to include the country code before the contact number.
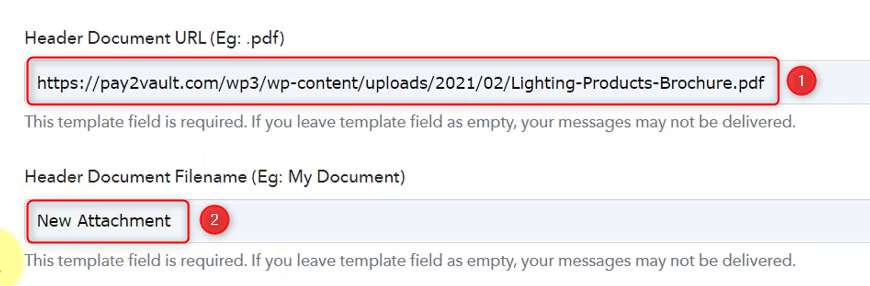
Copy the URL of the document you wish to upload and paste it underneath Header Document. Name your Header Document.

Map the body fields from above and click on ‘Save and Send Test Request’.
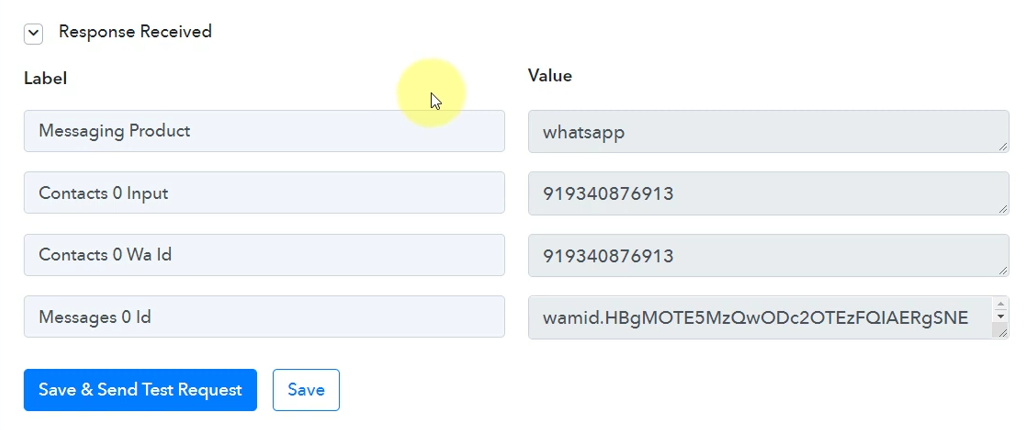
D. Response received
A positive response should be visible on Pabbly Connect
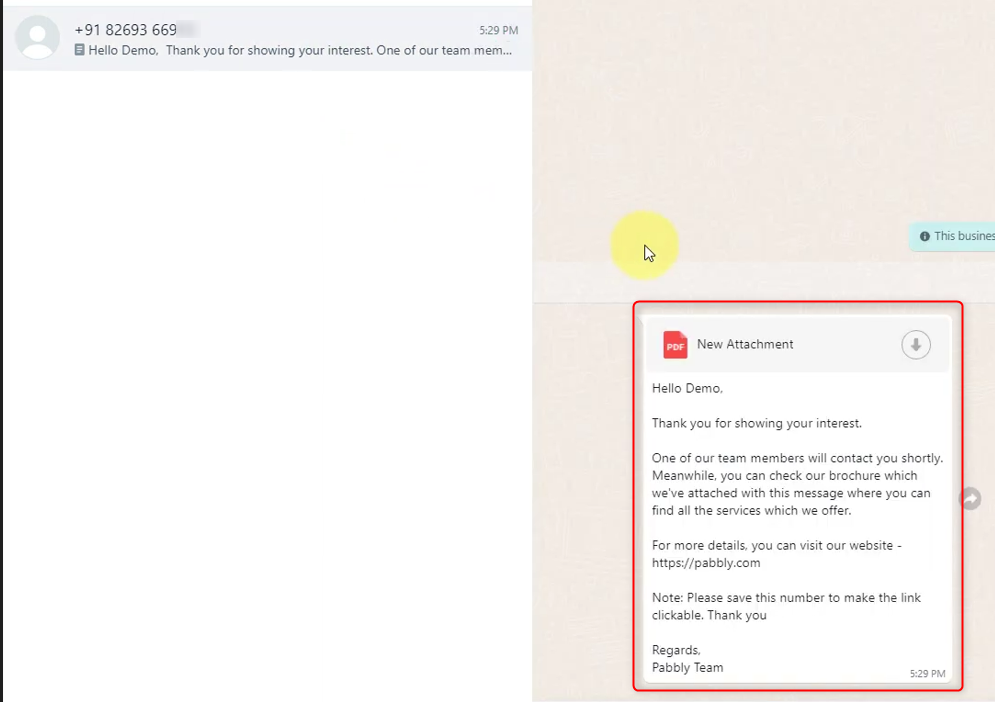
And user has also received a message with an attachment on Whatsapp.
With this, our process is finally complete.
The link below provides a copy of the workflow to familiarize you with the steps.
https://connect.pabbly.com/workflow/share/XBRWZAVWA2METgJGVTRWf1pOVWxUHgNVVzAJGw
Sign Up for a free Pabbly Connect account, and start automating your business.
Subscribe to our Youtube Channel for more such automation.
For any other queries, visit our forum