Let us explore how you can integrate Google Blogger with WhatsApp – following which your Google Blogger articles will automatically be shared via WhatsApp.
This automation requires a one-time setup, for which we will use Pabbly Connect.
We will first link Google Blogger with Pabbly Connect to capture the newly added articles, then link Pabbly Connect with WhatsApp and share the captured articles on WhatsApp.
Steps to Automatically Share Google Blogger Articles on WhatsApp
1. Sign In / Sign Up to Pabbly Connect and Create a Workflow
2. Establish a Connection between Blogger and Pabbly Connect
3. Setup Google Sheets as the Action App to Capture Data
4. Add an Iterator to the Workflow to Organise Data
5. Setup WhatsApp as the Action App to Share Articles
6. Compose a Message Template
7. Map the Necessary Fields
Step 1:- Sign In / Sign Up to Pabbly Connect and Create a Workflow
A. Sign In / Sign Up
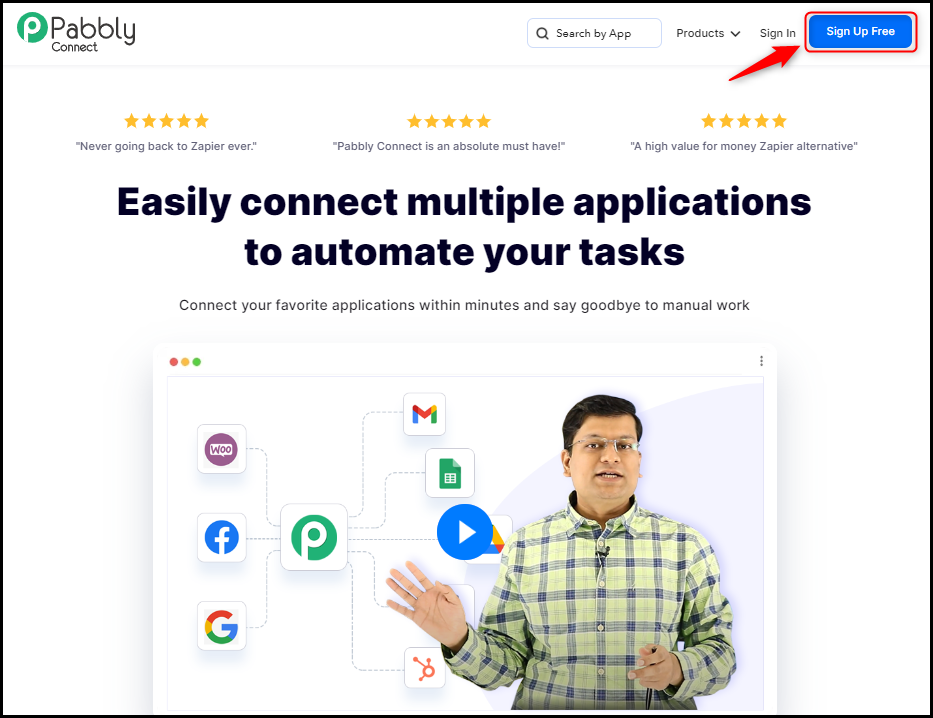
To begin this process, visit Pabbly Connect and create your account by clicking on the ‘Sign Up Free’ button. You can also click on Sign In if you already have an account.
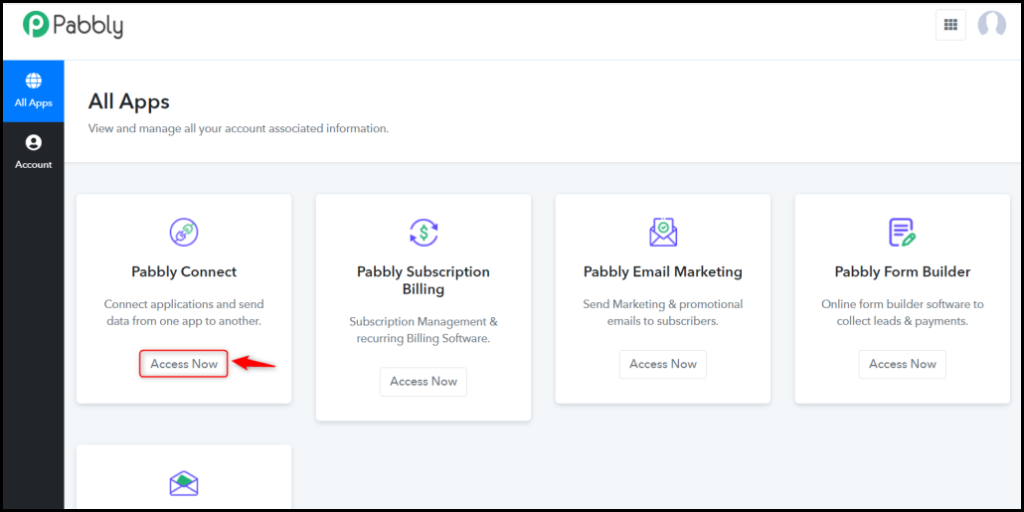
Click on the Pabbly Connect ‘Access Now’ button
B. Create Workflow
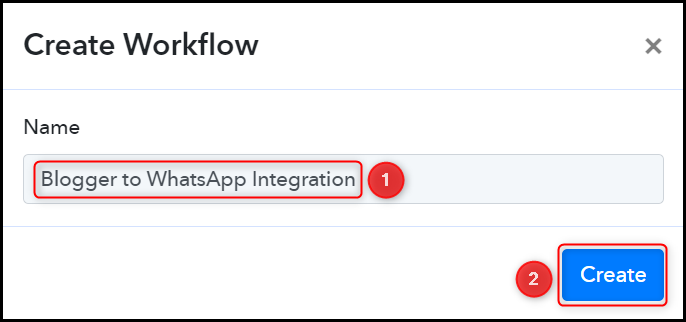
To create a new workflow, click the ‘Create Workflow’ button.
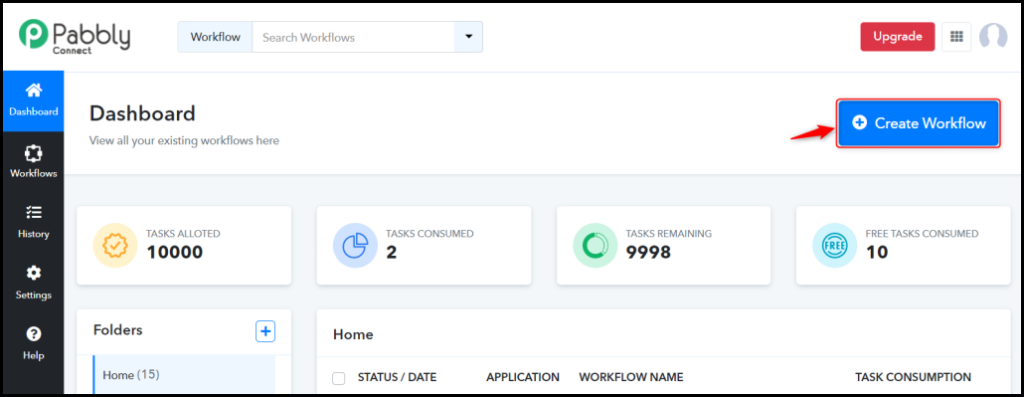
Name your workflow, and click on ‘Create’.
Step 2:- Establish a Connection between Blogger and Pabbly Connect
We will now look at the steps through which we will establish a link between Google Blogger and Pabbly Connect. This will help us capture details of the newly added Blogger articles.
A. Trigger App
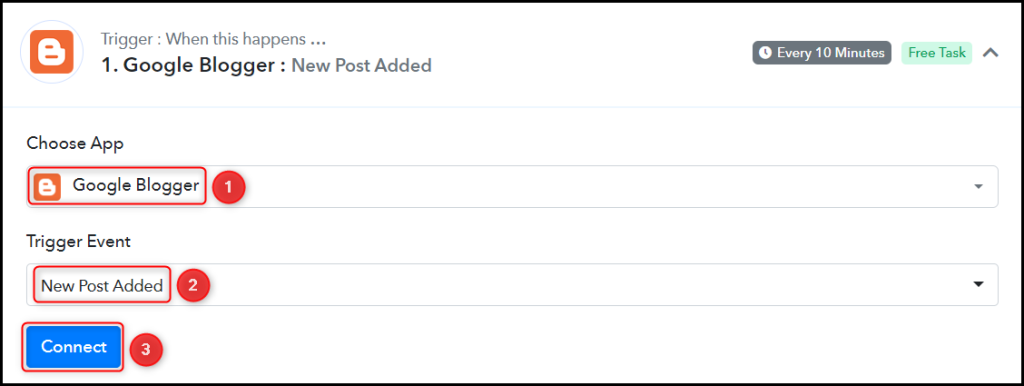
Trigger allows us to choose the application that will receive the data for Pabbly Connect. In our case, it would be Blogger.
Choose ‘Blogger’ as the Trigger App, select ‘New Post Added’, and click on ‘Connect’.
B. Connect with Google Blogger Account
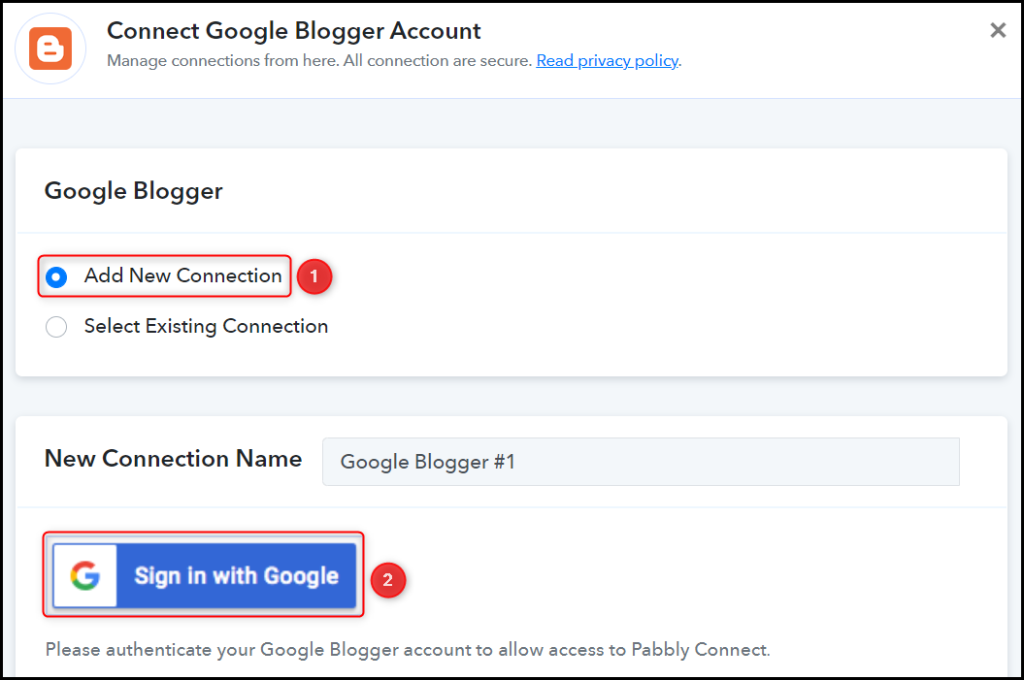
To connect with your Blogger account, select ‘Add New Connection’ and click on ‘Connect With Google Blogger’. Also, grant the authorization.
Select the Blog ID and Status of your blog, and click on ‘Save & Send Test Request’.
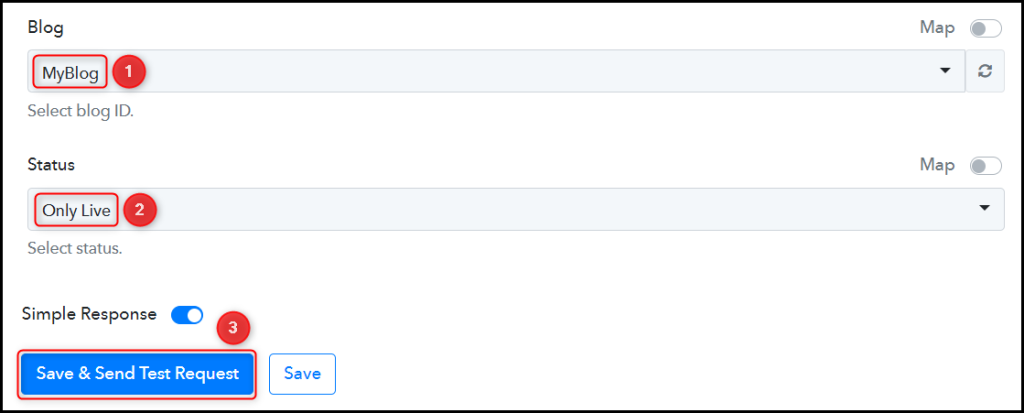
Expand Response Receive, and the details of your latest post must be visible, thus confirming the established connection.
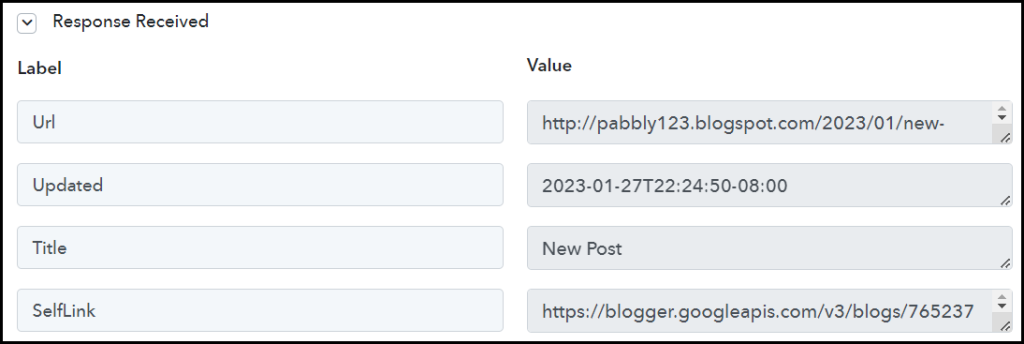
We have established a link between Blogger and Pabbly Connect. Pabbly Connect will now automatically capture the articles posted on Google Blogger.
Step 3:- Setup Google Sheets as the Action App to Capture Data
Action allows us to choose the application that will get executed by the workflow trigger.
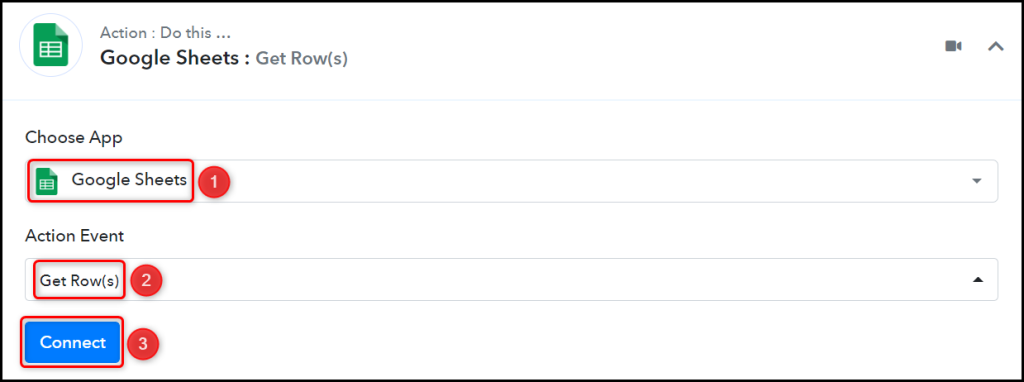
We essentially want to capture the WhatsApp numbers stored in Google Sheets. Thus, Google Sheets will be our Action App.
A. Action App
Choose ‘Google Sheets’ as the Action App, select ‘Get Row(s)’ as an Action Event, and click on ‘Connect’.
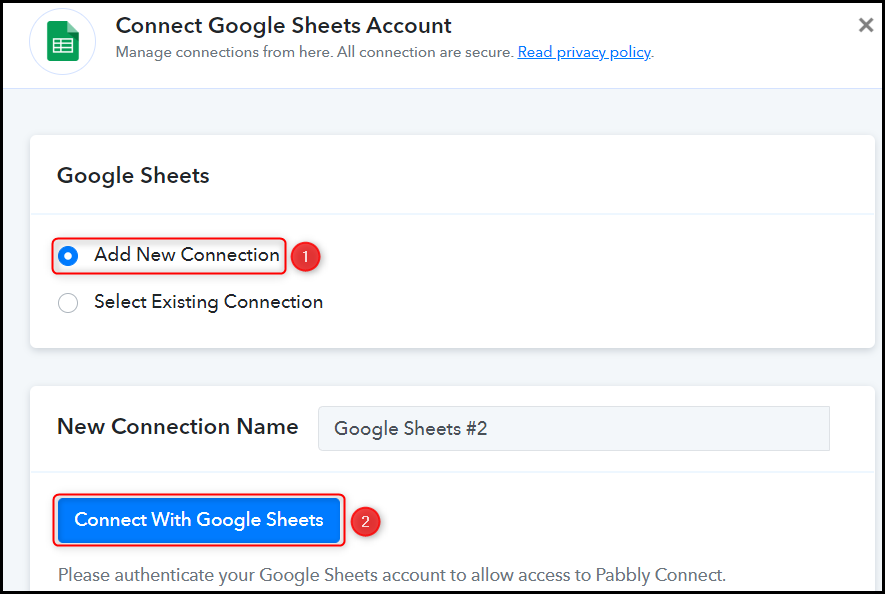
B. Connect Google Sheets Account
To connect with your Google Sheets account, select ‘Add New Connection’, and click on ‘Connect With Google Sheets’. Also, grant the authorization.
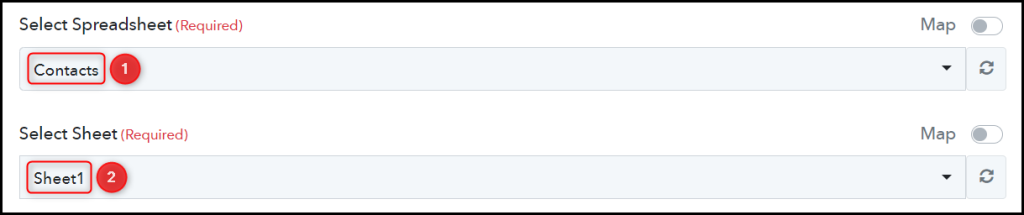
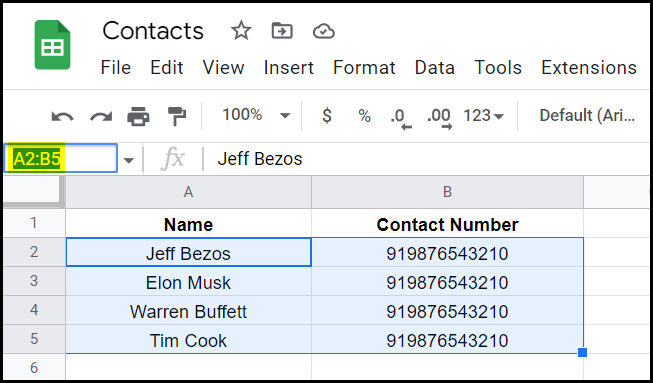
Select the Spreadsheet and Sheet from where you want to capture the data.
Enter the Range for your data, toggle off Simple Response, and click on ‘Save & Send Test Request’.
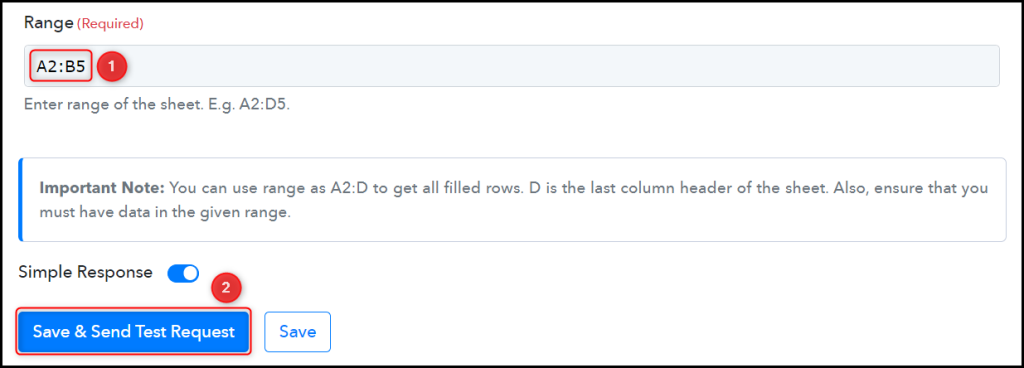
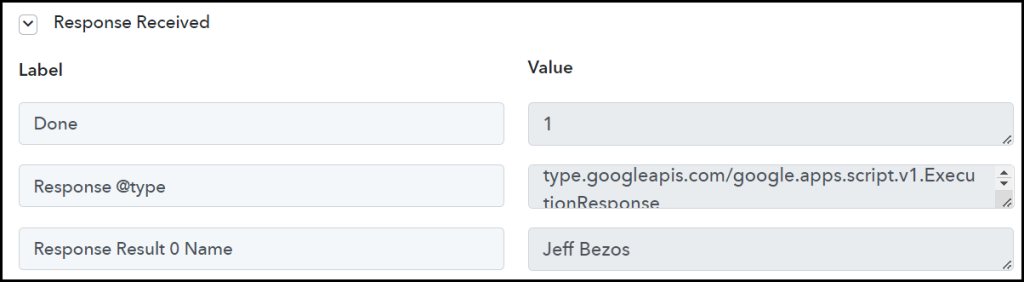
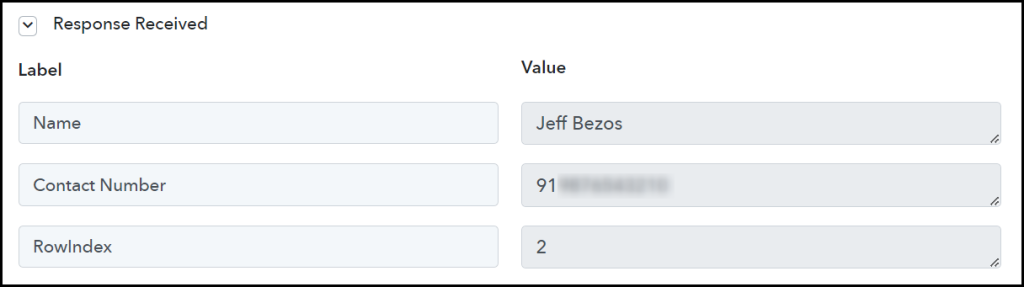
Expand Response Received, and the data you entered must be visible, thus confirming our established connection.
Step 4:- Add an Iterator to the Workflow to Organise Data
The data we captured from Google Sheets is unorganized – To organize and separate the data by row, we will use Iterator by Pabbly.
Add another Action Step to your workflow by clicking the ‘+’ button.

Choose ‘Iterator by Pabbly’ as the Action App, and click on ‘Save & Send Test Request’.
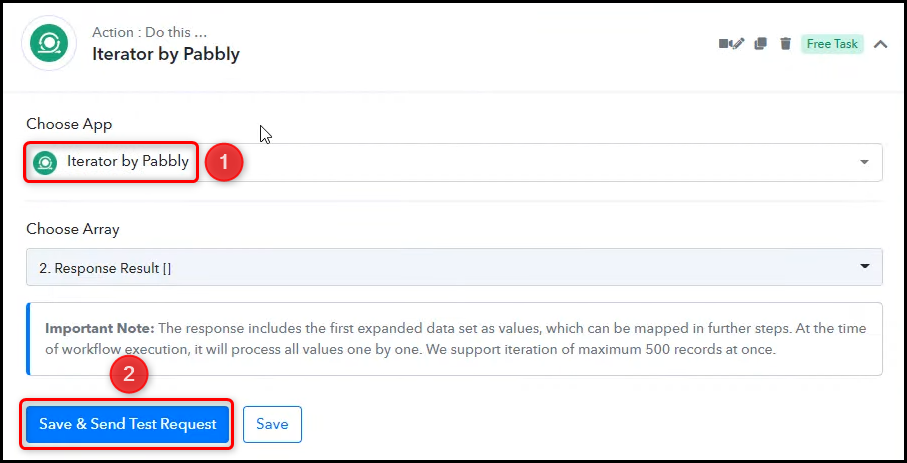
The data is now arranged in proper row format, and we can use it to send messages.
Step 5:- Setup WhatsApp Cloud API as the Action App to Send Messages
We essentially want to share the captured Google Blogger articles on WhatsApp. Therefore, WhatsApp Cloud API will be our Action App.
Note: Follow steps 1 to 3 of this blog to create a new Whatsapp Business Cloud API account if you don’t already have one.
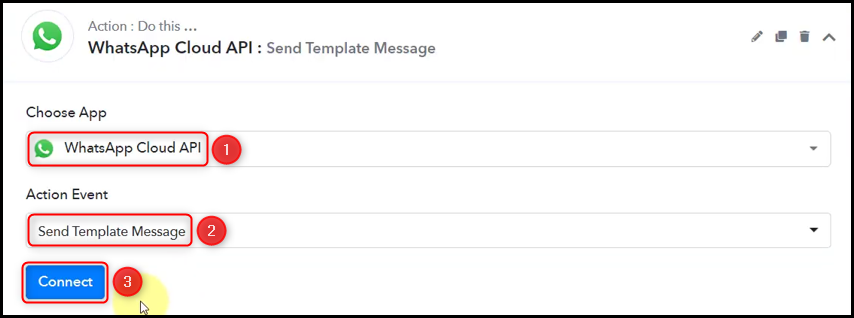
A. Action App
Choose ‘WhatsApp Cloud API’ as your Action App, select ‘Send Template Message’ as an Action Event, and click on ‘Connect’.
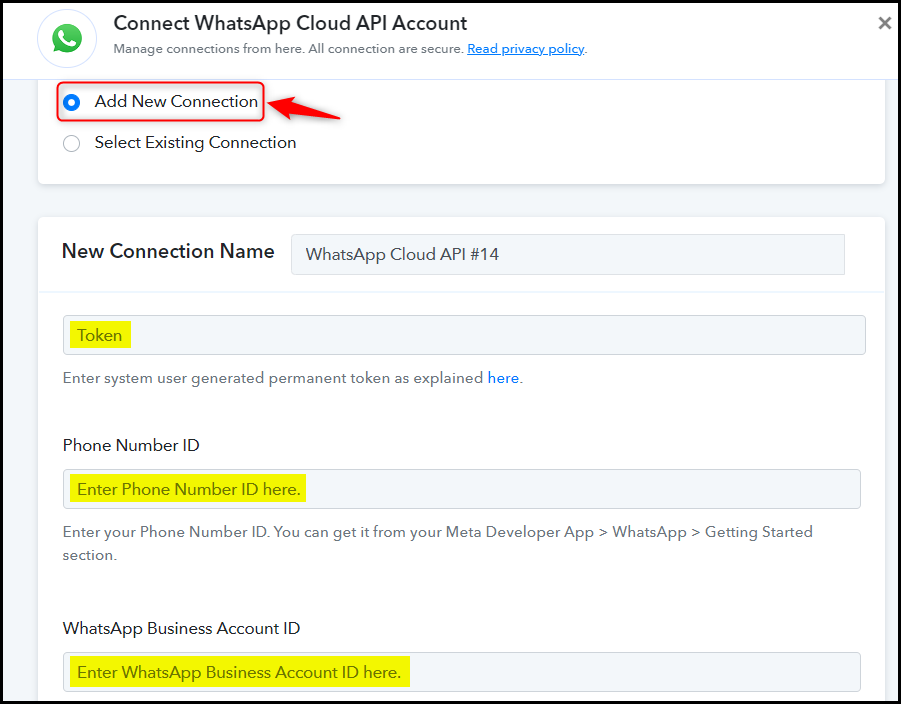
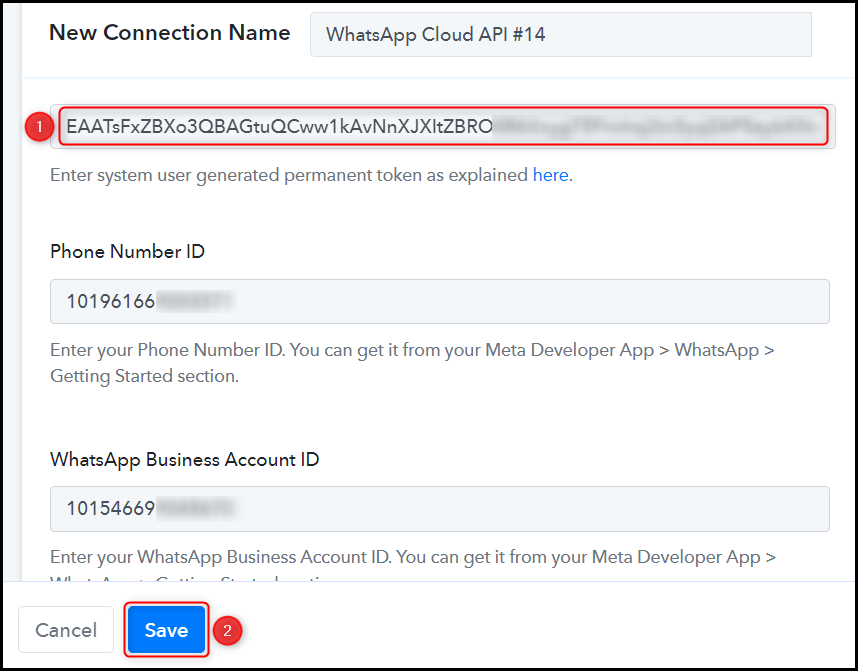
B. Connect WhatsApp Cloud API Account
To connect with your WhatsApp Cloud API account, select ‘Add New Connection’. You will be asked to enter your Permanent Token, Phone Number ID, and WhatsApp Business Account ID.
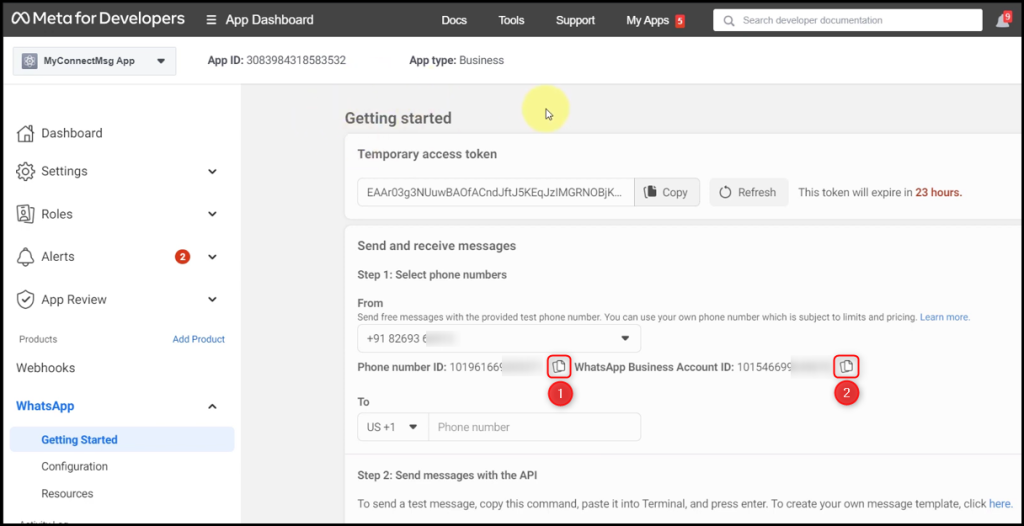
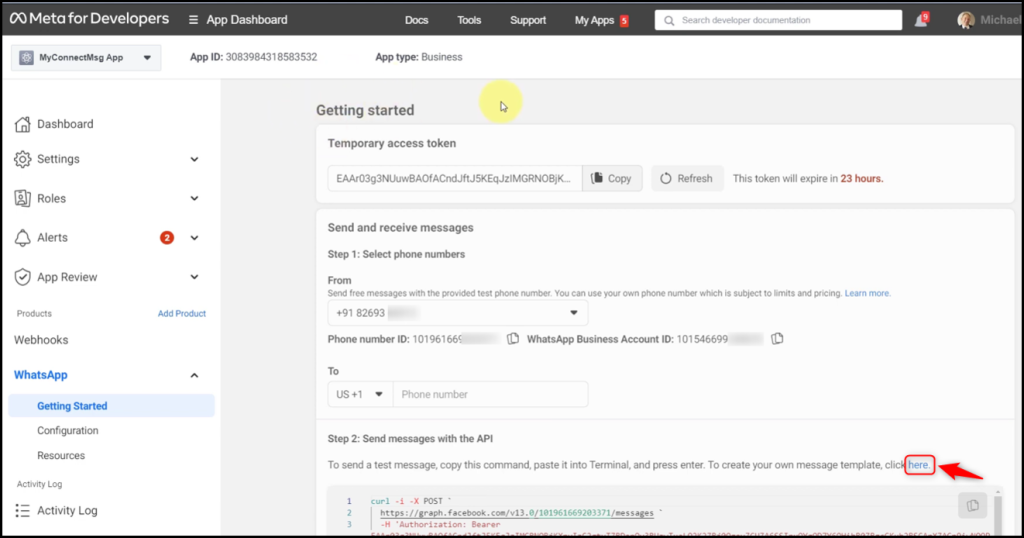
Go to your Facebook Developer dashboard, and copy the Phone Number ID and WhatsApp Business Account ID.
Paste both in their respective fields.

The Token visible on your dashboard is a temporary one that expires every 24 hours. For our workflow, we need a Permanent Token. You can generate a Permanent Access Token by following the steps given in this post.
Paste the Permanent Token, and click on ‘Save’.
Step 6:- Compose a Message Template
You will be asked to fill up a few fields. You can either select your Template Name directly from the list if you already have one ready or create a new message template by following these steps.
A. Create a Message Template
Switch to your WhatsApp Cloud API dashboard, and click the ‘here’ hyperlink. You will be redirected to a new page.
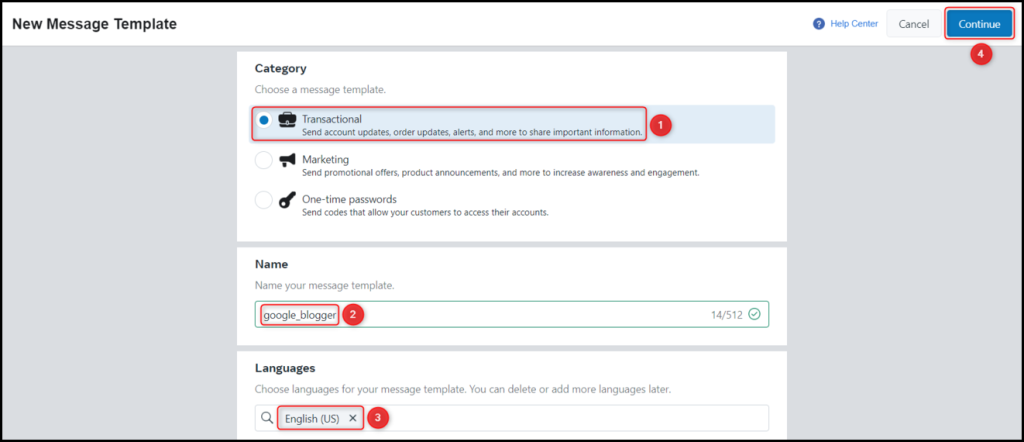
Click on ‘Create Message Template’.
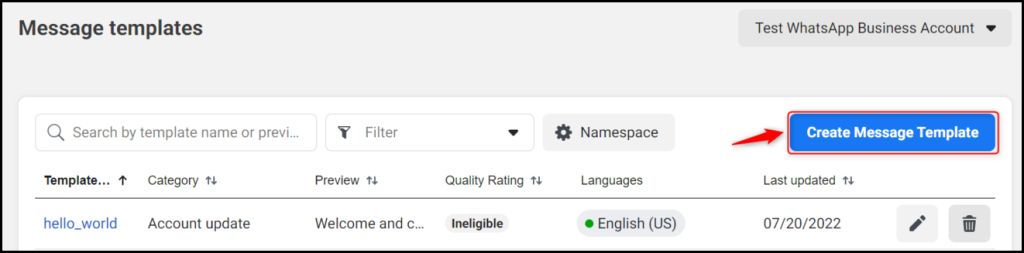
Select a Category, Name the template and pick a Language. Click on ‘Continue’.
B. Body with Dynamic Data Tags
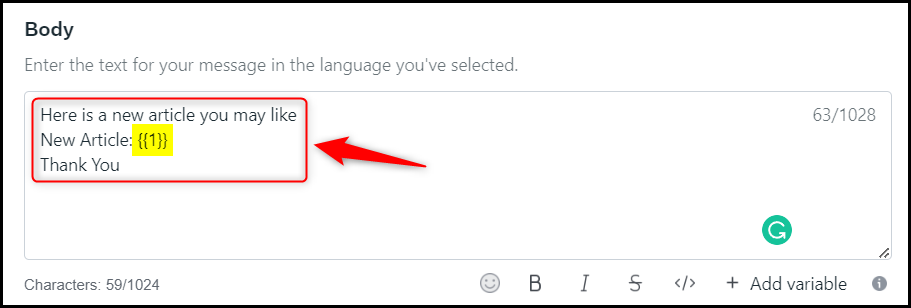
Type in your message in the Body field. To personalize your message, include Dynamic Data Tags in your template.
Dynamic Data Tags help us to include variables in our template, these variables will be replaced with actual data in your message. The actual data can be a name, an email address, date, time, ID number, etc. To add a dynamic tag to your template, write your variables between double curly braces {{variable}}.
‘Submit’ your message and ‘Confirm’.

As you submit your template, it could be approved right away or go to Facebook for a manual review. This process may take anywhere from a few minutes to a few hours. Reload your page to see if your template is approved and available, as indicated by the green color.
Step 7:- Map the Necessary Fields
Now that you have connected your WhatsApp Cloud API account, all you need is to map the necessary details from the step above. Mapping ensures our data remains dynamic and changes as per the received responses.
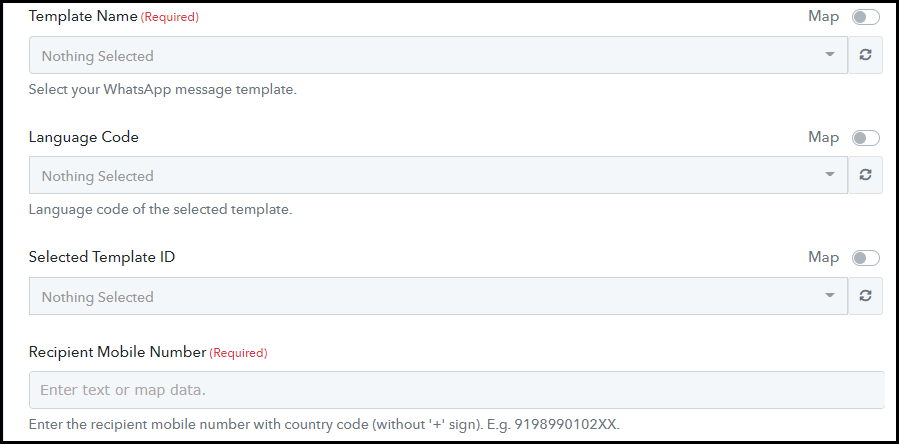
Select your Template Name.

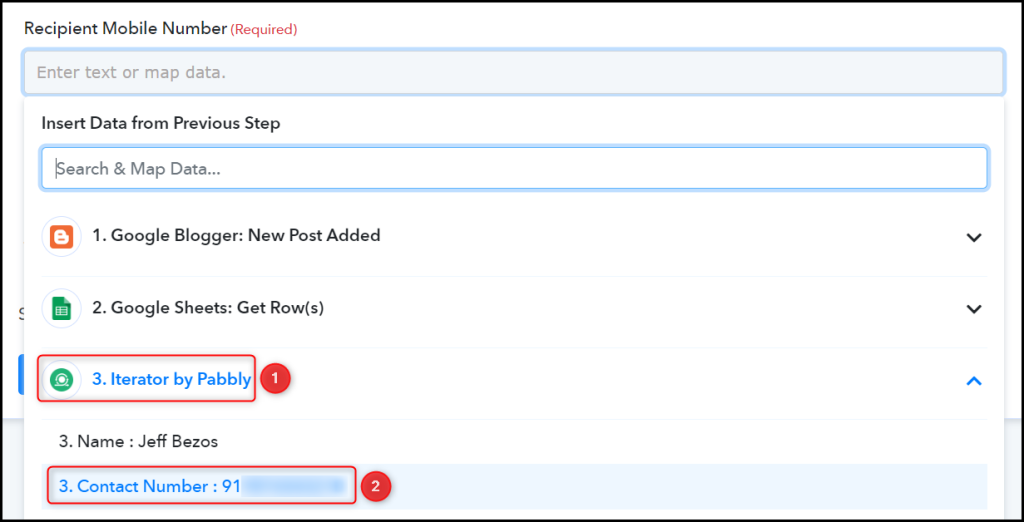
Map the Recipient Mobile Number from the step above.
Remember the Dynamic Data Tags we talked about? Those tags will be replaced by the data present in Body Fields.
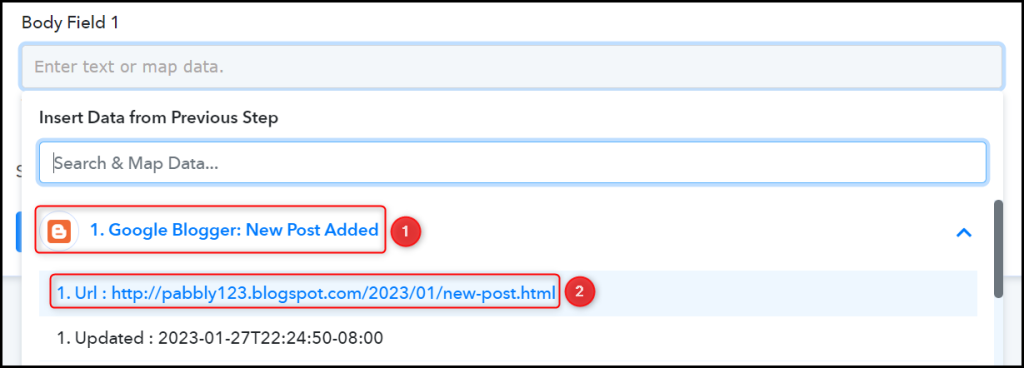
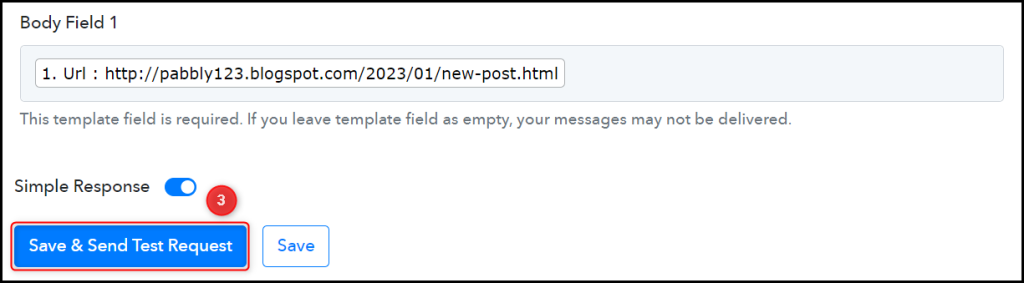
In Body Field, enter or map the relevant data from above. This could vary as per your choice of variable. Click on ‘Save & Send Test Request’.
The moment you click on Save & Send Test Request, a message will be sent to the recipient’s WhatsApp number.
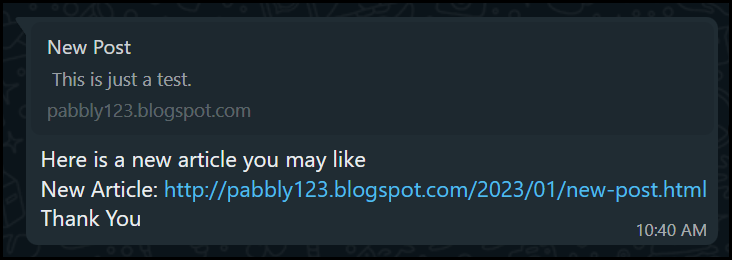
Our automation is complete. We have successfully integrated Google Blogger with WhatsApp. Each time you add a new article on Google Blogger, a message containing a link to the same article will automatically be sent to the WhatsApp number of your choice.
You can copy this entire workflow by clicking this link.
Sign Up for a free Pabbly Connect account, and start automating your business
Subscribe to our Youtube Channel for more such automation
For any other queries, visit our forum