When a temporary access token expires, the integration between Pabbly Connect and WhatsApp Business Cloud API stops working. We can overcome this issue by generating a Permanent Access Token.
In this blog post, we will discuss the steps required to generate a Permanent Access Token in WhatsApp Business Cloud API.
Prerequisites: Set up your WhatsApp Cloud API account by following these steps if you haven’t already.
Four-step Process to generate Permanent Token
1. Login to your Facebook Developers account and go to Business Settings
2. Create System Users
3. Add Assets to your System users
4. Generate your Permanent Access Token
Step 1:- Login to your Facebook Developers account and go to Business Settings
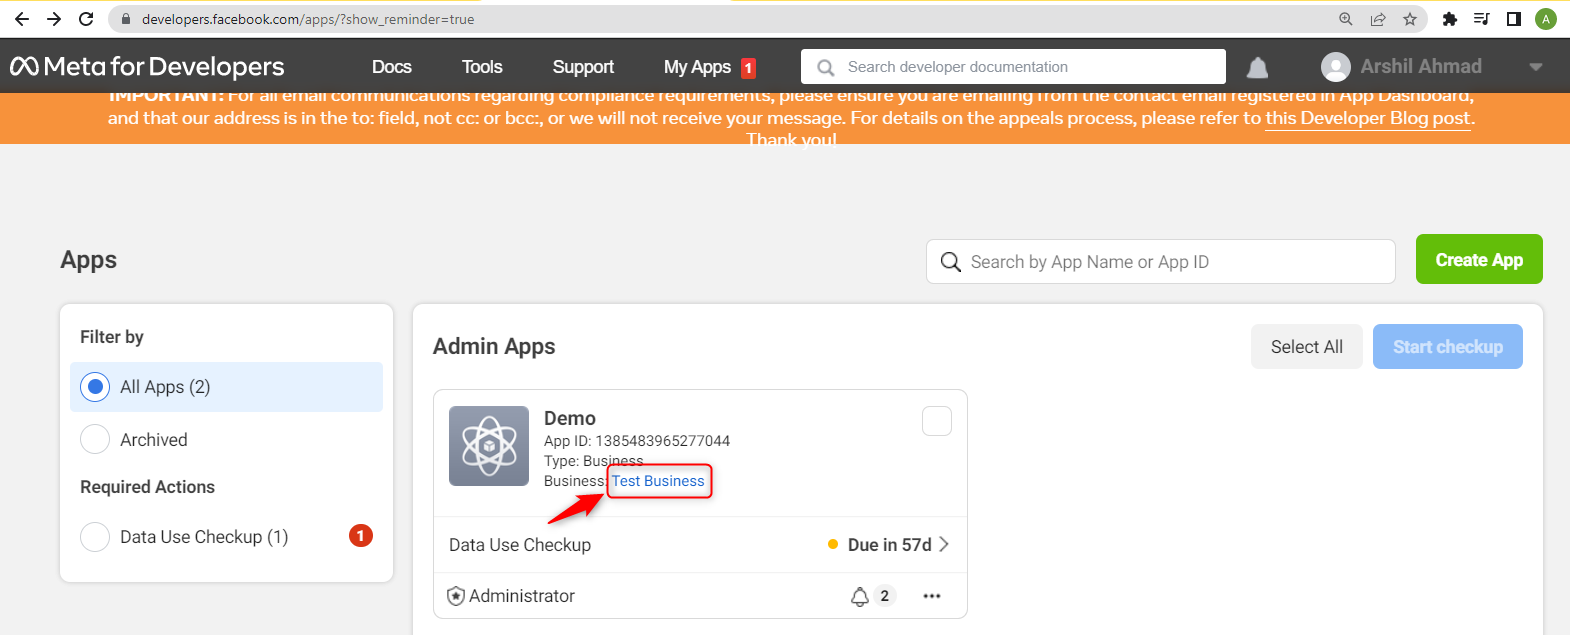
Login to your Facebook Developers account, then click on ‘My Apps’.

Click on ‘Test Business’, and it will redirect you to Business Settings of your WhatsApp Cloud API account in a separate tab.
Step 2:- Create System Users
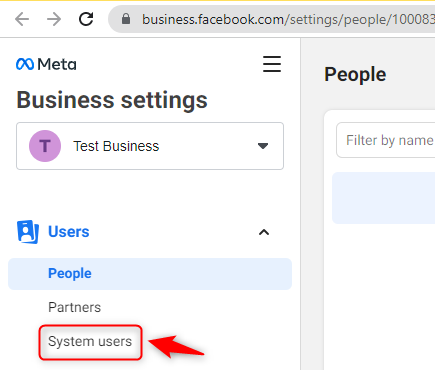
Click ‘System Users’
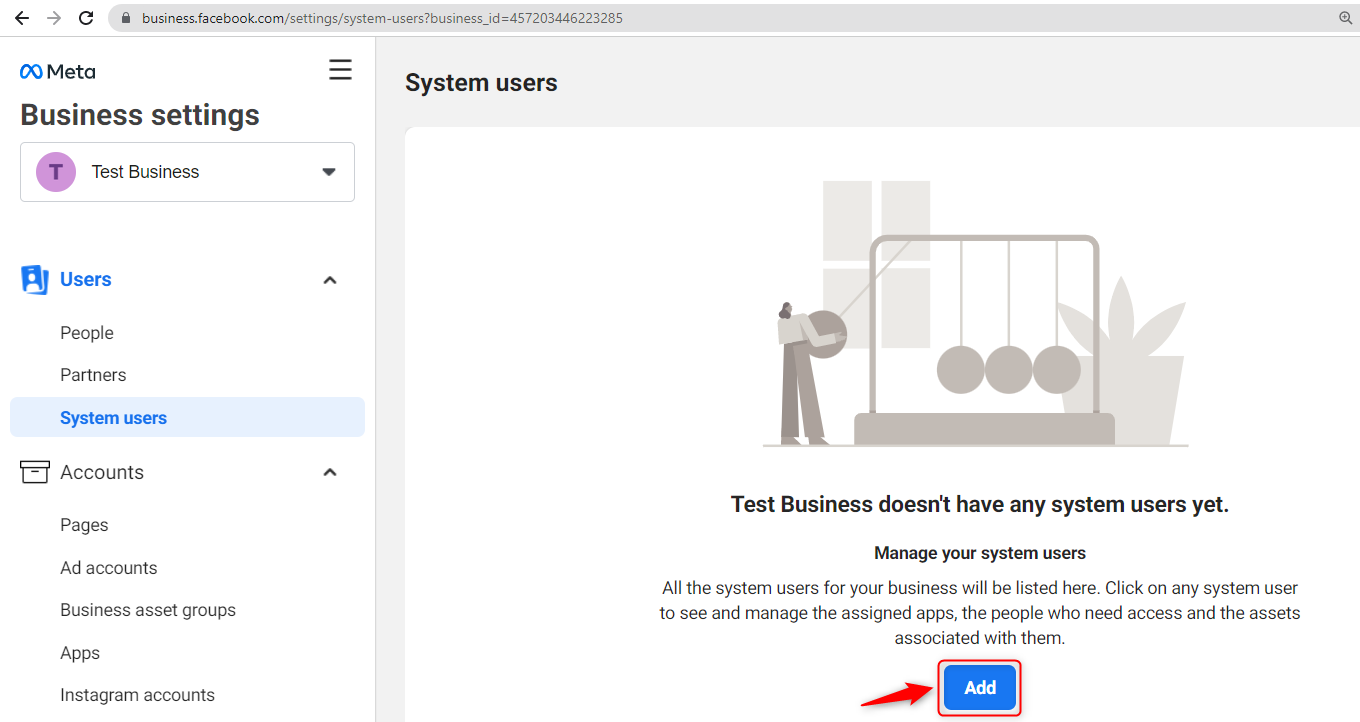
‘Add’ a System User, and you will be prompted to accept a policy.
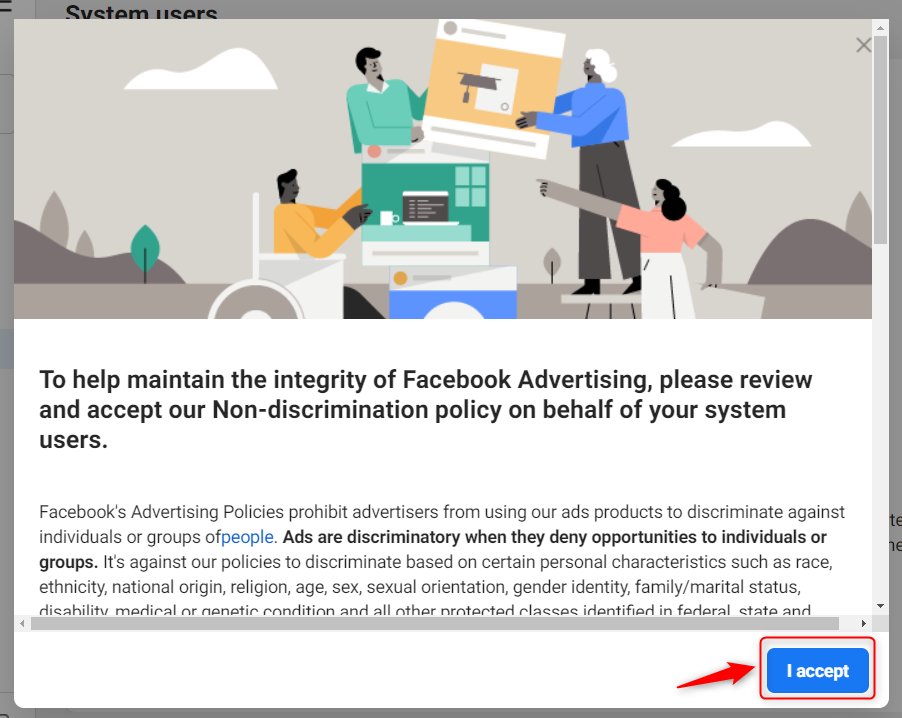
‘Accept’ the policy.
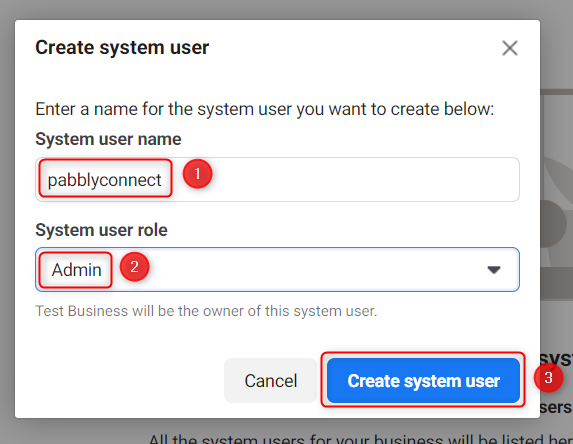
Fill in a System Username and define the System User Role as ‘Admin’. Click on ‘Create system user’.
Step 3:- Add Assets to your System users
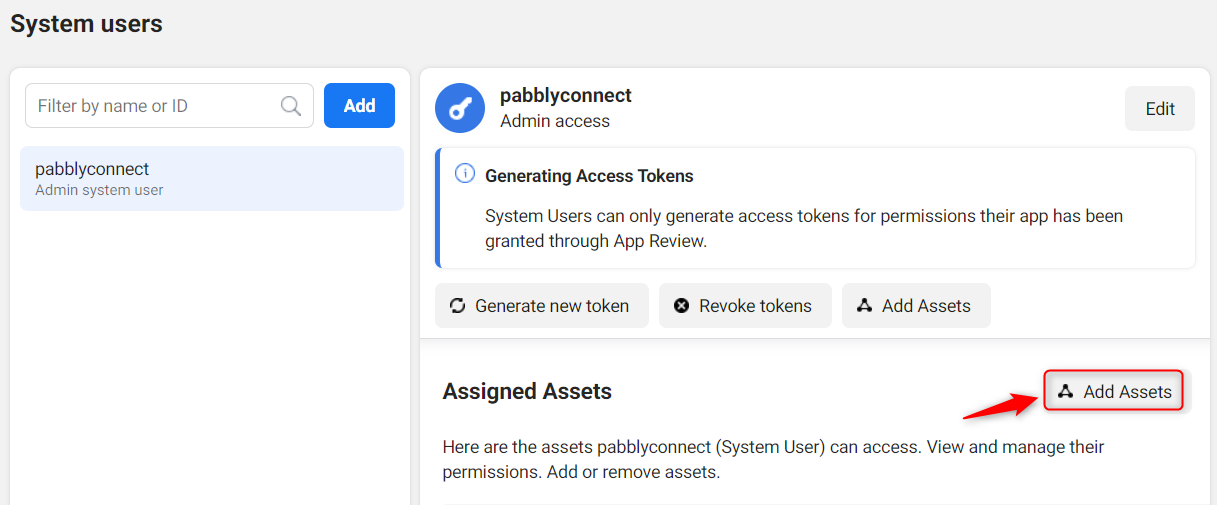
Click on Add Assets
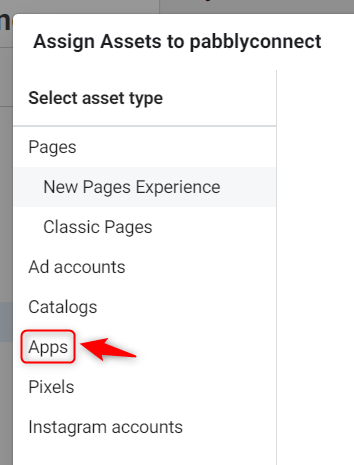
Choose ‘Apps’ as asset type.
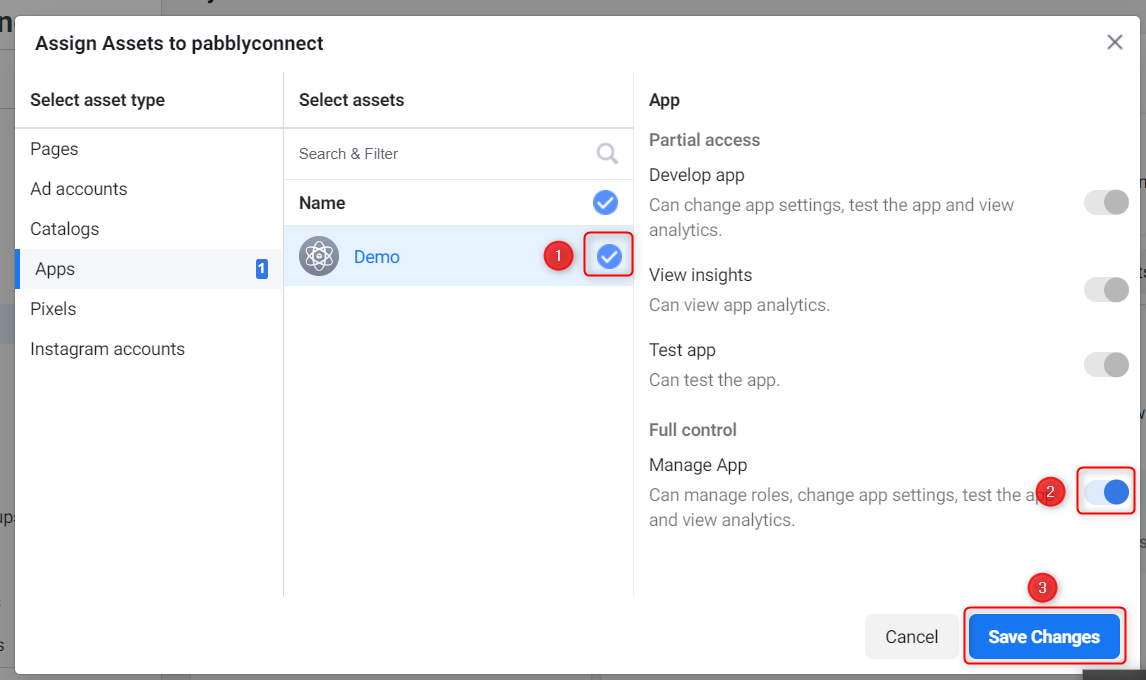
Select your app and give full control to this app. Then ‘Save Changes’.
You have now successfully added an asset.
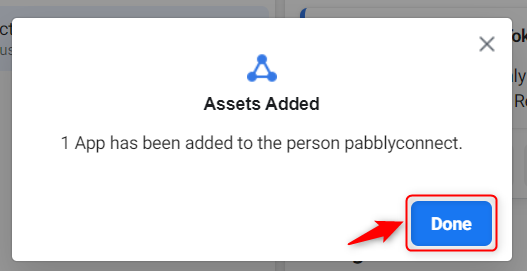
Step 4:- Generate your Permanent Access Token
Click on ‘Generate new token’
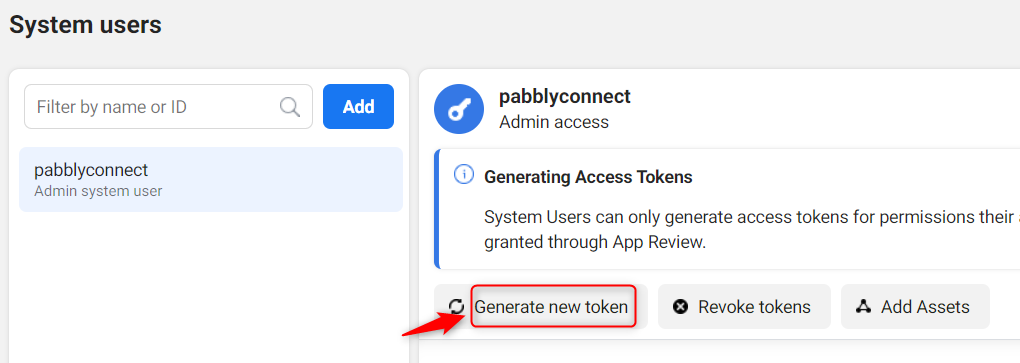
Select the app to which you have given access.

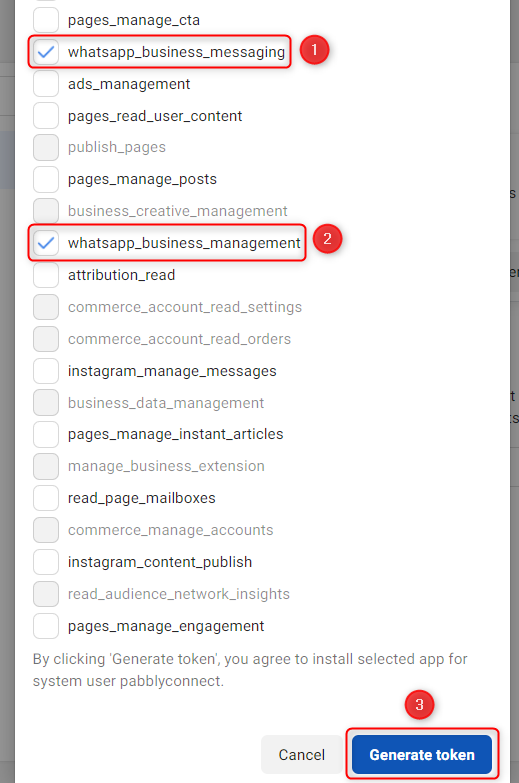
Scroll down, and give your app ‘whatsapp_business_messaging’ and ‘whatsapp_business_management’ permissions. Click on ‘Generate Token’.
You have now generated your Permanent Access Token. Copy your access token, and
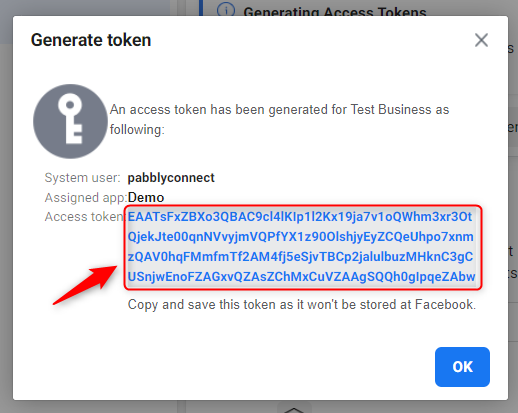
Paste and save your access token in a notepad.

You can now use this Permanent Token wherever needed without worrying about its expiration.
Sign Up for a free Pabbly Connect account, and start automating your business.
Subscribe to our Youtube Channel for more such automation.
For any other queries, visit our forum