In this article, we will explore the process of integrating MS Excel with Telegram, enabling users to automatically send messages on Telegram whenever data is entered into an Excel worksheet.
This automation requires a one-time setup, for which we will use Pabbly Connect.
Initially, we will establish a connection between MS Excel and Pabbly Connect to retrieve the entered data. Subsequently, we will establish a connection between Pabbly Connect and Telegram to dispatch a message to a Telegram group or channel using the obtained data.
Steps to Send Telegram Messages from Microsoft Excel Automatically
1. Sign In / Sign Up to Pabbly Connect and Create a Workflow
2. Setup MS Excel as the Trigger App to Extract Data
3. Setup Telegram as the Action App to Send Messages
Step 1:- Sign In / Sign Up to Pabbly Connect and Create a Workflow
A. Sign In / Sign Up
To begin this process, visit Pabbly Connect and create your account by clicking on the ‘Sign Up Free’ button. You can also click on Sign In if you already have an account.

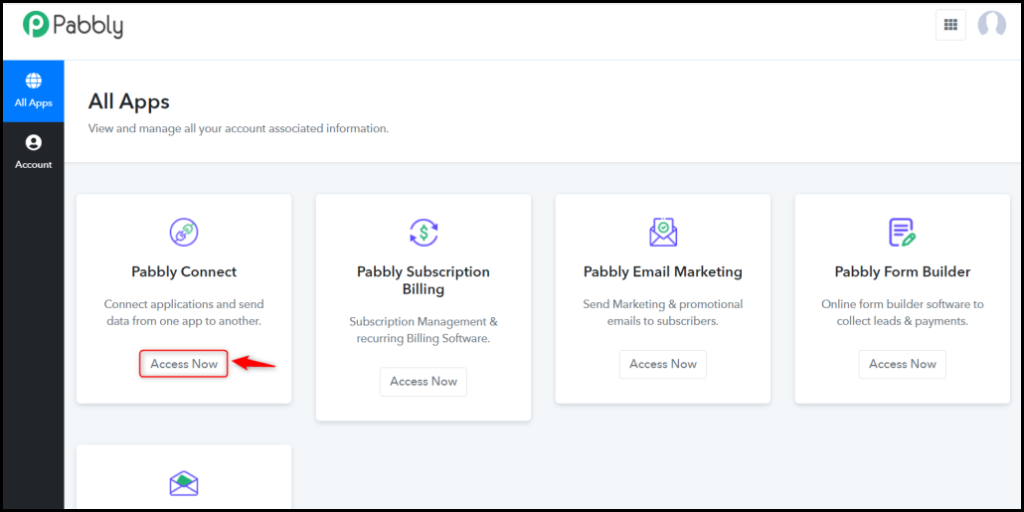
Click on the Pabbly Connect ‘Access Now’ button
B. Create Workflow
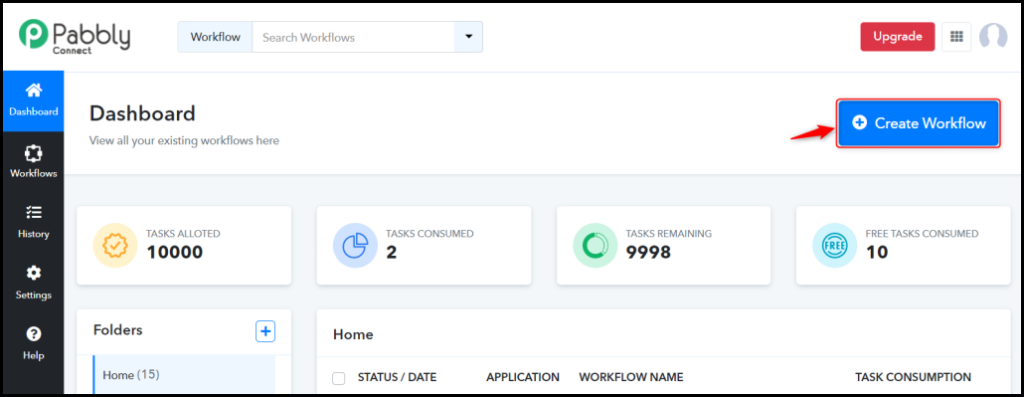
To create a new workflow, click the ‘Create Workflow’ button.
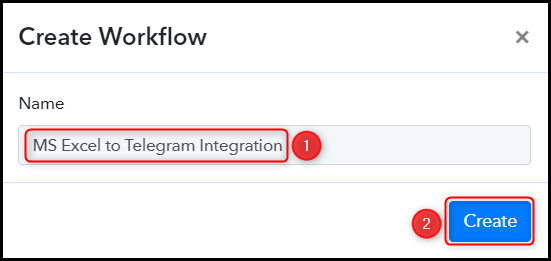
Name your workflow, and click on ‘Create’.
Step 2:- Setup MS Excel as the Trigger App to Extract Data
Let us now examine the necessary steps to establish a connection between Microsoft Excel and Pabbly Connect, which will allow us to extract messages from MS Excel worksheet.
A. Trigger App
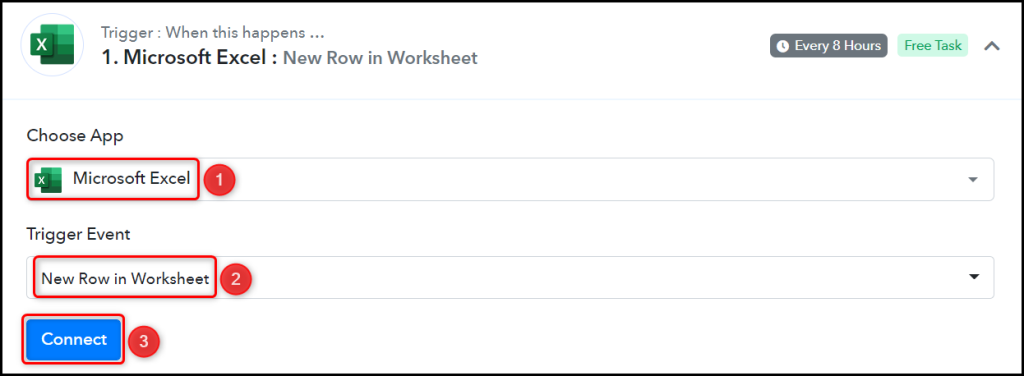
Trigger allows us to choose the application that will receive the data for Pabbly Connect. In our case, it would be Microsoft Excel.
Choose ‘Microsoft Excel’ as the Trigger App, select ‘New Row in Worksheet’ as an Trigger Event, and click on ‘Connect’.
B. Connect MS Excel Account
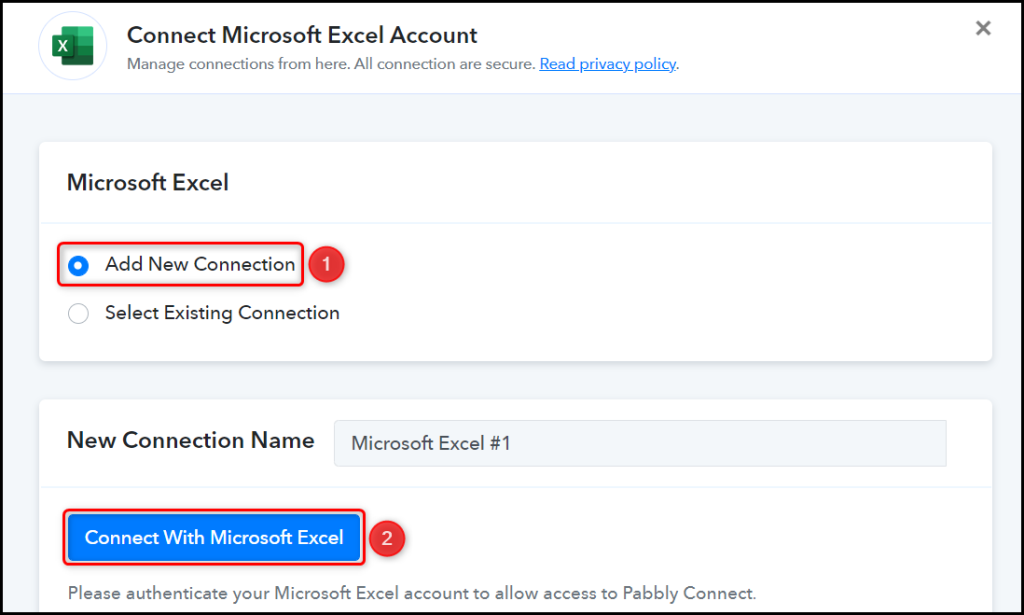
To connect with your MS Excel account, select ‘Add New Connection’ and click on connect with ‘Microsoft Excel’. Also, grant the authorization.
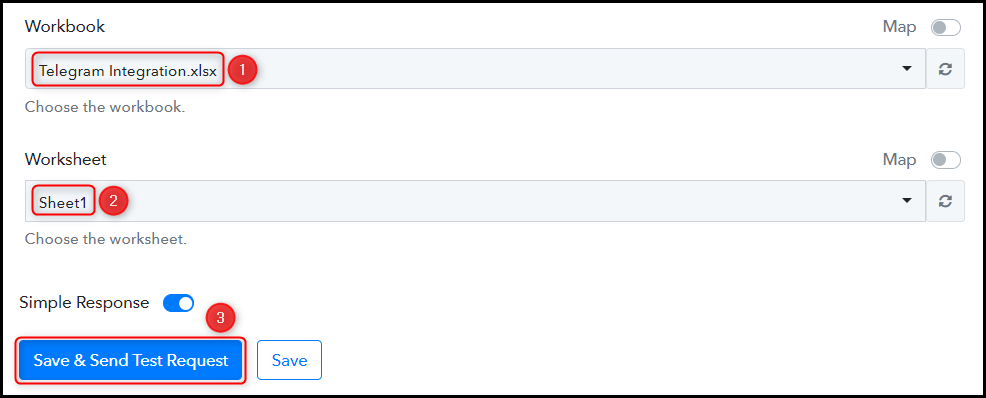
Select the Workbook and Worksheet from where you want to capture the data, and click on ‘Save & Send Test Request’.
Expand Response Received, where the data you entered must be visible, thus confirming our established connection.

Step 3:- Setup Telegram as the Action App to Send Messages
Action allows us to choose the application that will get executed by the workflow trigger.
We essentially want to utilize the data obtained from MS Excel for the purpose of sending messages on Telegram. To accomplish this, we will set up the Telegram Bot as our Action App.
A. Action App
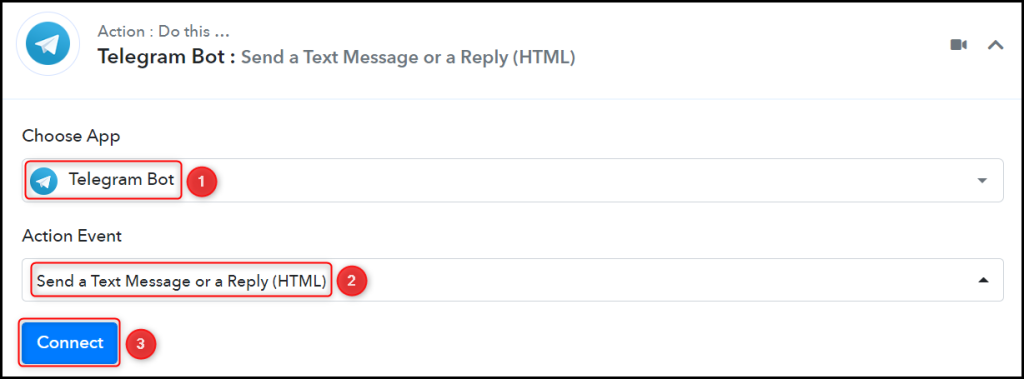
Choose ‘Telegram Bot’ as the Action App, select ‘Send a Text Message or a Reply (HTML)’ as an Action Event, and click on ‘Connect’.
B. Connect Telegram Account
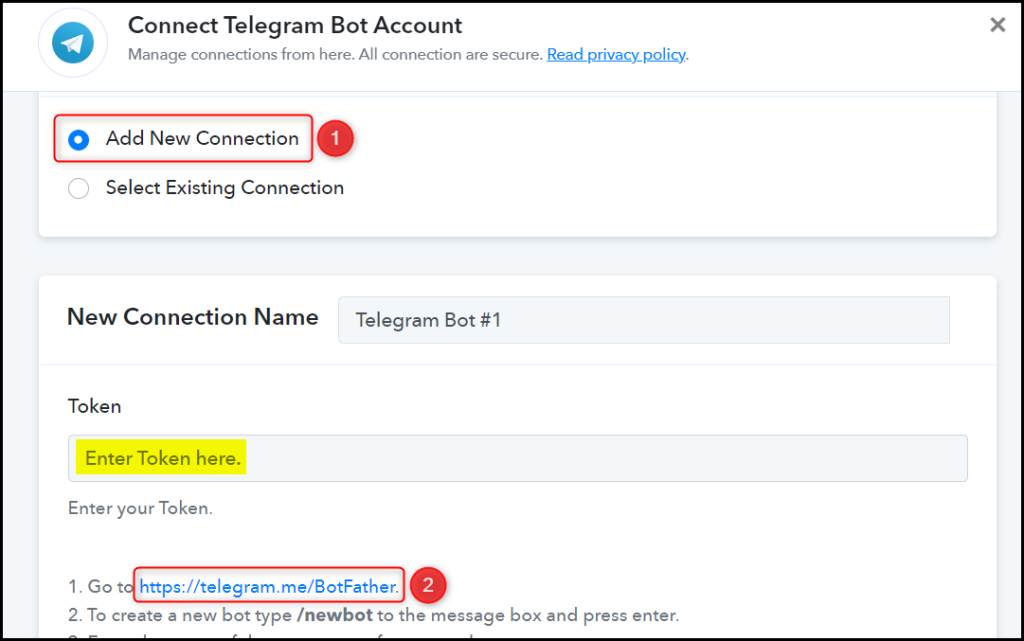
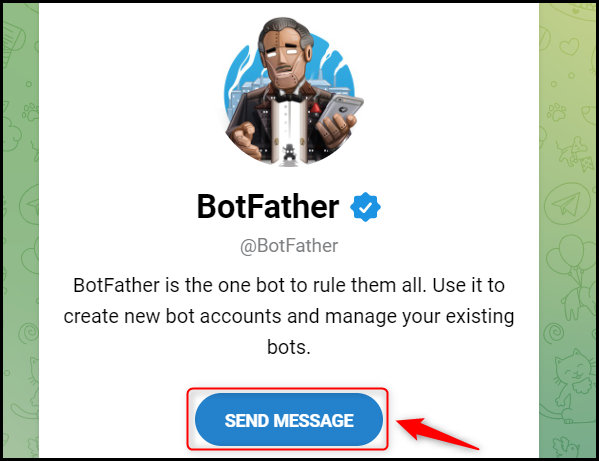
To connect with your Telegram account, select ‘Add New Connection’. You will be asked to enter your Token. Go to ‘https://telegram.me/BotFather’ and click on ‘Send Message’.
C. Create a New Bot
In order to send a message to Telegram, it is necessary to have a bot. Simply type ‘/newbot’ and send the message to create one.

When prompted, provide a Name and Username for your new bot.

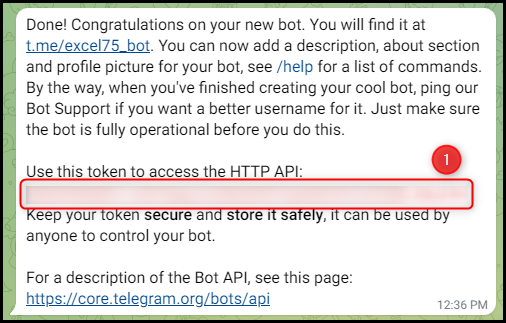
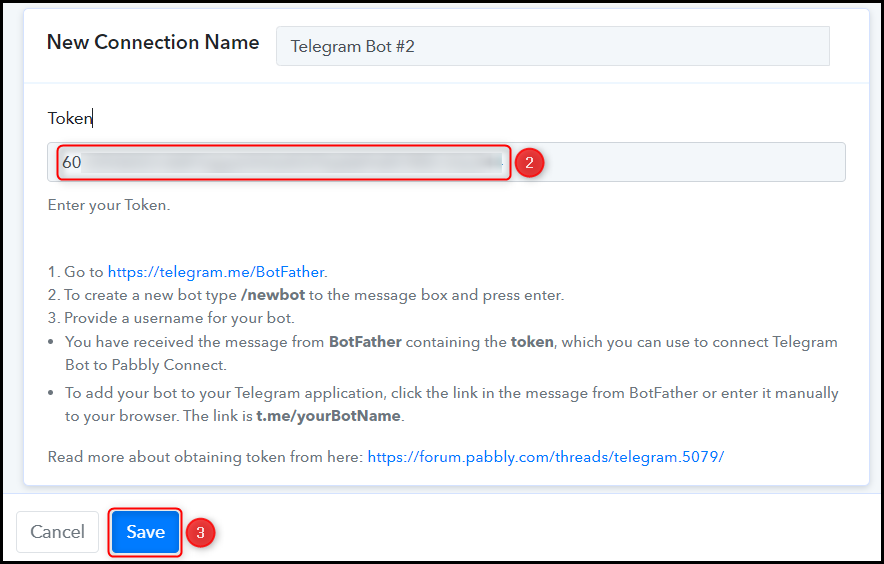
Copy the API Token, paste it into its designated field, and click on ‘Save’.
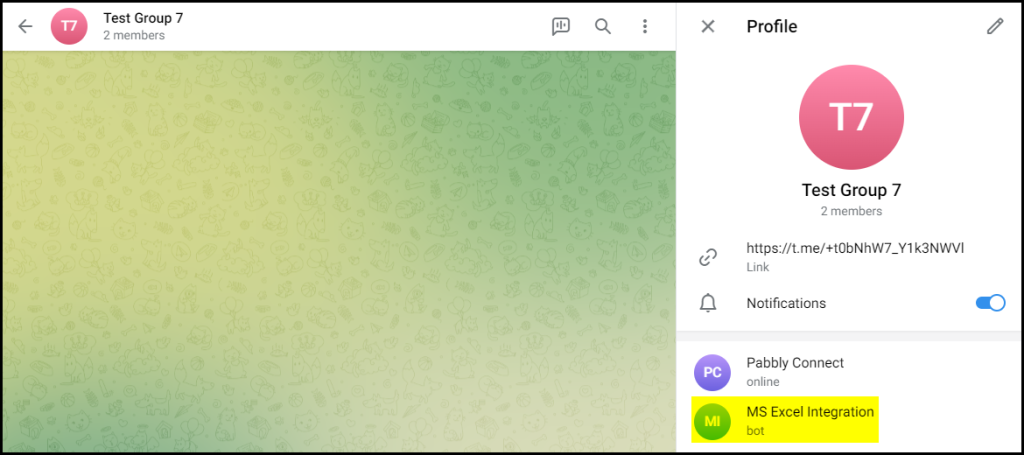
Add the bot to the group or channel where you intend to send the messages.
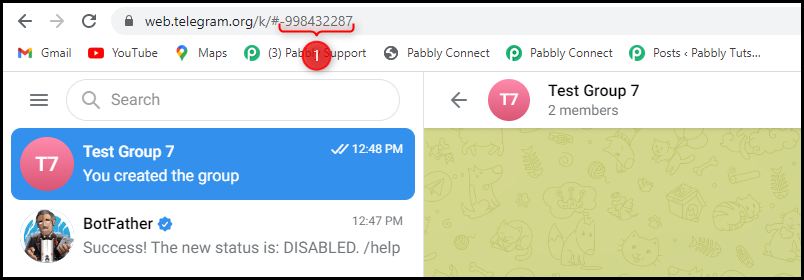
Copy and paste the Chat ID from the URL of your Telegram group or channel.

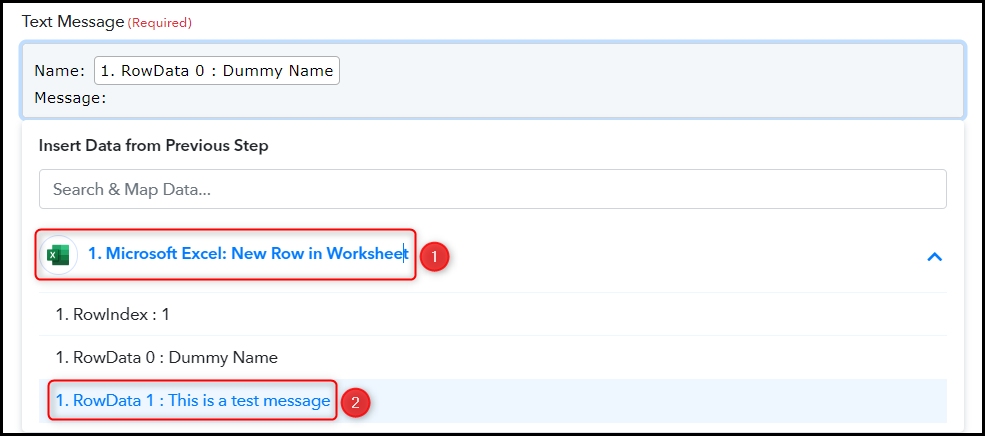
Compose the Text Message to be sent by mapping the data from the step above, disable the Notifications and Link Previews if you desire, and click on ‘Save & Send Test Request’.
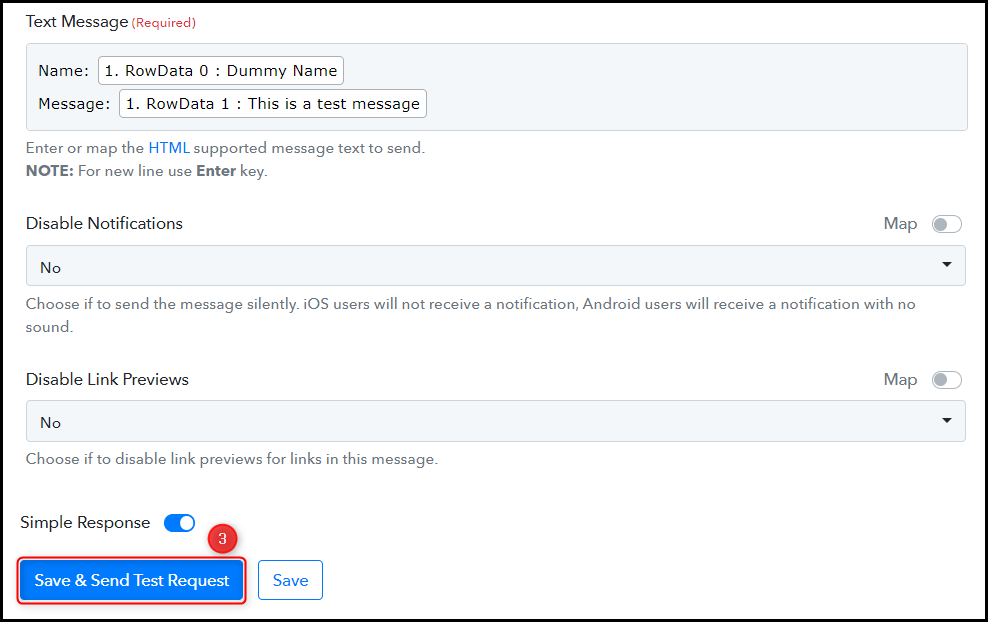
When you click on Save & Send Test Request, the message will be sent to your chosen Telegram group or channel.
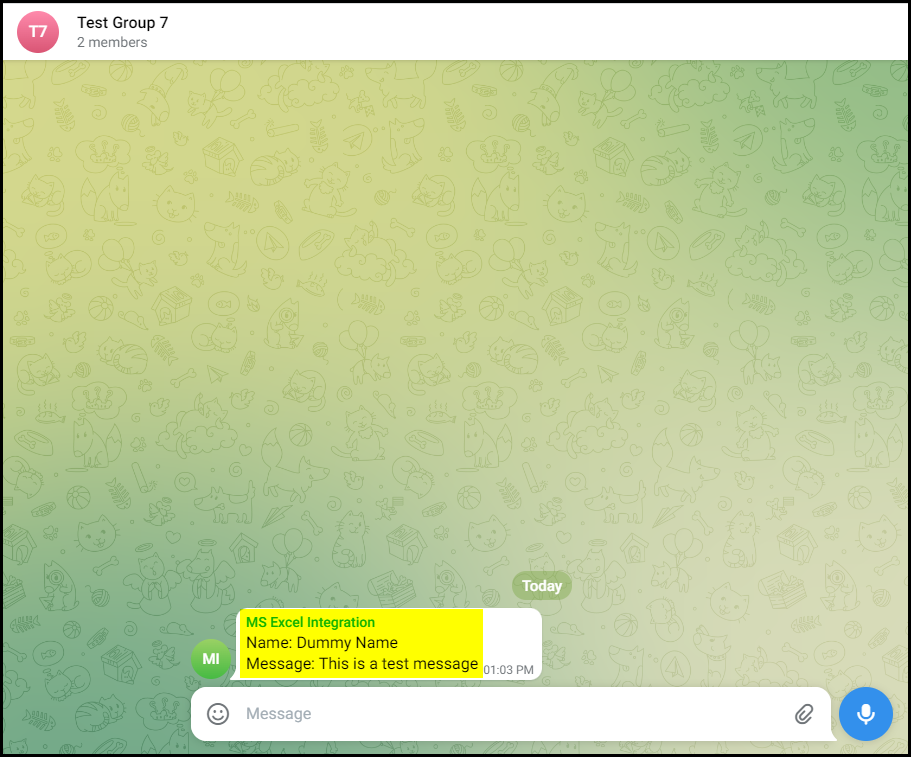
The integration of MS Excel with Telegram is now complete and fully functional. Every time you add a new message in a row of your MS Excel worksheet, it will be automatically transmitted to your Telegram group or channel.
You can copy this entire workflow by clicking this link.
Sign Up for a free Pabbly Connect account, and start automating your business
Subscribe to our Youtube Channel for more such automation
For any other queries, visit our forum
