This blog post will help you set up WhatsApp Business Cloud API, which will enable you to send custom template messages on WhatsApp using Pabbly Connect. Additionally, we will discuss the step-by-step method for sending WhatsApp messages in bulk to distinct individuals using WhatsApp Business Cloud API.
Steps Needed for Sending WhatsApp Message Automatically
1. Log in to the Facebook Developers account and create a business app
2. Add products to your app and receive a sample template message
3. Add and verify the phone number via which you will send messages
4. Integrate the number with Pabbly Connect to send template messages
5. Create Message Template
6. Get your message template approved
7. Bind the data using Pabbly Connect
8. Create a trigger app and connect with Google sheets
9. Create an action app and send a test message
10. Complete the Final Setup
Step 1:- Log in to the Facebook Developers account and create a business app.
Visit developers.facebook.com and log in to your account.
A. My Apps
Click on ‘My Apps’ button, visible at the top right corner of the page.

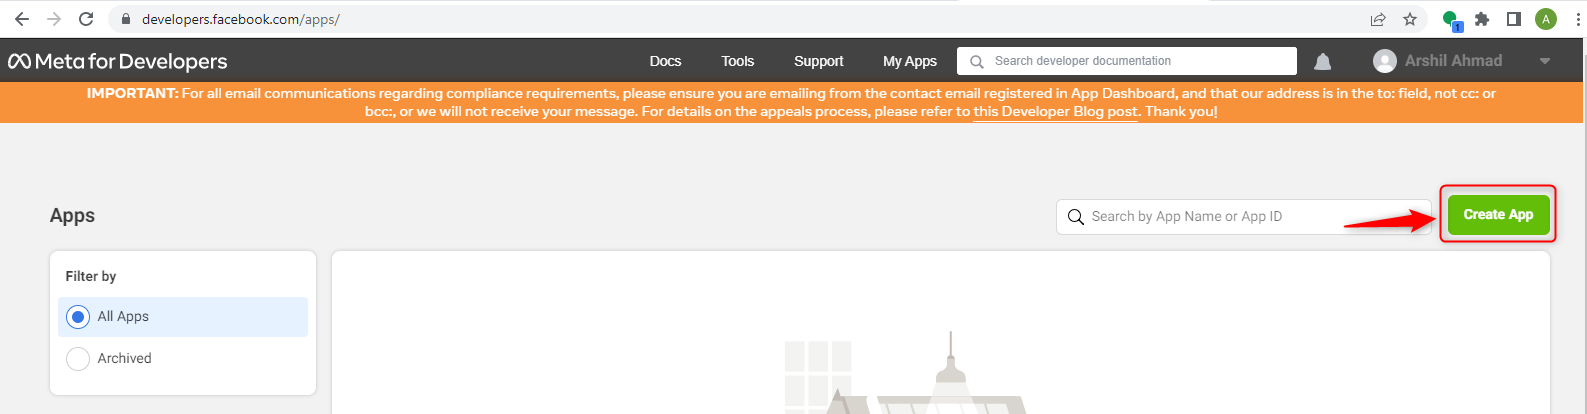
B. Create App
Press the green ‘Create App’ button, to create a new app.
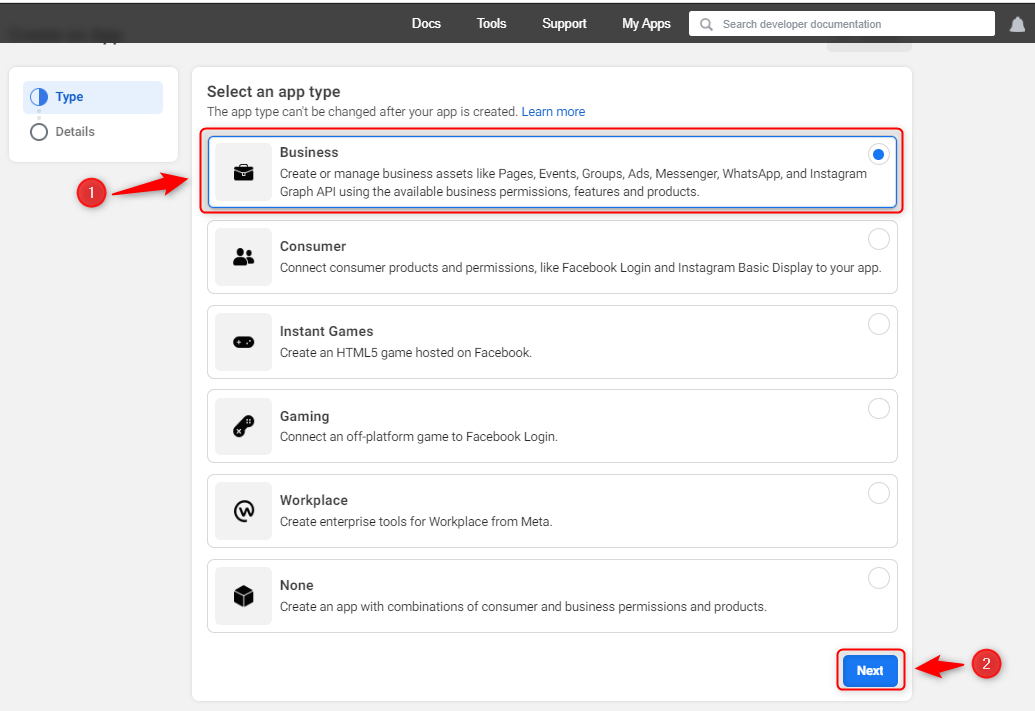
C. App Type
Select ‘Business’ as the app type, then click on ‘Next’.
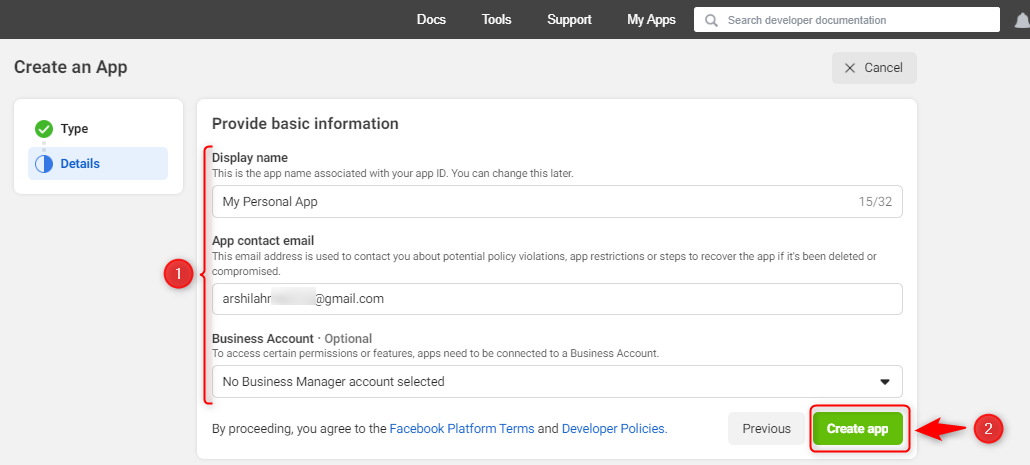
D. Provide basic information
Enter the Display Name and select a Business Account if you have one. Click on ‘Create app’.
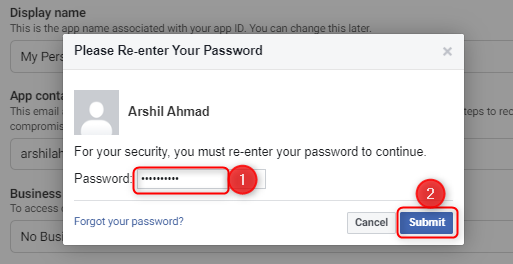
Enter your Password and Submit.
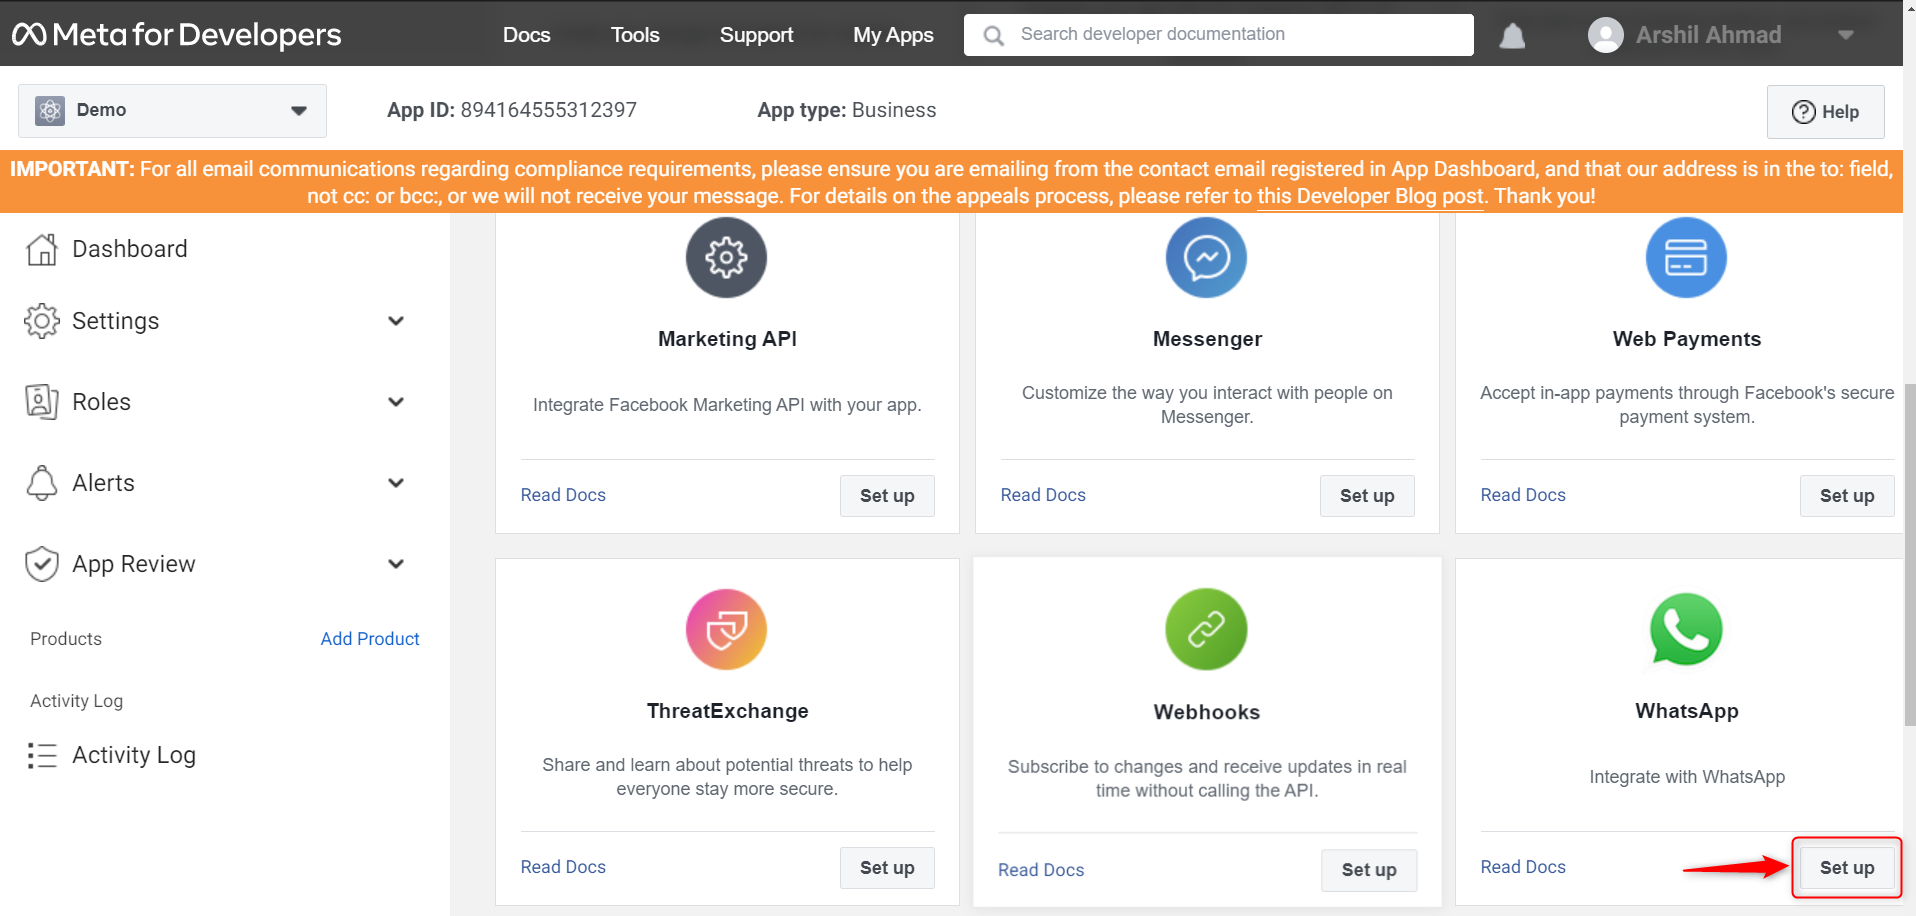
Step 2:- Add products to your app and receive a sample template message.
A. Add Products
Scroll down to WhatsApp and click on ‘Set up’ to add products.
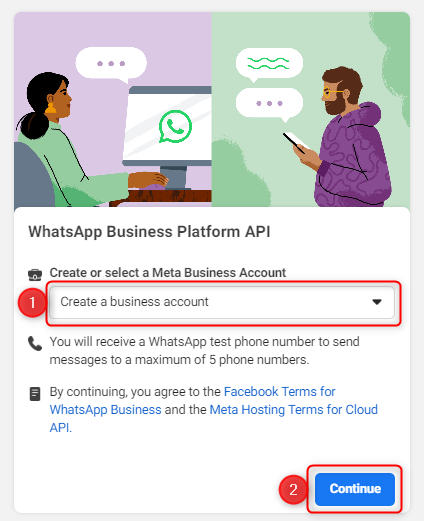
Choose an existing business account, or press ‘Continue’ and Facebook will create one for you.
B. Receive a sample message
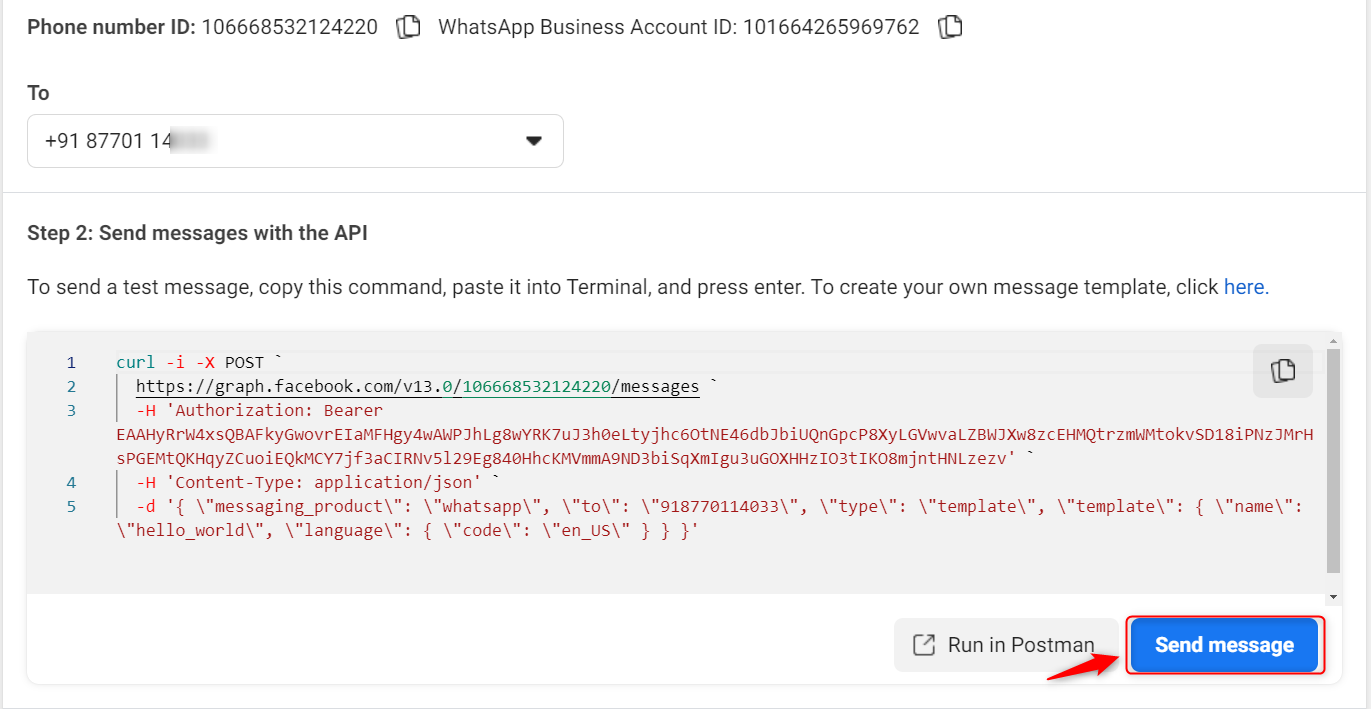
On this page, Facebook has generated a test phone number and formed a sample API call, to send us a template message.
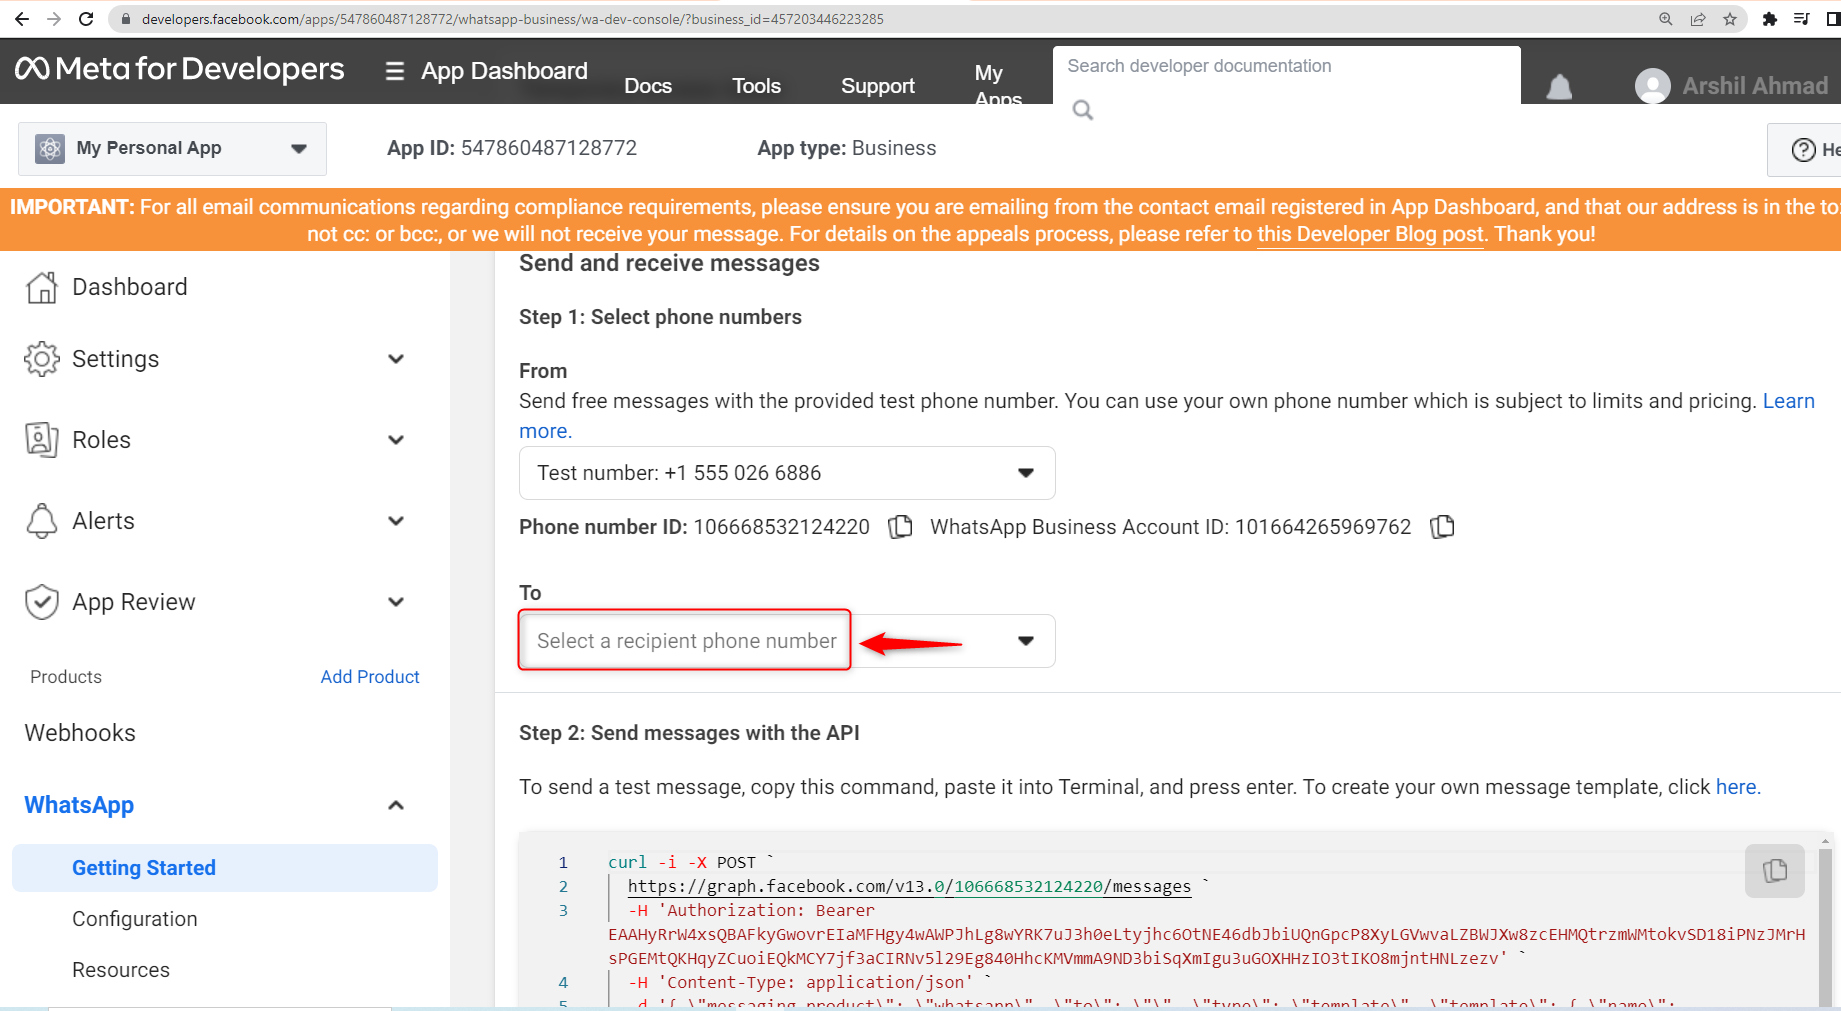
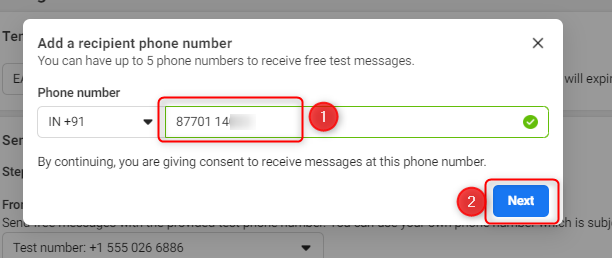
Add and verify a number on which you will receive the test message.
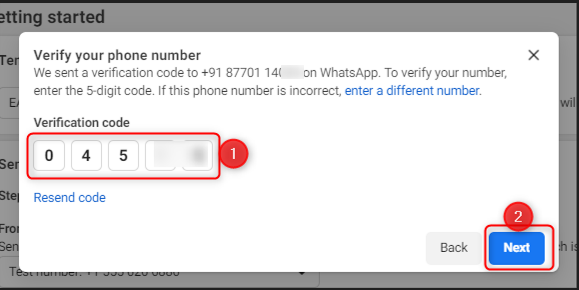
Click on ‘Send message’ and check if you have received the message on WhatsApp.
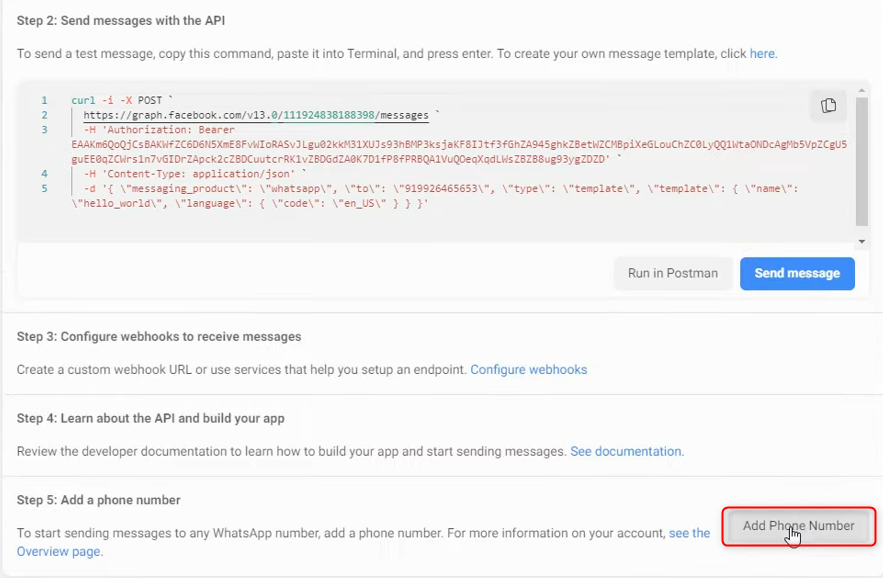
Step 3:- Add and verify the phone number via which you will send messages.
To add the number through which you will send the messages, click on ‘Add Phone Number’.
Fill in your essential business information.
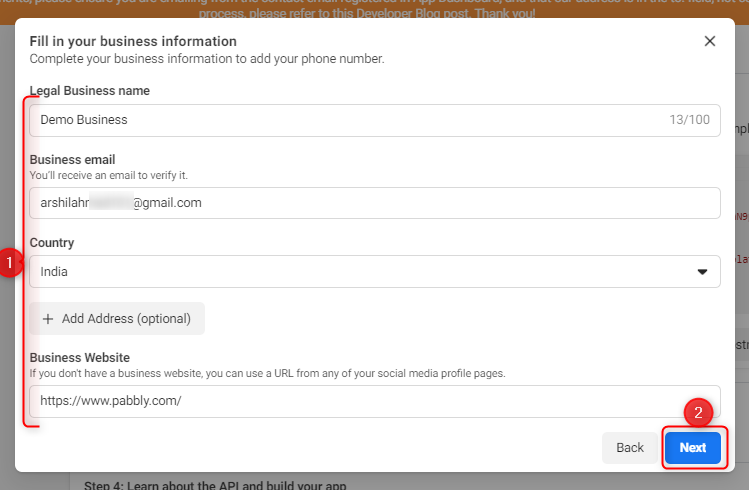
Select your Timezone and Category.
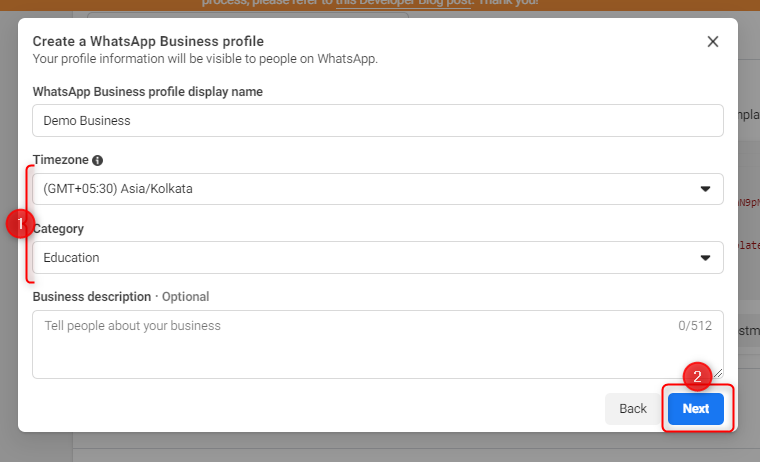
Fill in your Contact Number.
Important Note: This step requires a number not registered with WhatsApp. Use an alternate number or delete your existing WhatsApp account, then fill out the details.
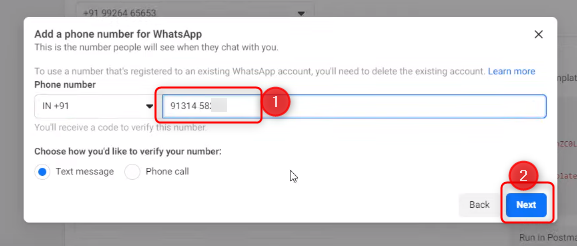
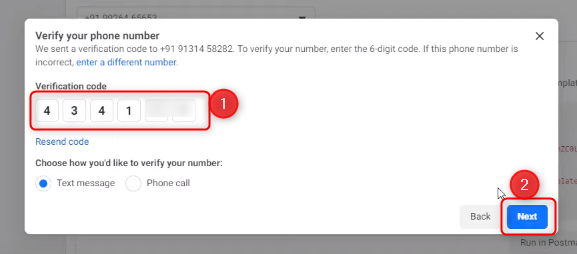
Verify the number and click on ‘Next’.
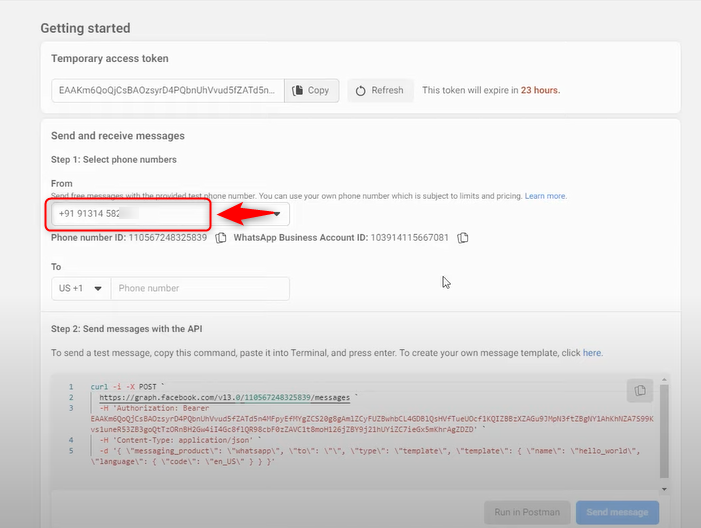
The verified number will now be visible under the heading From.
Step 4:- Integrate the number with Pabbly Connect to send template messages
A. Data Modification
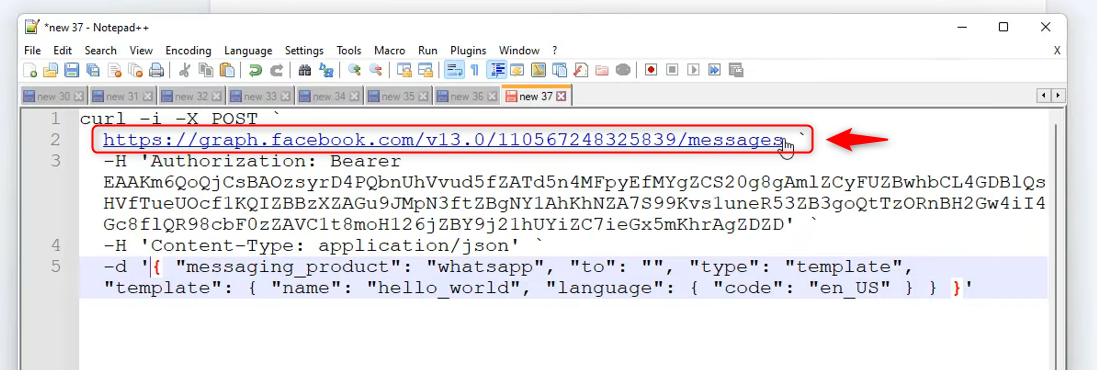
To send a template message through your registered number to any number, copy the entire command

And paste it on a notepad. On your notepad, select the data represented with ‘-d’
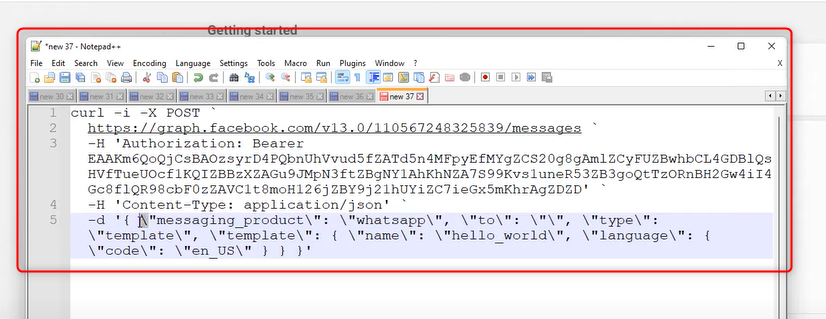
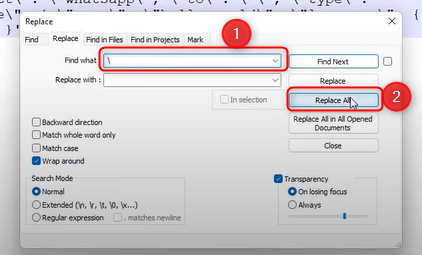
Then find and replace backward slashes ‘\’ with empty spaces using Ctrl+F keys.
B. Sign In / Sign Up
Visit pabbly.com and sign in to your Pabbly Connect account. If you don’t already have an account,

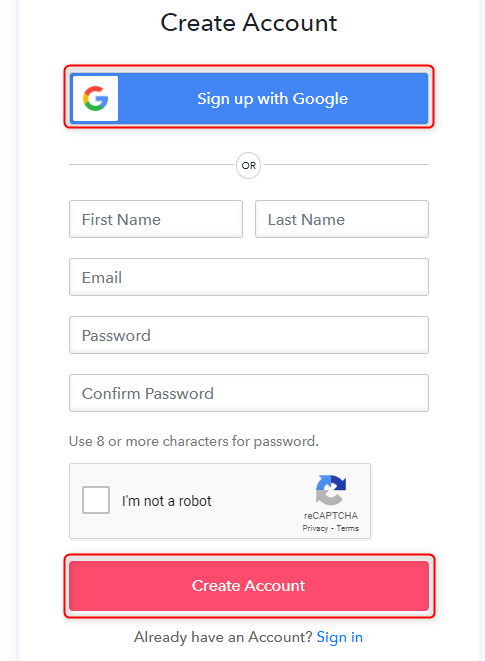
‘Sign Up Free’ to create a free Pabbly Connect account.

Click on ‘Sign up with Google’ to sign up using your Gmail account, or fill in your details and click on ‘Create Account’
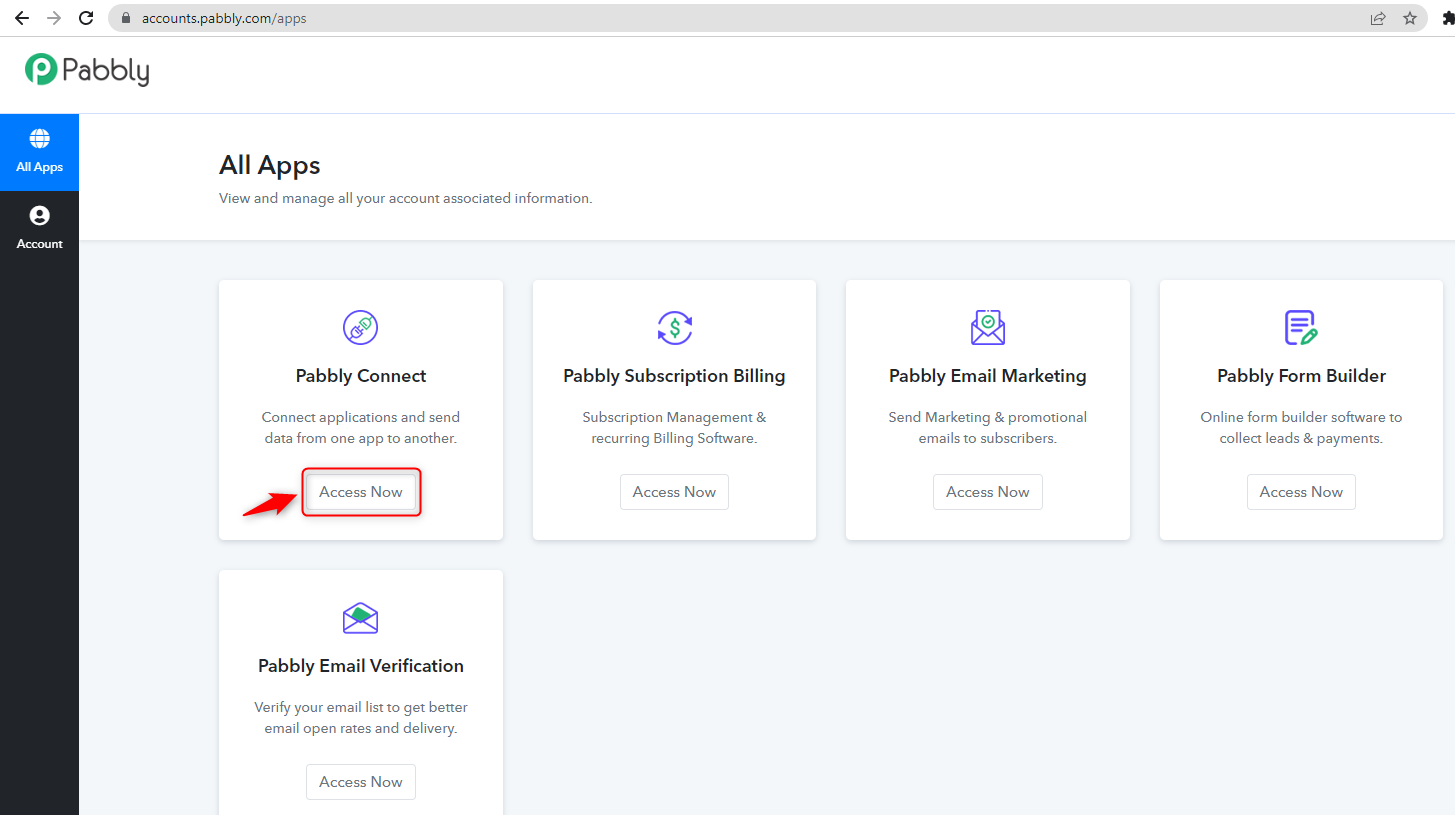
Click on Pabbly Connect ‘Access Now’ button
C. Create Workflow
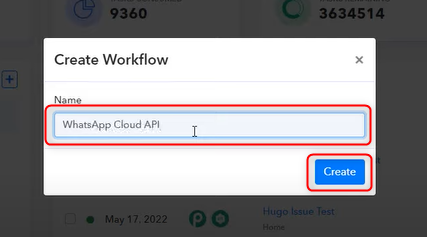
Visit the Pabbly Connect dashboard and click on ‘Create Workflow’.
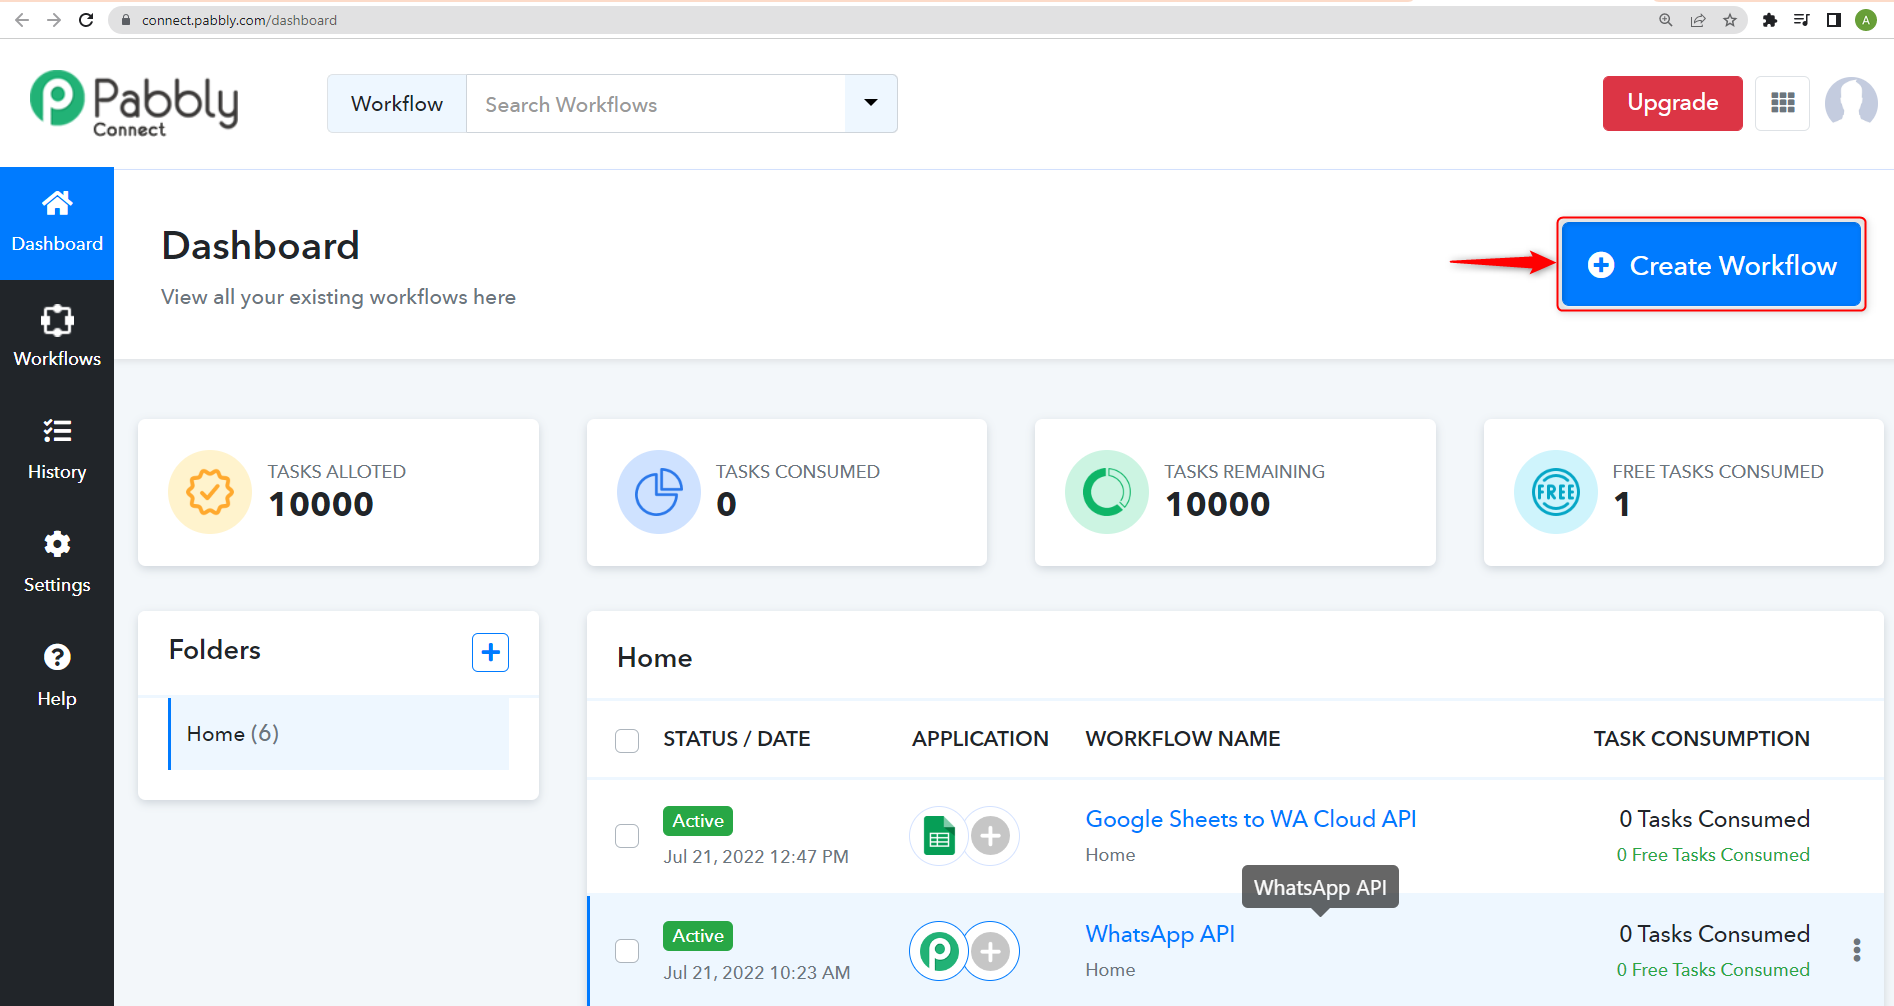
Name your workflow and press ‘Create’.
D. Trigger App
Choose a trigger app. Copy the Webhook URL
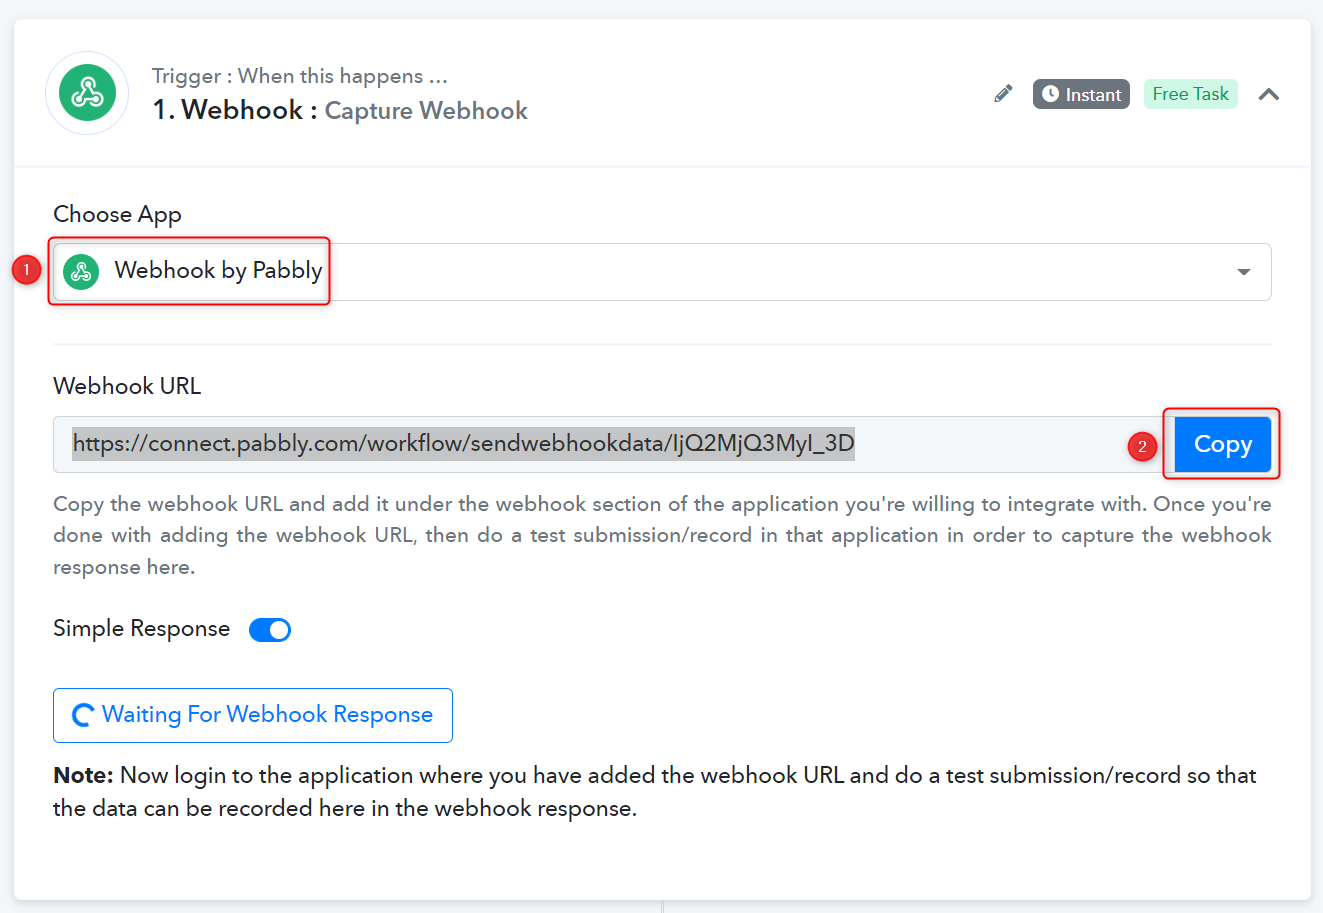
And paste that link in a different tab, modify the URL, and press Enter.

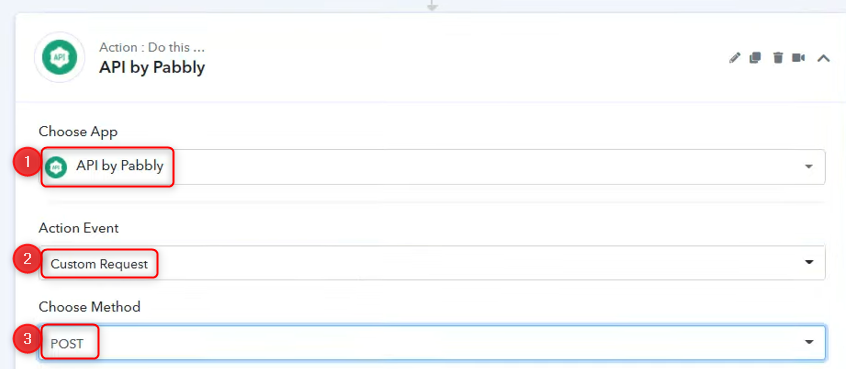
E. Action App
Expand the Action app tile and choose ‘API by Pabbly’. In Action Event, select ‘Custom Request’. Choose ‘POST’ as the method.
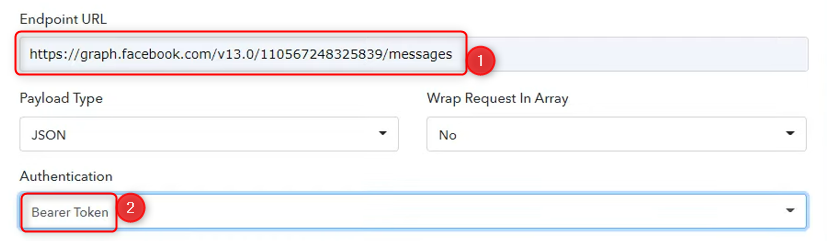
Copy the Endpoint URL from the notepad.
Paste the Endpoint URL and select ‘Bearer Token’ as authentication.
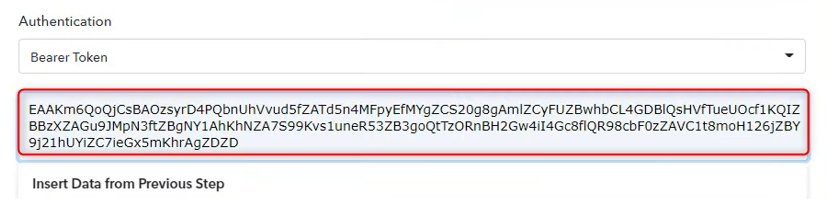
Copy the Bearer Token ID from the notepad

And paste the Bearer Token ID.
Copy Data from the notepad
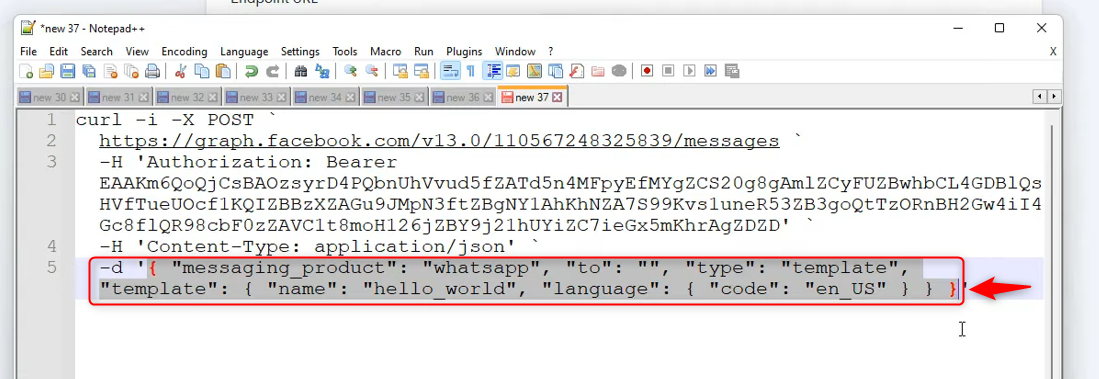
Paste the Data and type in the number to whom you want to send the message. You can also map a number from the trigger step.
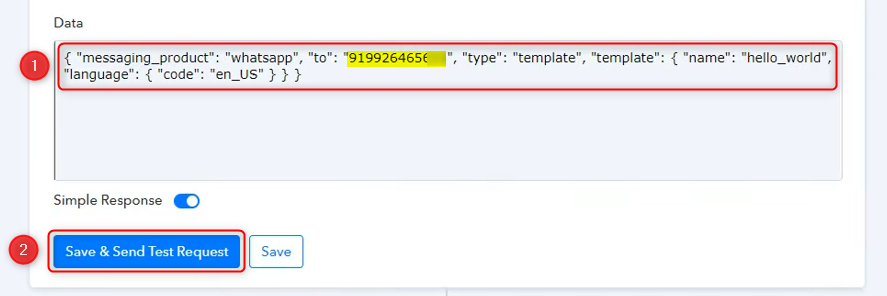
Click on ‘Save and Send Test Request’, and your message is delivered.
Since the WhatsApp Business Cloud API setup is complete, we can now focus on understanding the process for sending WhatsApp messages in bulk.
Prerequisites:
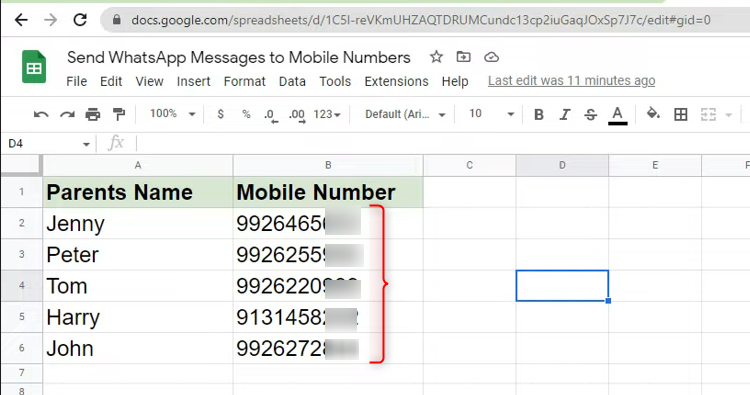
A. Have a list of contact numbers on Google sheets.
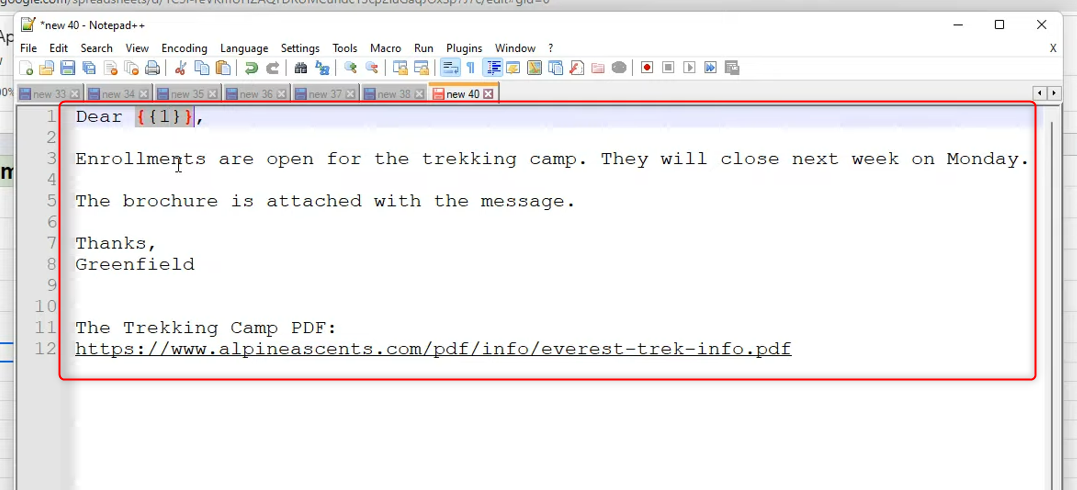
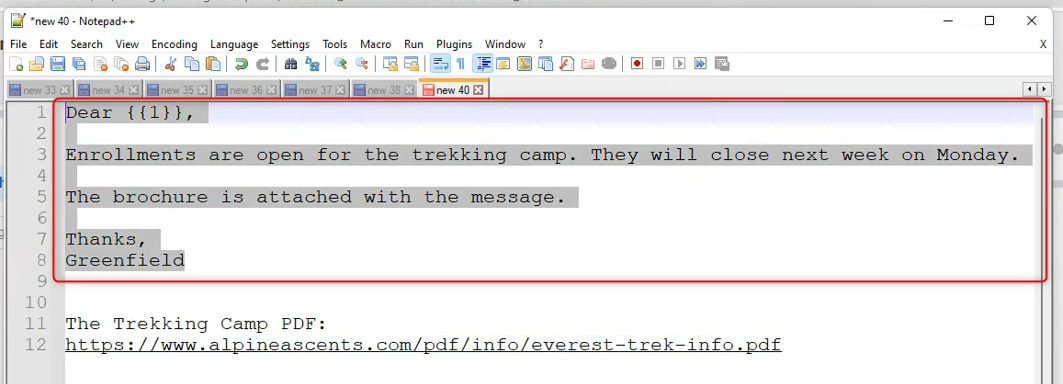
B. Write your message on the notepad app. For e.g., We have created a template for Trekking Camp Enrollment.
Step 5:- Create Message Template
Switch to the Facebook developers page.
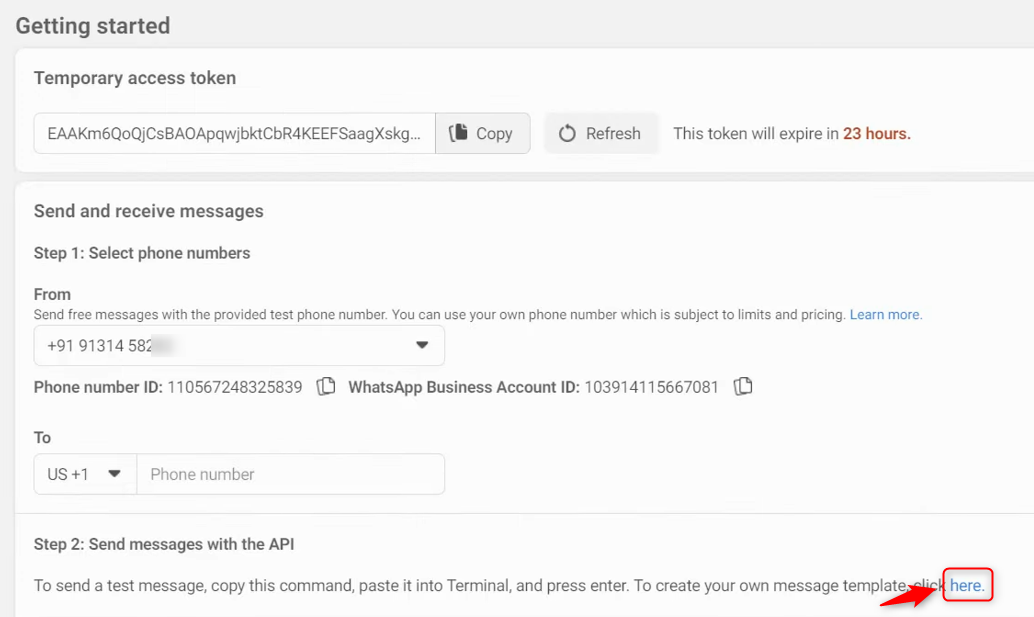
To create a message template, click on the ‘here’ hyperlink. It will redirect you to a different page.
Click on ‘Create Message Template’.

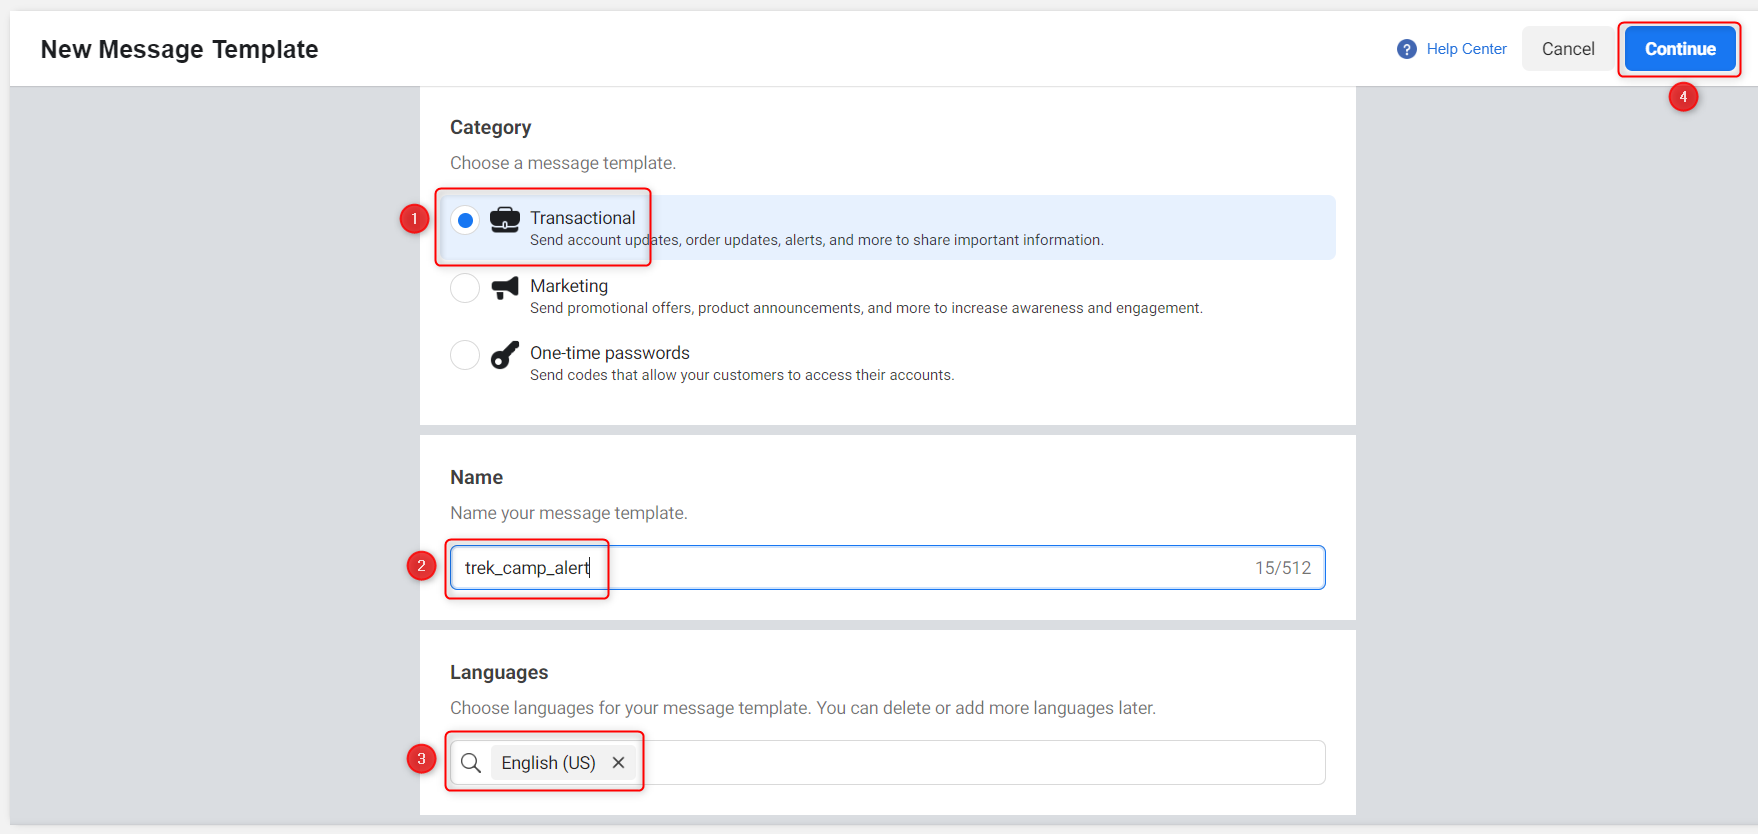
Choose ‘Transactional’ as the Category, Name your message template, and pick your Language. Press ‘Continue’.
Step-6. Get your message template approved
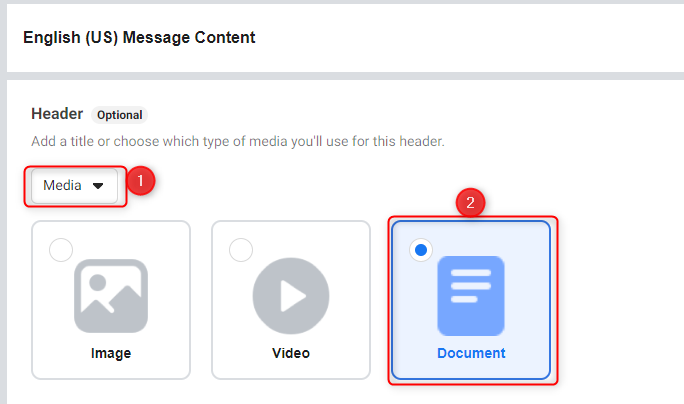
A. Header
Select a Header based on your needs. If your message contains a picture, a video, or a document, click ‘Media’; otherwise, select ‘Text’.
B. Body
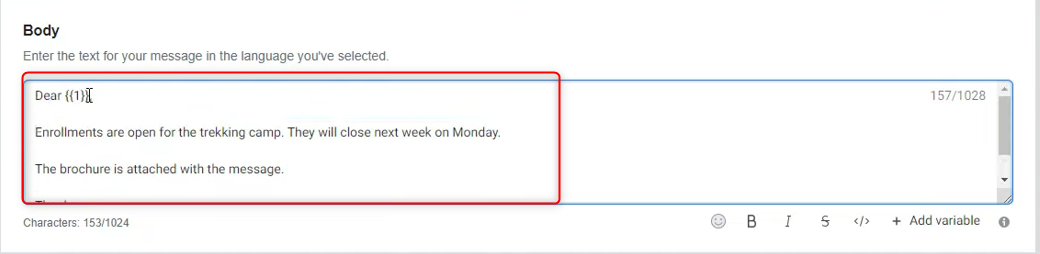
Copy your message from the notepad.
Paste it as the Body. You can add variables to your message using the ‘Add variable’ button. This variable will act as a replacement for a name in your message.
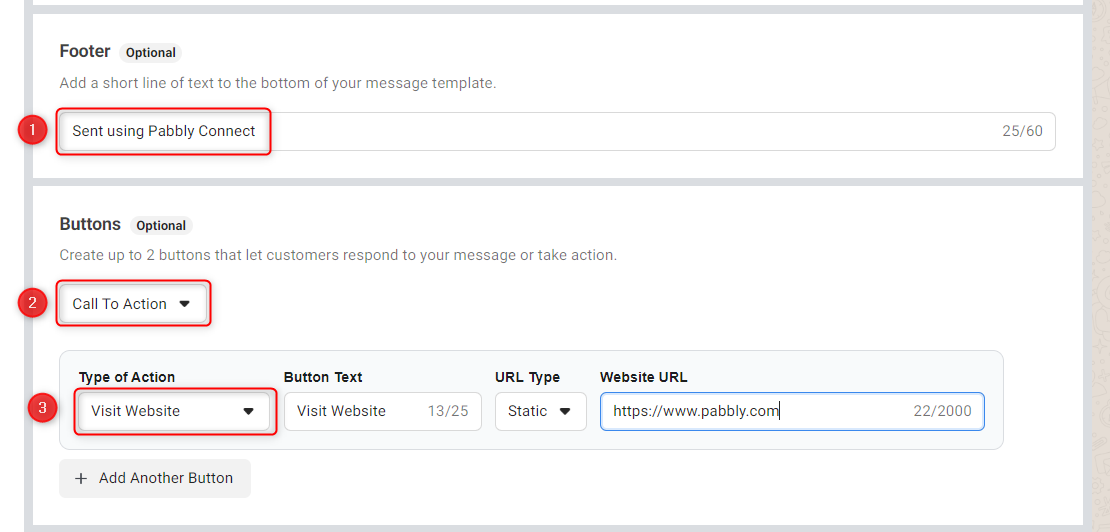
C. Footer and Buttons
Type in a Footer as per your need. Choose a Button if you want to include a phone number, a link to the website or a quick reply.
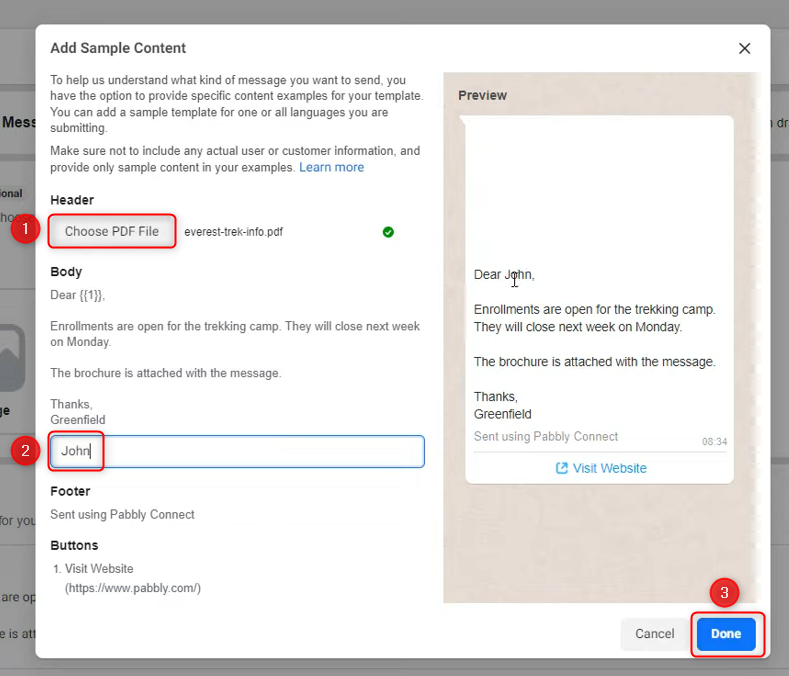
D. Sample
Click on the ‘Add Sample’ button to create a sample template for Facebook review.

Choose a media file to be included as a header, name your variables. Click on ‘Done’.
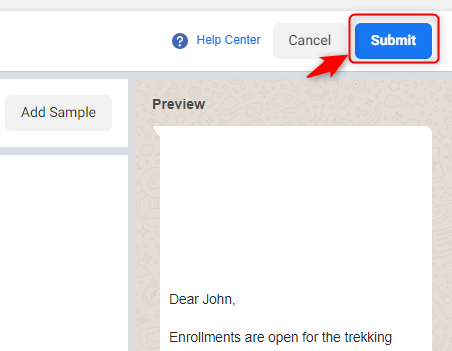
E. Submit for review
Click on ‘Submit’ and ‘Confirm’.
As you submit your template, it could be available for use right away or go to Facebook for a manual review. This process may take anywhere from a few minutes to a few hours. Reload your page to see if your template is approved and available, as indicated by the green dot.

Step 7:- Bind the data using Pabbly Connect
Now that your template is approved, you can start creating a workflow in Pabbly to bind the data in the Google sheets with WhatsApp Cloud API.
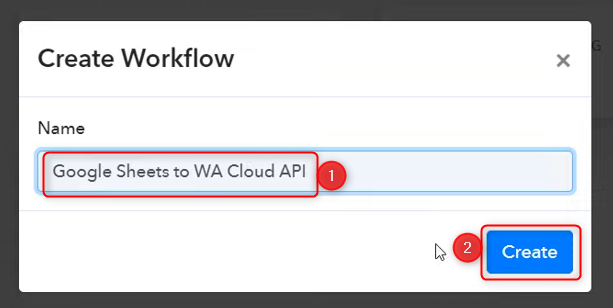
Go to the Pabbly Connect dashboard and create a new workflow.

Name your workflow and click on ‘Create’.
Step 8:- Create a trigger app and connect with Google sheets
A. Trigger App
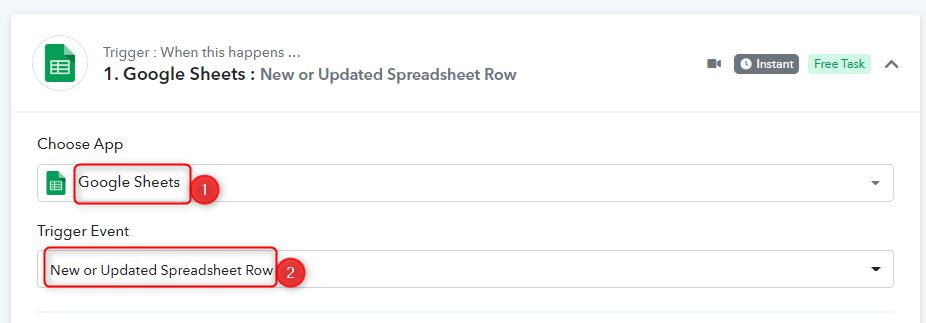
In trigger, we will choose the application that, when triggered, will perform the necessary action. In our case it would be Google Sheets.
Choose your Trigger App as ‘Google Sheets’ to fetch the data and select ‘New or Updated Spreadsheet Row’ as a Trigger Event.
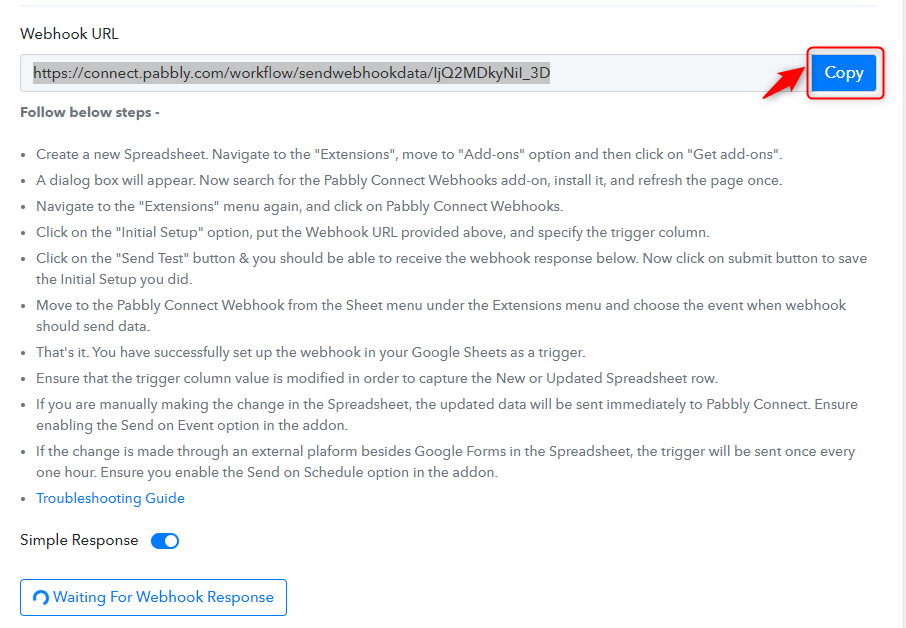
Copy the Webhook URL and switch to the Google sheets tab.
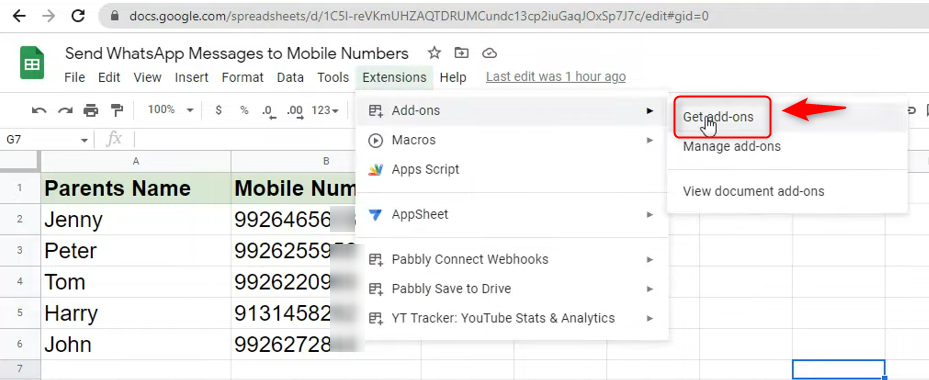
B. Pabbly Connect Webhook Extension
Click on Extensions > Add-ons > Get add-ons. Search for Pabbly Connect Webhook.
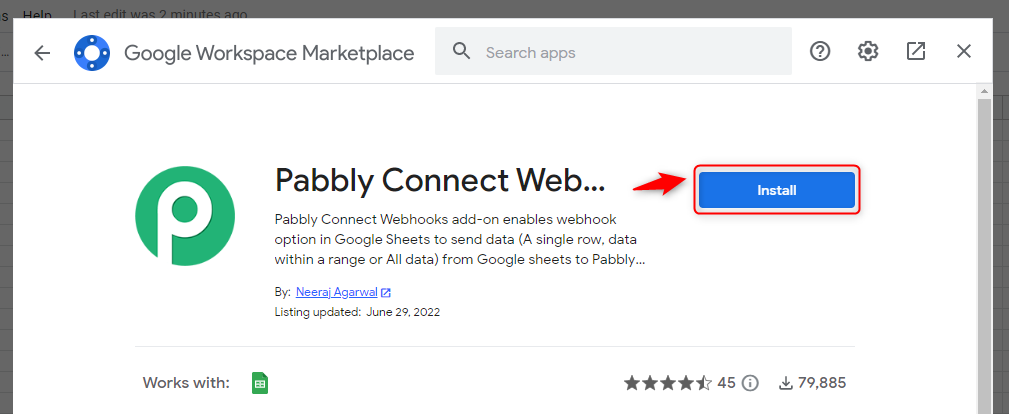
Install the Pabbly Connect Webhook extension.
C. Data Extraction
After installing the add-on, again click on Extension > Pabbly Connect Webhooks > Initial Setup.
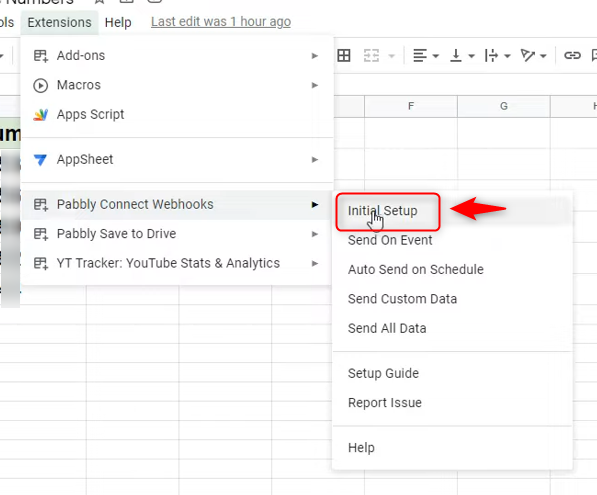
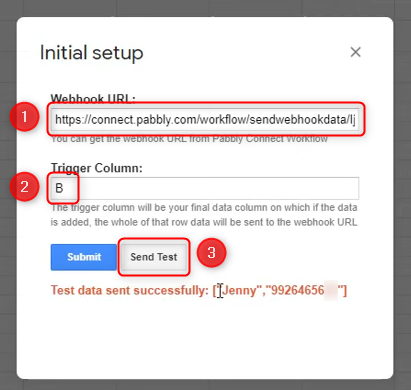
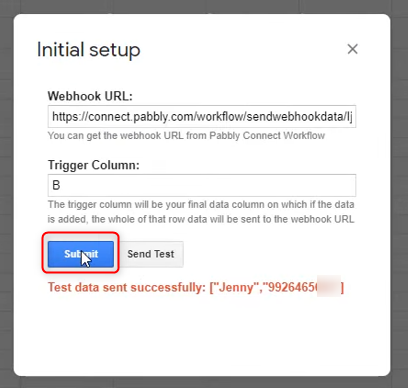
Paste the Webhook URL that we copied earlier, and in the Trigger Column, mention the name of the last column in which the data is available. Click on ‘Send Test’
D. Data Visibility
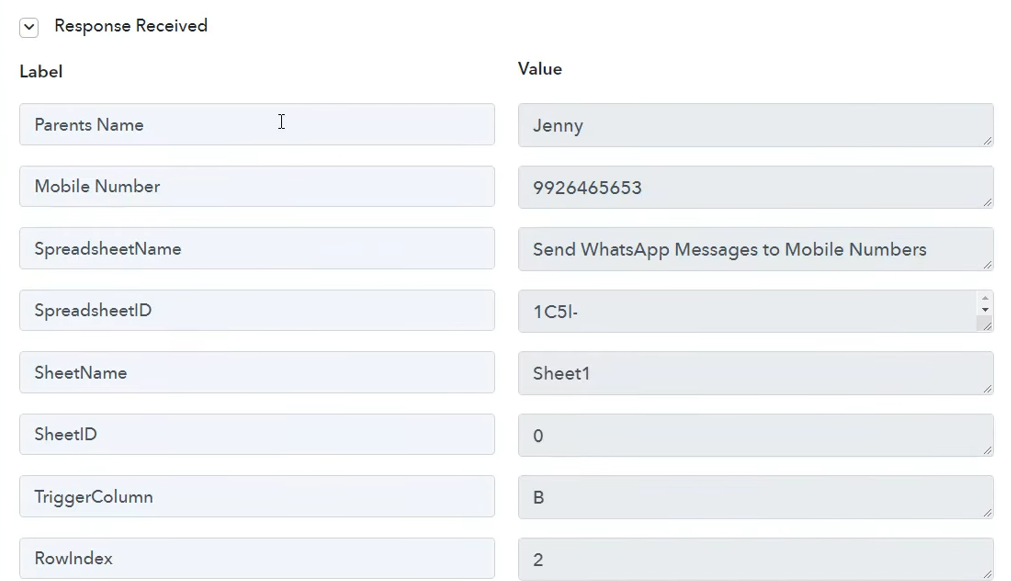
Go back to the Pabbly Connect dashboard, and the data must be visible now.
Step 9:- Create an action app and send a test message
A. Action App
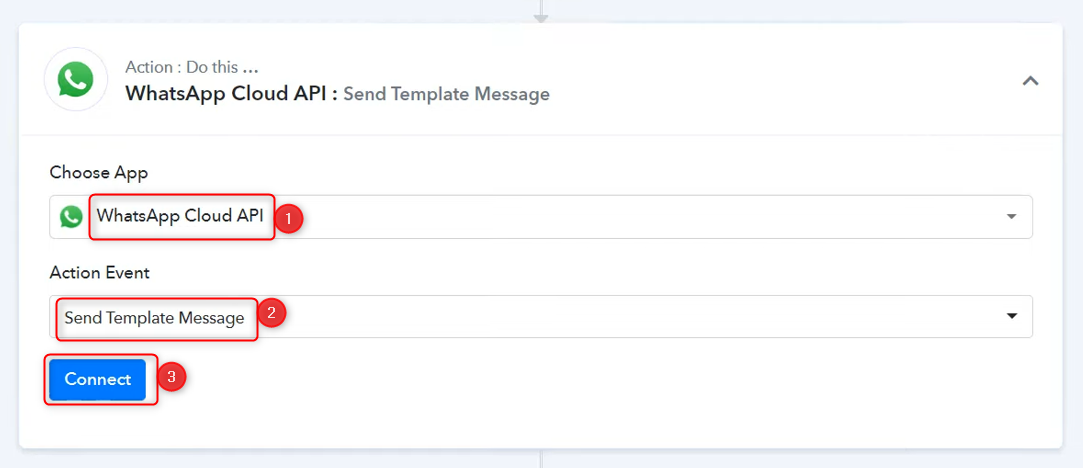
Expand the action step and select ‘Whatsapp Cloud API’ as the action app. Choose ‘Send Template Message’ as the action event and click on ‘Connect’.
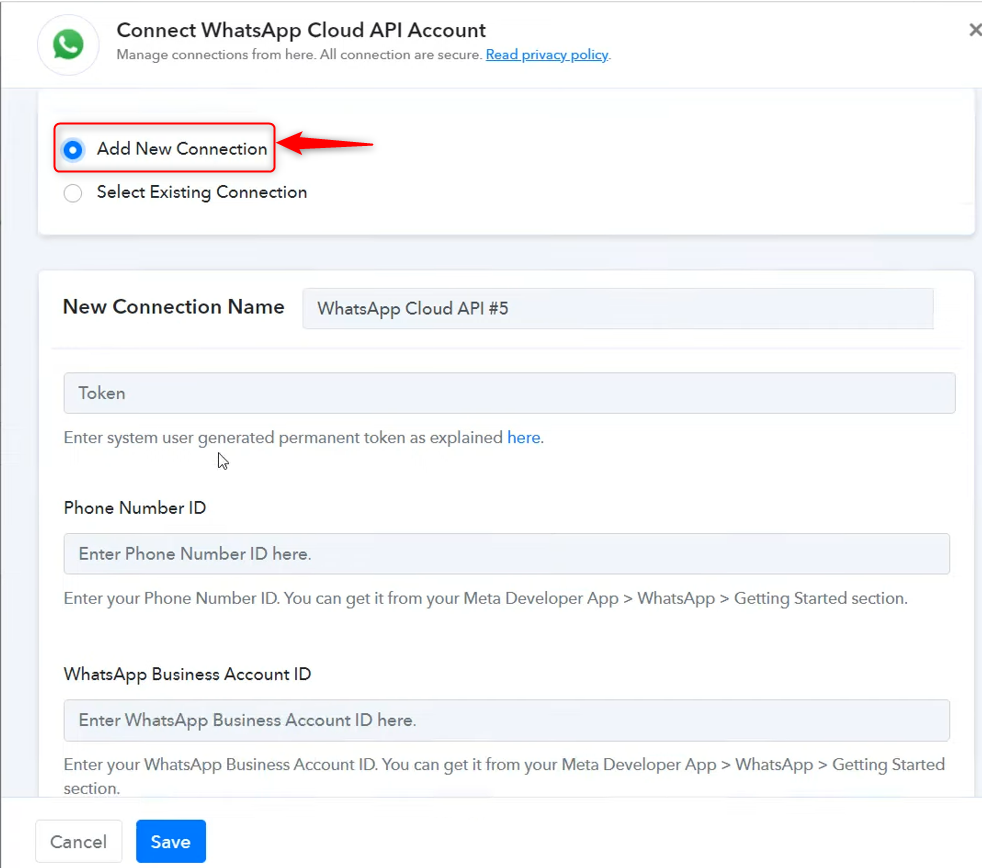
B. Add New Connection
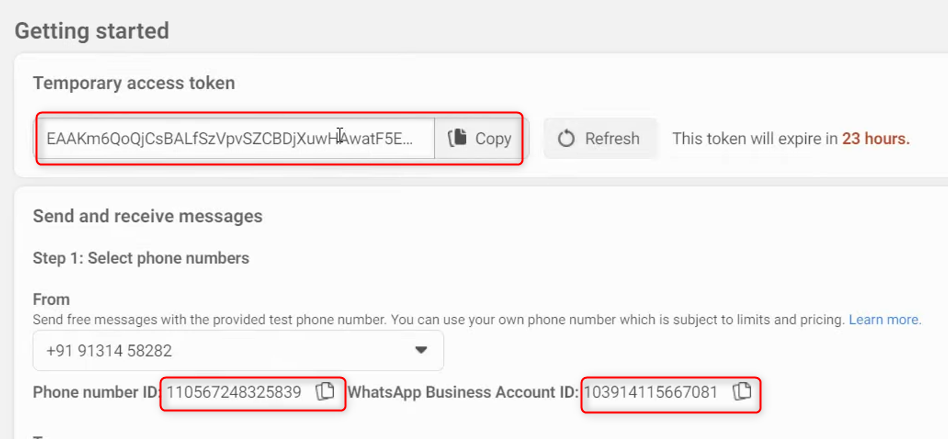
Select ‘Add New Connection’ and switch to the Facebook Developer dashboard page to find the required token, phone number and WhatsApp business account ID.
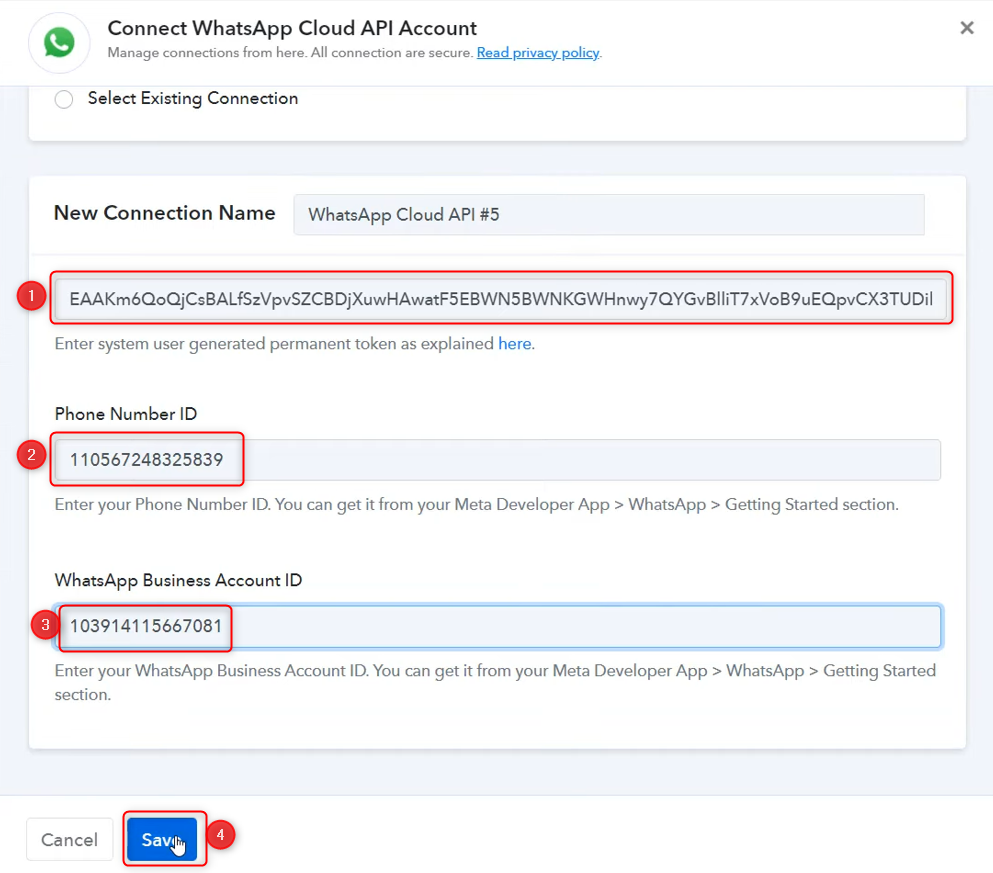
Copy the IDs from the Facebook developers page
Paste them here and ‘Save’ the new connection. Pabbly will fetch the templates from your Facebook developer account.
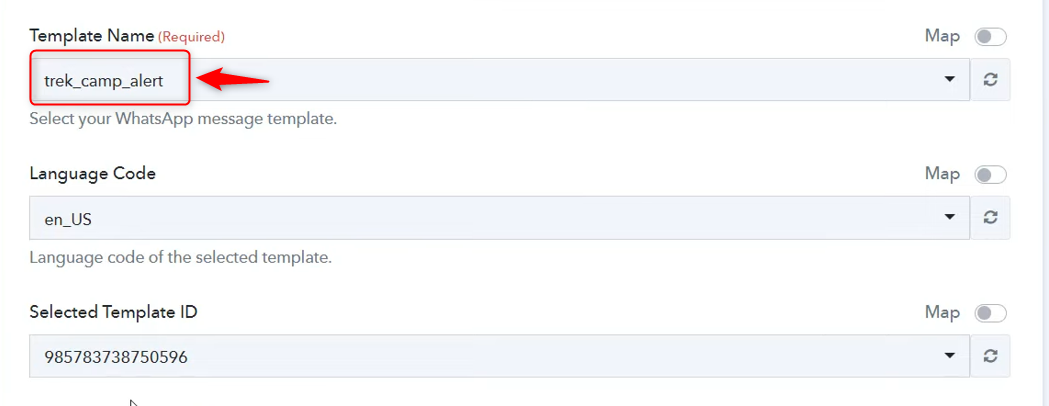
C. Auto-populated fields
Choose your template name from the auto-populated list.
Add the recipient’s mobile number by mapping it from above, and make sure to add a country code before the number if not included already.

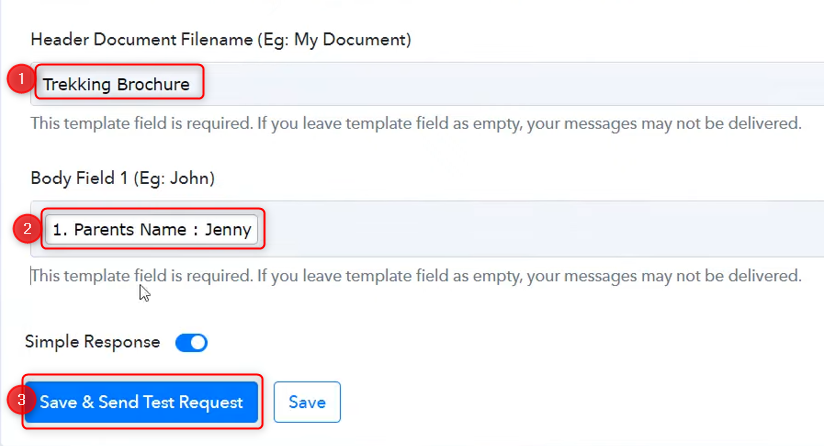
Under the Header Document URL, paste the URL of the document attached in your template.

Write the name of your document under the Header Document Filename. In Body Field, map the recipient name from above.
Click on ‘Save and Send Test Request’
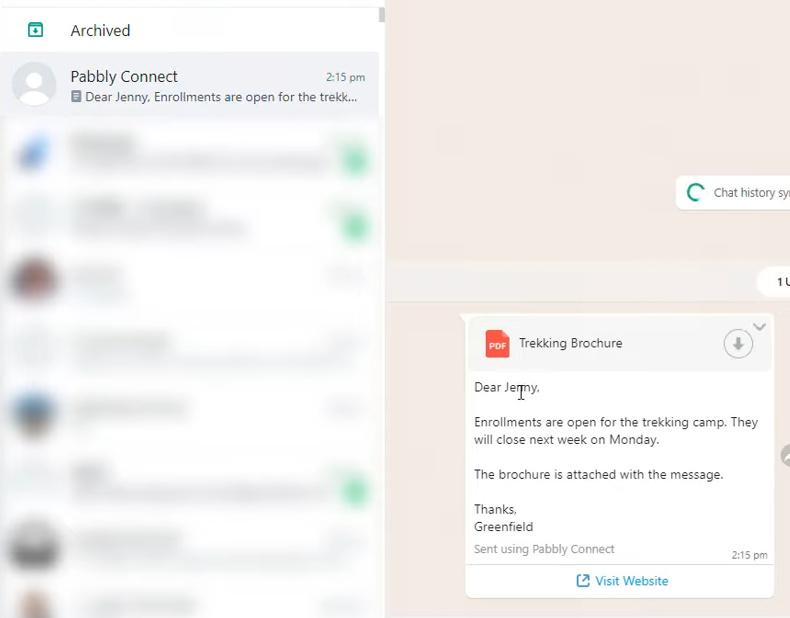
Your message will get delivered.
Step 10:- Complete the final setup
Switch back to Google sheets, and click on ‘Submit’.
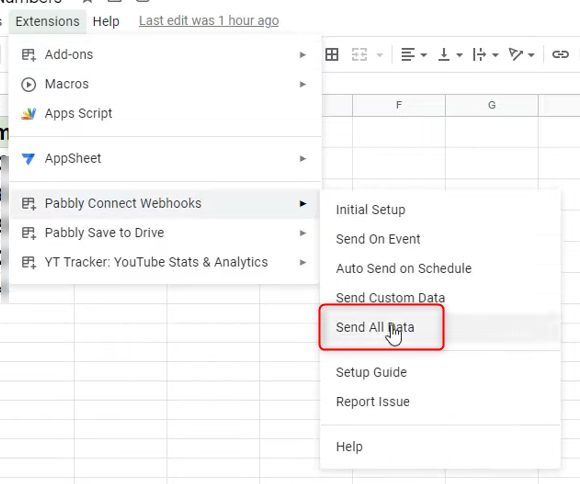
Now that your initial setup is complete, you need to click on Extension > Pabbly Connect Webhooks > Send All Data.
Your data will get passed on to Pabbly Connect for it to send messages on your behalf.
And with this final step, our process is complete!
Sign Up for a free Pabbly Connect account, and start automating your business.
Subscribe to our Youtube Channel for more such automation.
For any other queries, visit our forum