
In this post, we will discuss the integration of GitHub with Asana, which enables the automatic creation of tasks in Asana whenever a new issue is added to GitHub.
To set up this automation, we will be using Pabbly Connect, which requires a one-time setup.
To get started, we will link GitHub with Pabbly Connect to capture new issues, then link Pabbly Connect with Asana to create tasks based on the captured issues.
Step to Automatically Create Asana Tasks from GitHub Issues
1. Sign In / Sign Up to Pabbly Connect and Create a Workflow
2. Setup GitHub as the Trigger App to Fetch New Issues
3. Setup Asana as the Action App to Create New Tasks
Step 1:- Sign In / Sign Up to Pabbly Connect and Create a Workflow
A. Sign In / Sign Up
To begin this process, visit Pabbly Connect and create your account by clicking on the ‘Sign Up Free’ button. You can also click on Sign In if you already have an account.

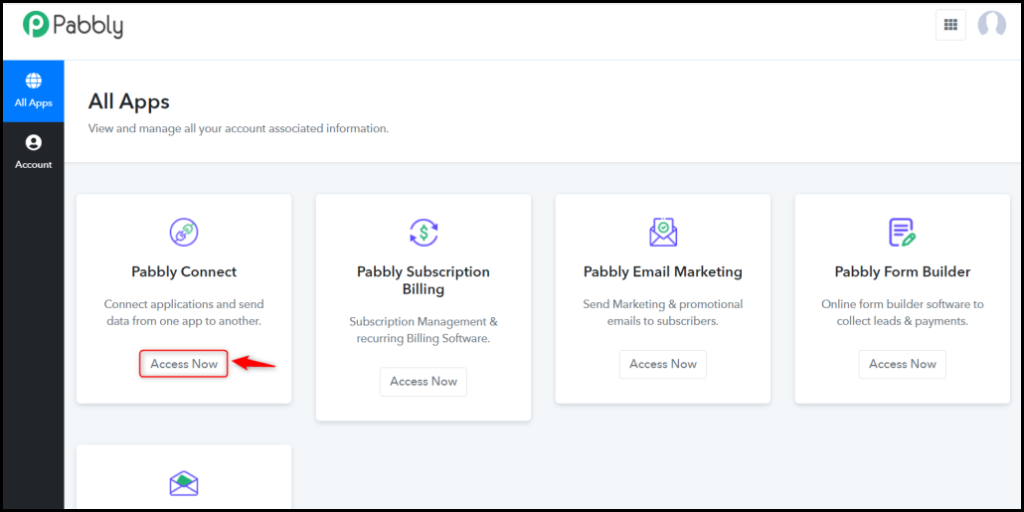
Click on the Pabbly Connect ‘Access Now’ button
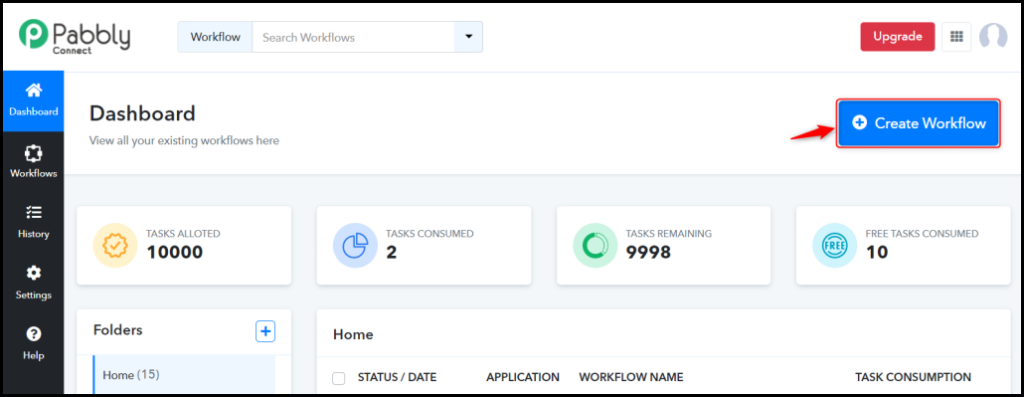
B. Create Workflow
To create a new workflow, click the ‘Create Workflow’ button.
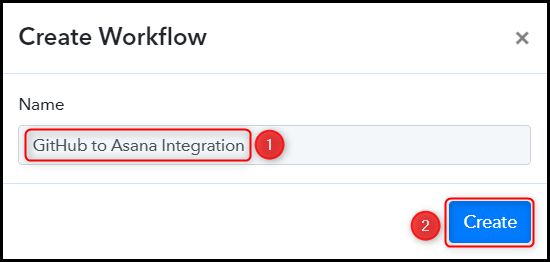
Name your workflow, and click on ‘Create’.
Step 2:- Setup GitHub as the Trigger App to Fetch New Issues
We will now go over the steps involved in establishing a connection between GitHub and Pabbly Connect, which will allow us to fetch any newly created issues on GitHub.
A. Trigger App
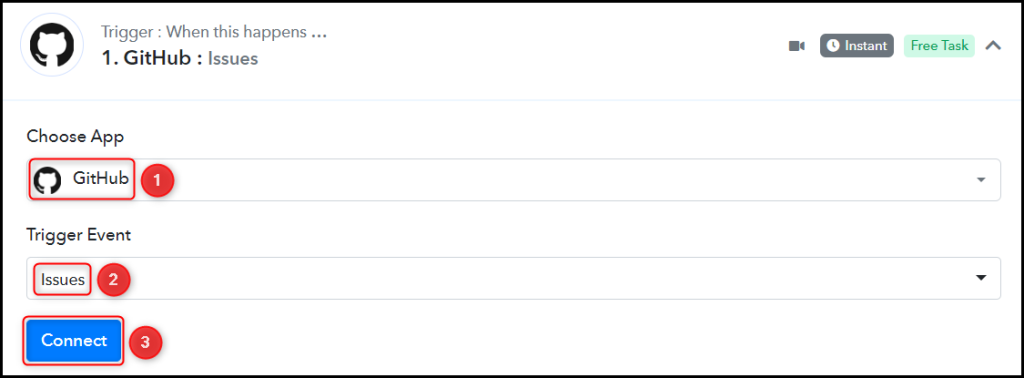
Trigger allows us to choose the application that will receive the data for Pabbly Connect. In our case, it would be GitHub.
Choose ‘GitHub’ as the Trigger App, select ‘Issues’ as a Trigger Event, and click on ‘Connect’.
B. Connect GitHub Account
To connect with your GitHub account, select ‘Add New Connection’ and click on ‘Connect With GitHub’. Additionally, grant the necessary authorization.

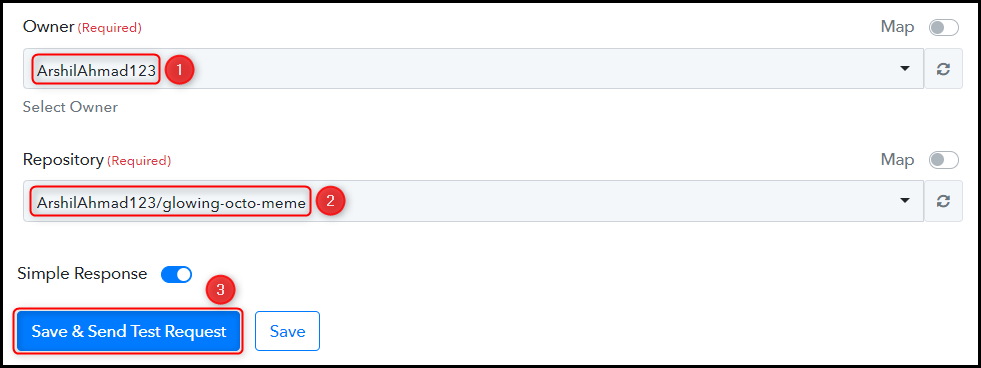
Choose the Owner and Repository from which you want to retrieve the issues, then click on ‘Save & Send Test Request’.
D. Test Connection
To verify the established connection, we will create a new issue and examine the received response.
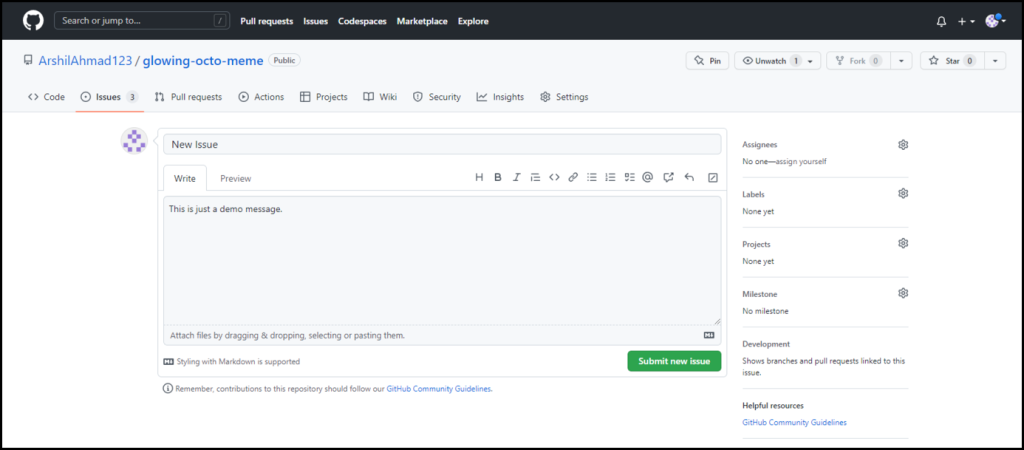
Expand the Response Received section to view the details of the issue you have just created, which should be visible there.

Step 3:- Setup Asana as the Action App to Create New Tasks
Action allows us to choose the application that will get executed by the workflow trigger.
Our main objective is to utilize the data gathered from GitHub issues to generate new tasks in Asana. Therefore, Asana will be our Action App.
A. Action App
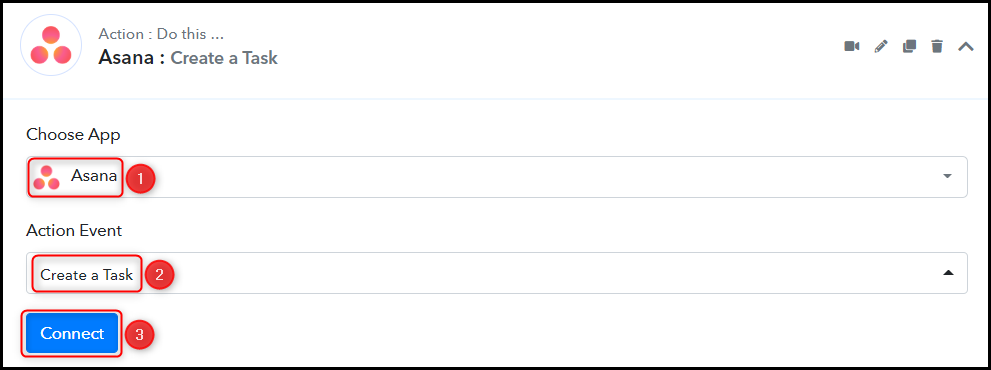
Choose ‘Asana’ as your Action App, select ‘Create a Task’ as an Action Event, and click on ‘Connect.
B. Connect Asana Account
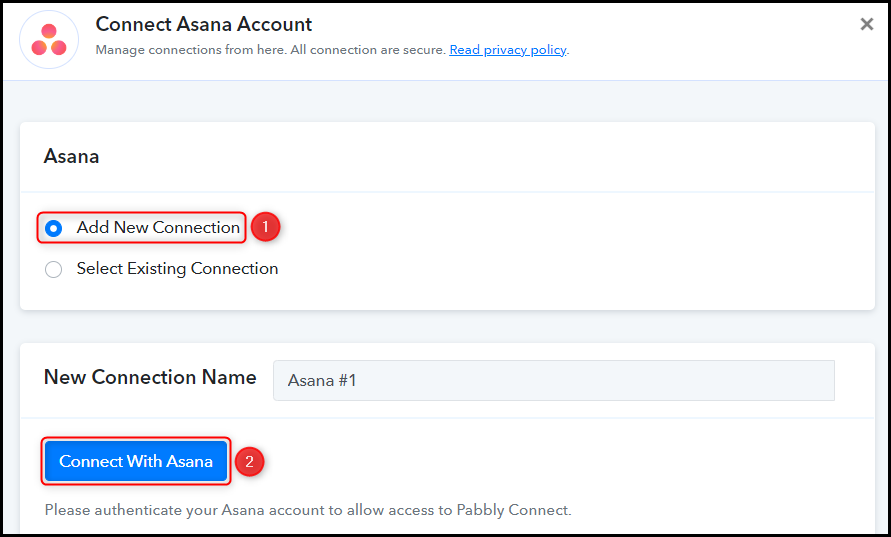
To connect with your Asana account, select ‘Add New Connection’, and click on ‘Connect With Asana’.
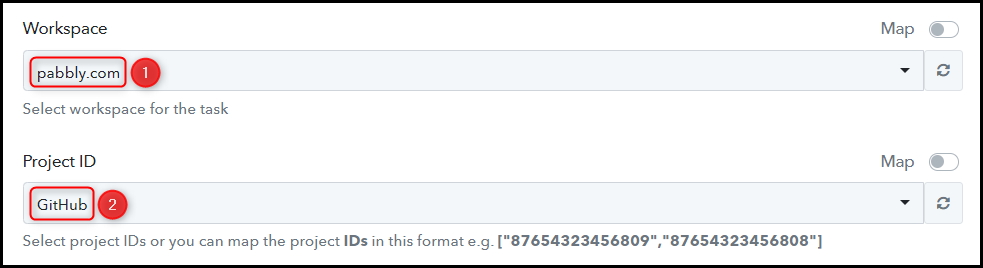
Select the Workspace and Project ID in which you would like to create the tasks.
C. Map Necessary Fields
Once you have linked your Asana account, the subsequent stage involves mapping the issue particulars from the preceding step. Mapping ensures our data remains dynamic and changes as per the received responses.
Map Task Name from the previous step.


Likewise, choose or map the other required fields, leaving the irrelevant ones blank, and then click on ‘Save & Send Test Request’.

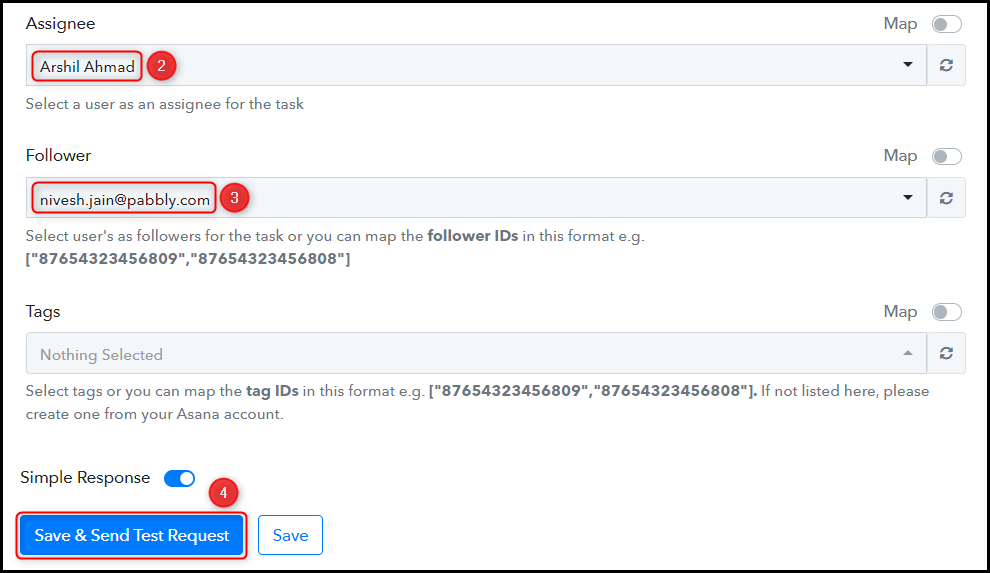
The moment you click on Save & Send Test Request, a new task will be added to your Asana task list.
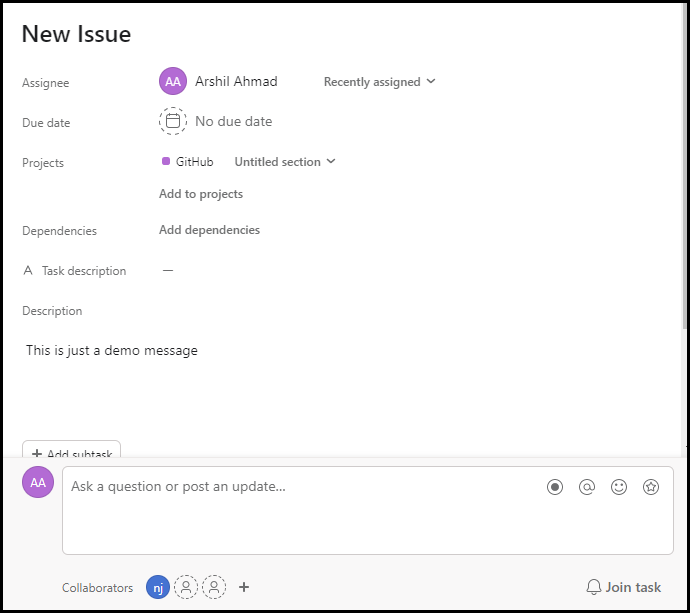
The automation process is complete, and GitHub has been successfully integrated with Asana. Henceforth, every time a new issue is created in your GitHub account, it will be added automatically as tasks in Asana.
You can copy this entire workflow by clicking this link.
Sign Up for a free Pabbly Connect account, and start automating your business
Subscribe to our Youtube Channel for more such automation
For any other queries, visit our forum